Swirling Success

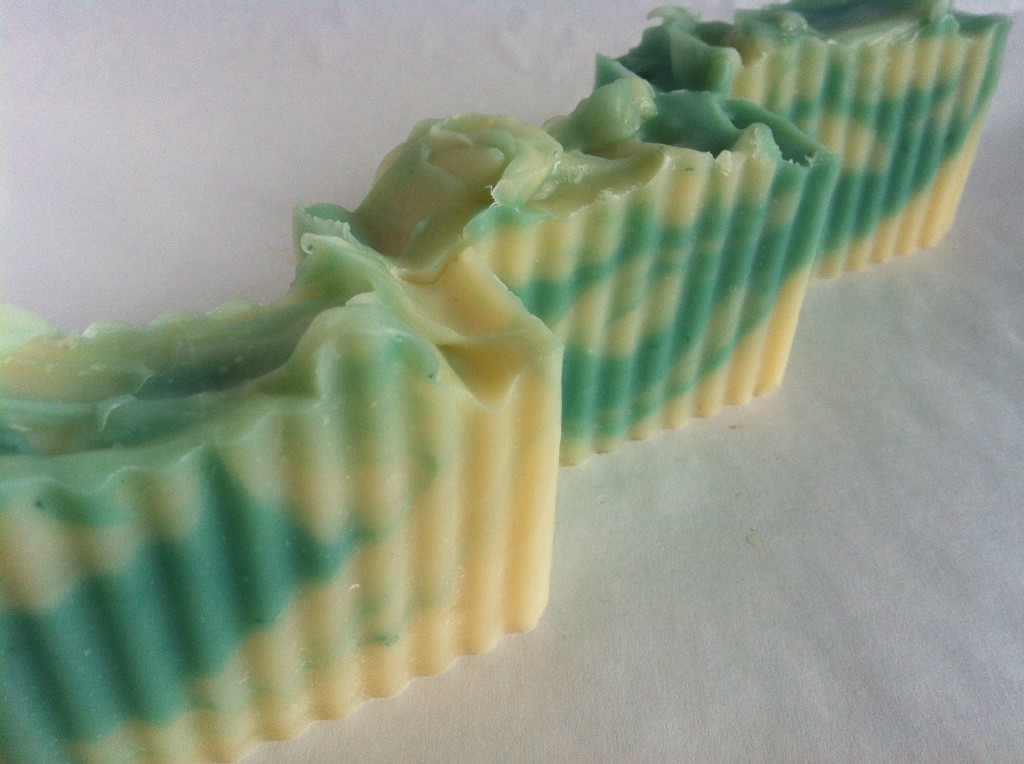
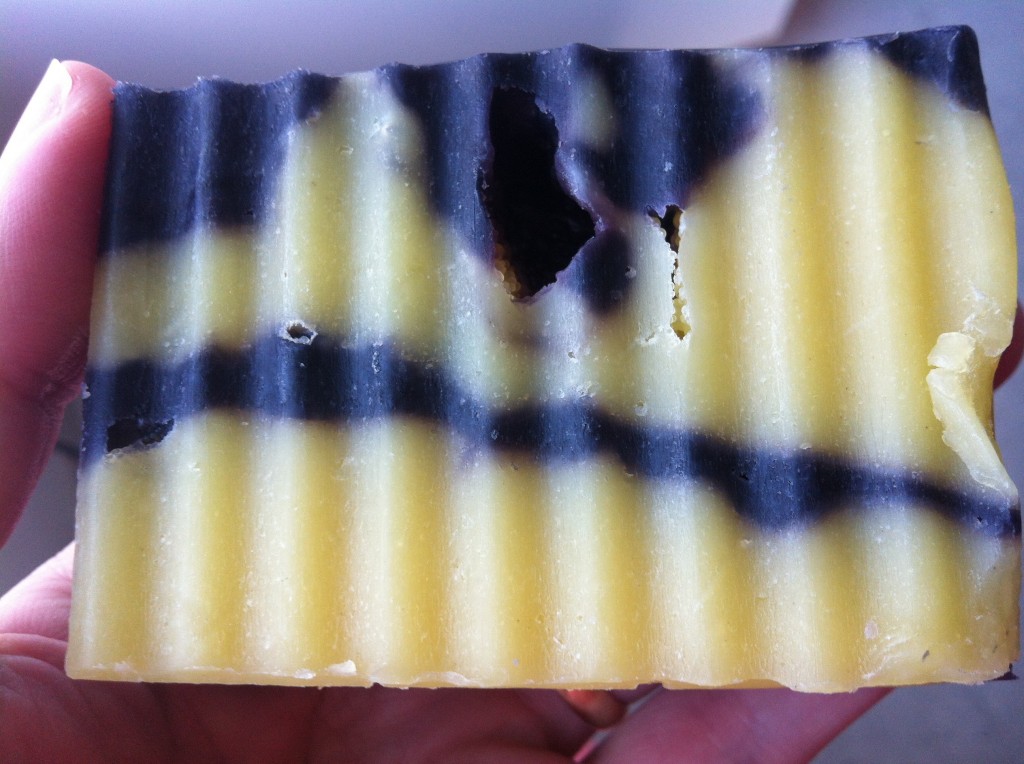
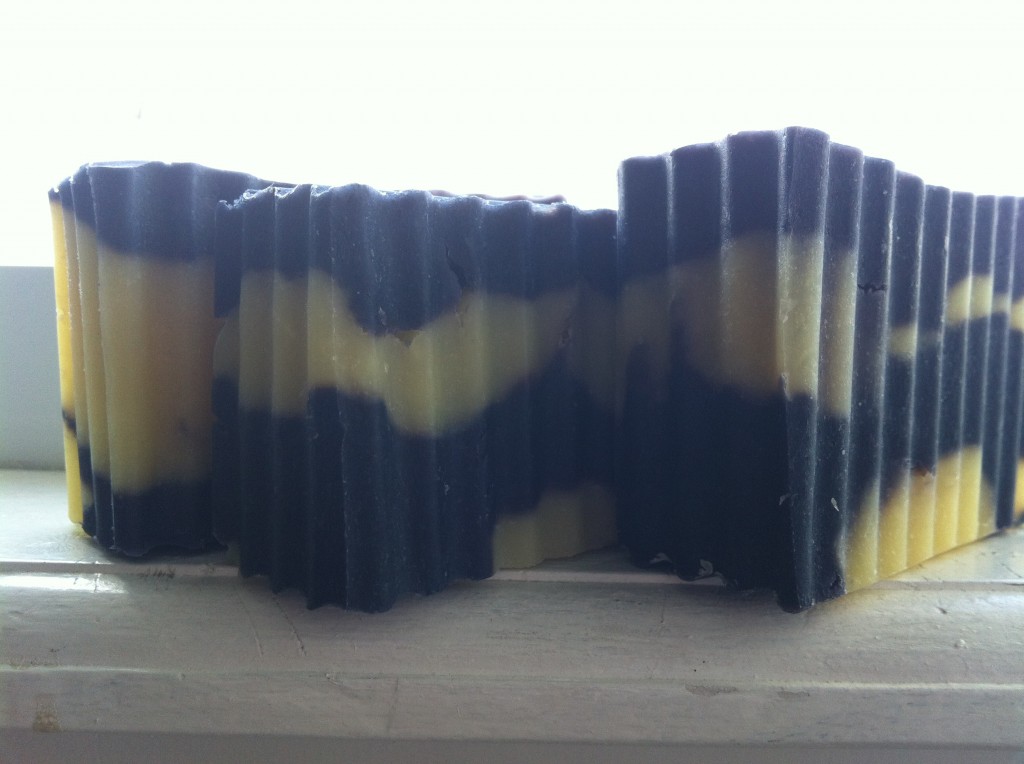
I’ve been trying for some time to swirl two colors together with no success, but I finally did it!
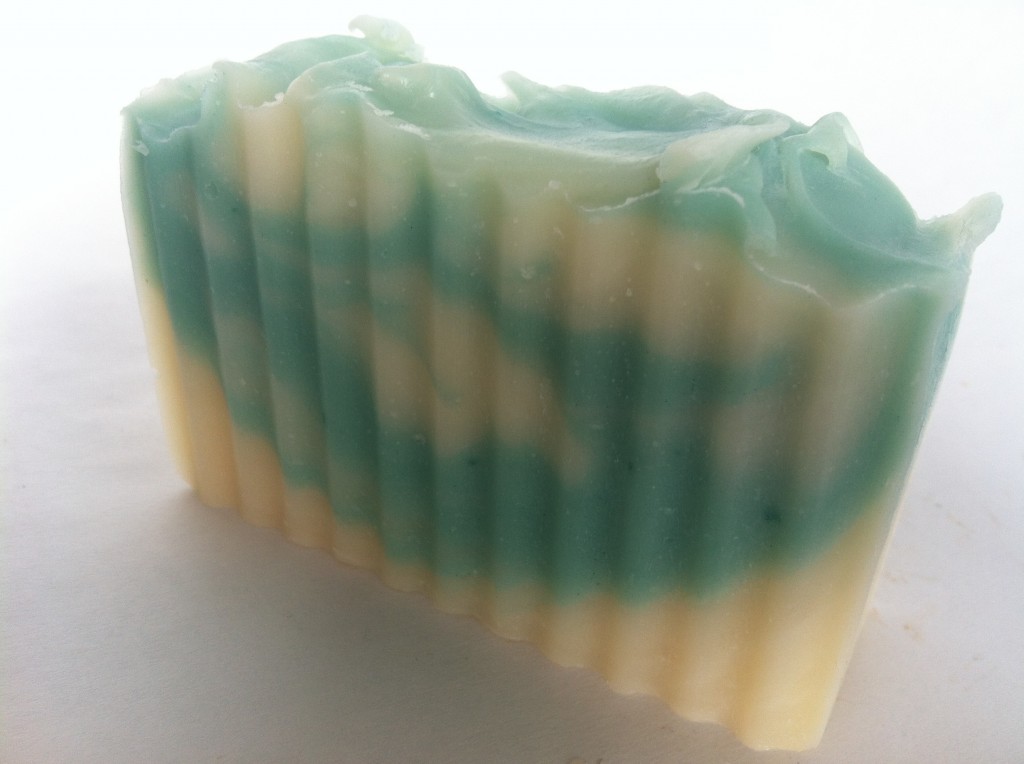
Coconut Lime VerbenaI created this soap because I didn’t have enough lemongrass essential oil to make a second batch of Lemongrass Sage today. Lemongrass Sage has turned out to be my most popular soap. I sold out of the supply I brought to a recent craft fair at my school, and I have sold several bars of it over this Thanksgiving weekend. I have to admit, it’s a great soap, and I use it myself on my face.

At a loss as to what type of soap to make, I decided to try something new. I had a coconut lime verbena scent I had been meaning to try, and I had some green colorant left over from making the Cucumber Yogurt batch (as it turns out, I needed to use a lot more colorant to make the soap look greenish), so I decided to try swirling again.

Ingredients:

  • 30% olive oil
  • 25% coconut oil
  • 25% palm oil
  • 10% avocado oil
  • 5% cocoa butter
  • 5% castor oil

Coconut Lime VerbenaI started to use yogurt as a base when it occurred to me I should try coconut milk instead because of the coconut lime verbena scent. I knew I wanted the white part of the soap to be as white as possible without using titanium dioxide (I don’t have any). My shea butter is raw, unrefined shea butter, and it has a yellow cast that makes my white soaps a more yellow shade of cream. The cocoa butter I have is white, and I noticed when I used it to make the Vanilla Sugar Cane soap that the soap batter was much whiter than normal, though because of the vanillin in the fragrance I used, the soap later turned a browner color. So, I decided to use cocoa butter in this recipe when I usually use shea. On a whim, I also decided on avocado oil instead of sweet almond or a full 40% olive oil. No particular reason aside from wanting to experiment. Avocado oil is good for people with sensitive skin, and it has vitamins A, D, and E.

I mixed the oils with the coconut milk and lye, added the fragrance, and divided the batch in half. I colored one half. By the time I had the colored portion ready, the white portion had already reached the consistency of very thick pudding, or perhaps mashed potatoes like I make them (whipped potatoes, really). I started to lament a little bit, thinking of my Amy Lowell Lilac Soap, when I remembered a swirling technique I learned on YouTube:

The swirling technique Celine described saved my soap! I think it turned out gorgeous. It smells heavenly. I can’t wait to try it with another kind of soap. One of the interesting things about swirling is that each time the soap is different. Each individual bar is different. You just don’t know what you will get. I’m very pleased with how the soap turned out.

Coconut Lime VerbenaThe soap is beautiful, and I love the coconut lime scent. I’m also proud of the way the soap itself turned out with the coconut milk base. I admit I was excited about the idea when I remembered I had some frozen coconut milk I could use.

Creative Commons License

Coconut Lime Verbena by Dana Huff is licensed under a Creative Commons Attribution-NonCommercial 3.0 Unported License.
Permissions beyond the scope of this license may be available at Suds Life: About.

Vanilla Sugar Cane Soap

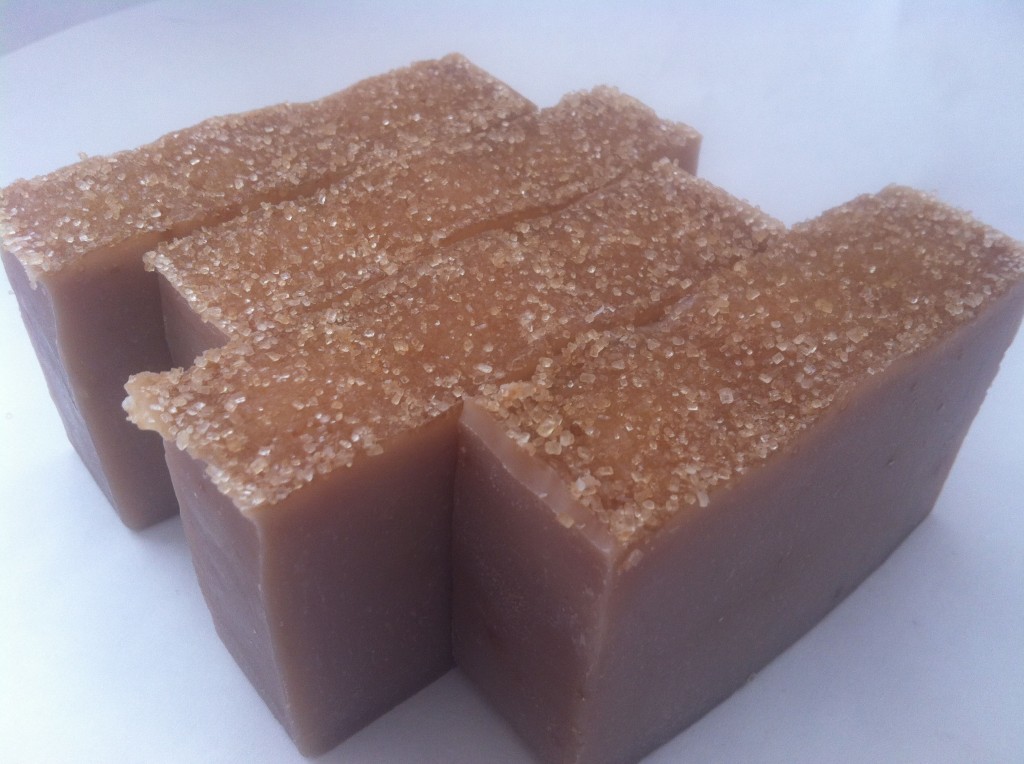
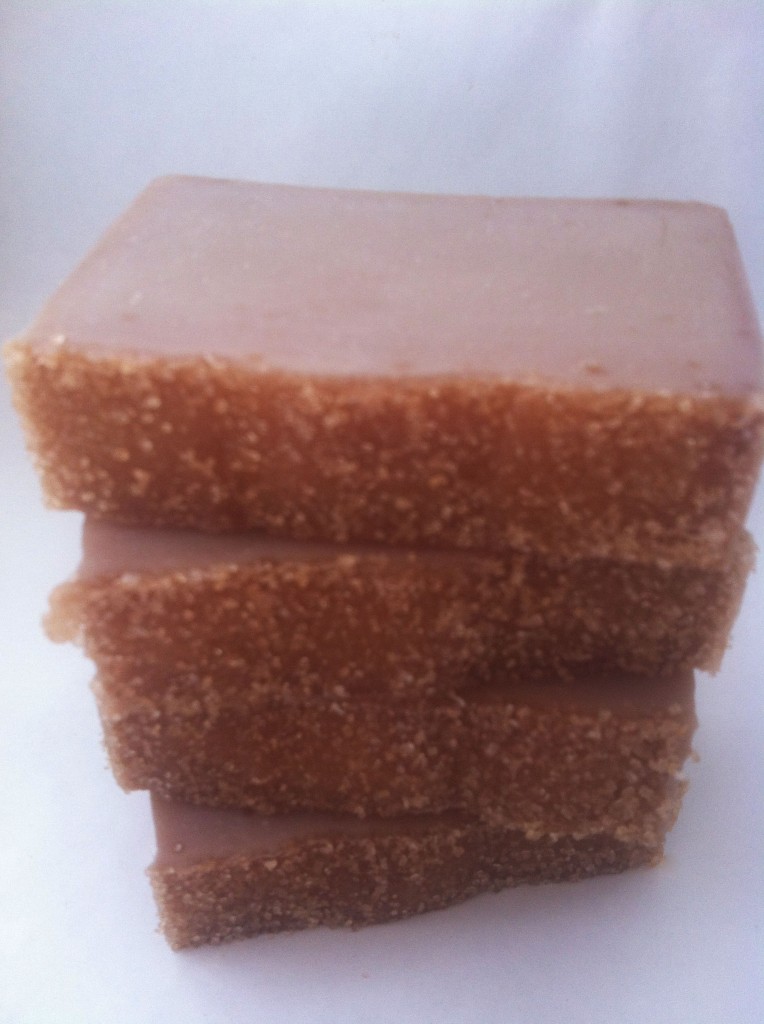
Vanilla Sugar Cane SoapInspired by Attica Locke’s new novel The Cutting Season, I created a new soap using some ingredients I had been wanting to try for some time.

Ingredients

  • 30% olive oil
  • 25% coconut oil
  • 25% palm oil
  • 10% sweet almond oil
  • 5% cocoa butter
  • 5% castor oil

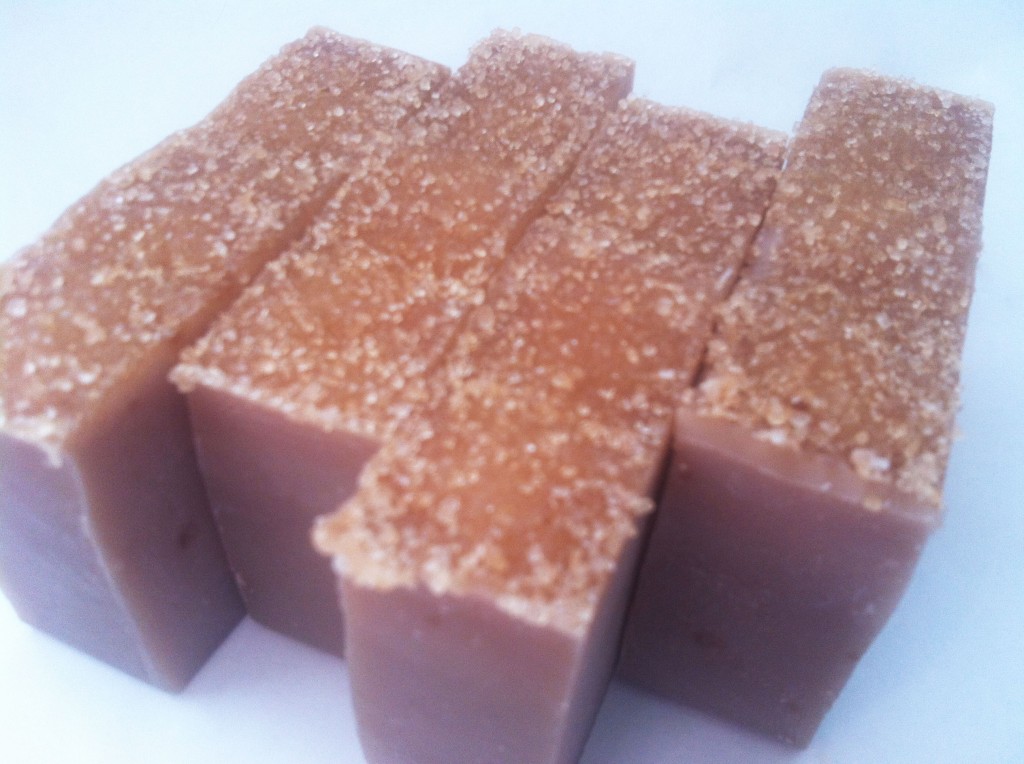
I had never soaped with sweet almond oil and castor oil, and I was really pleased with the consistency of the soap. I used Nature’s Garden’s Warm Vanilla & Sugar fragrance oil. It smells exactly like Bath & Body Works’s Warm Vanilla Sugar fragrance, which happens to be one of my favorites. I layered the top of the soap with raw sugar.

Vanilla Sugar CaneBecause the fragrance oil has vanilla in it, it has discolored the soap, which I expected and did not mind. I am not sure if it will continue to darken as it cures, but I’m not worried. Even if it darkens more, I think it will still be a beautiful soap.

It should be ready to sell in the Etsy store by the last week of November. It smells great. I cannot wait until it’s ready to use.

Vanilla Sugar Cane

Cucumber Yogurt Soap

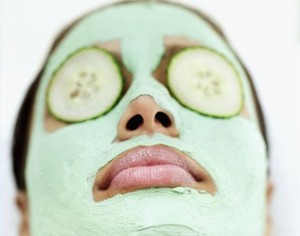
I’ve been wanting to make a cucumber yogurt bar for a long time. Heidi Corley Barto has a recipe for a soap using a cucumber purée in her book The Natural Soap Chef, and after reading about the testers’ reaction to Anne L. Watson’s Yogurt Parfait soap in Milk Soapmaking, I decided I should try to combine the two. A quick Google search told me I was not the first person to have this idea. After all, it makes sense. Don’t spas give cucumber/yogurt facials, after all? If those two ingredients weren’t wonderful for your face, then the spas wouldn’t be charging the big bucks for facial treatments.

Cucumber Yogurt SoapRecipe

  • 250 g coconut oil
  • 225 g palm oil
  • 120 g shea butter
  • 275 g olive oil
  • 200 g avocado oil
  • 55 g castor oil

155 g lye
186 g cucumber-water purée
187 g plain whole milk yogurt

The Process

First I peeled two small cucumbers and shaved off the seeds with my peeler as well. Barto suggested using English cucumbers because they have fewer seeds, but I either couldn’t find them, or my store didn’t have them, so I just opted for some small pickling cucumbers. I imagine you could just use one big cucumber, but since it was the first time I made this soap, I wanted to go with smaller cucumbers in case one was enough. After I peeled and deseeded the cucumbers, however, I decided two was probably more like it. I added distilled water to the cucumbers and puréed them in my blender. Barto also suggested not peeling the cucumbers so that the peel added pigment, but I wasn’t too sure about that, so I peeled them.

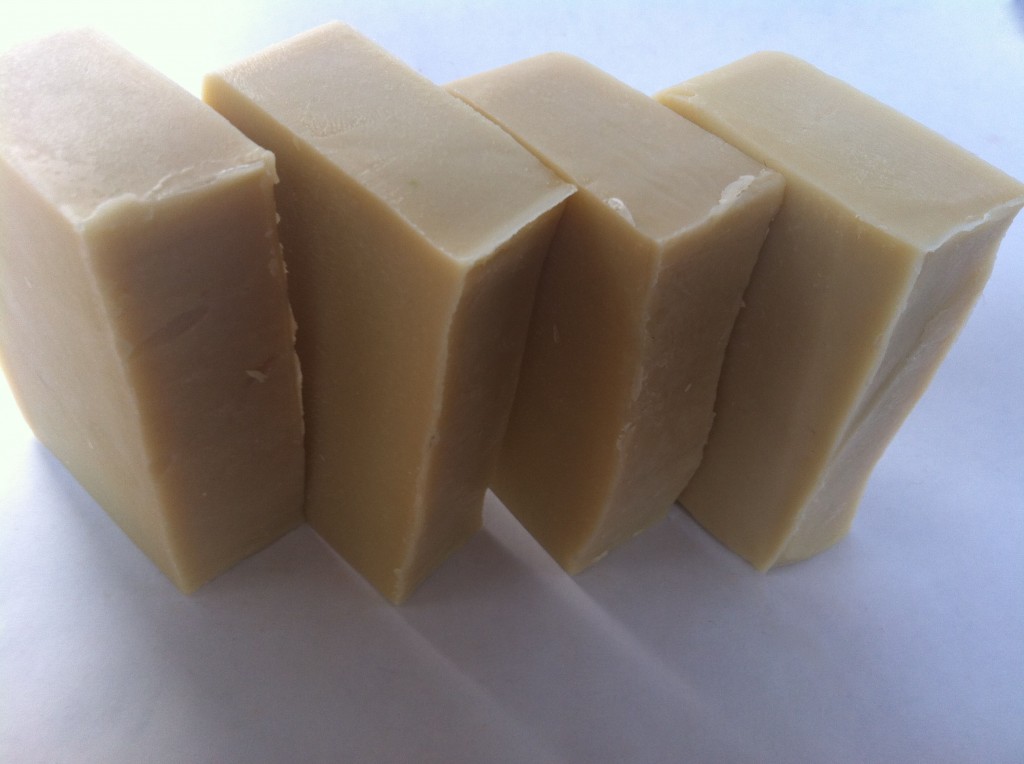
I mixed half cucumber-water purée with half yogurt and froze the mixture in an ice cube tray. When I was ready to make the soap, I mixed the lye with the frozen cucumber-yogurt cubes and melted my shea butter, coconut oil, and palm oil in a large bowl. Then I added olive oil, avocado oil, and castor oil to the melted hard oils. Once the cucumber-yogurt and lye mixture was 90°, I added it to the oils and stick blended it to a light trace. Then I added a tiny bit of green pigment that didn’t really wind up coming through in the soap, and a very nice cucumber melon fragrance oil from Nature’s Garden, a new favorite vendor that has reasonable prices and a wide variety of products.

Cucumber Yogurt SoapCreative Commons License

Cucumber Yogurt Soap by Dana Huff is licensed under a Creative Commons Attribution-NonCommercial 3.0 Unported License.
Permissions beyond the scope of this license may be available at Suds Life: About.
Facial Mask Image via eHow

Cinnamon Apple Cider Soap

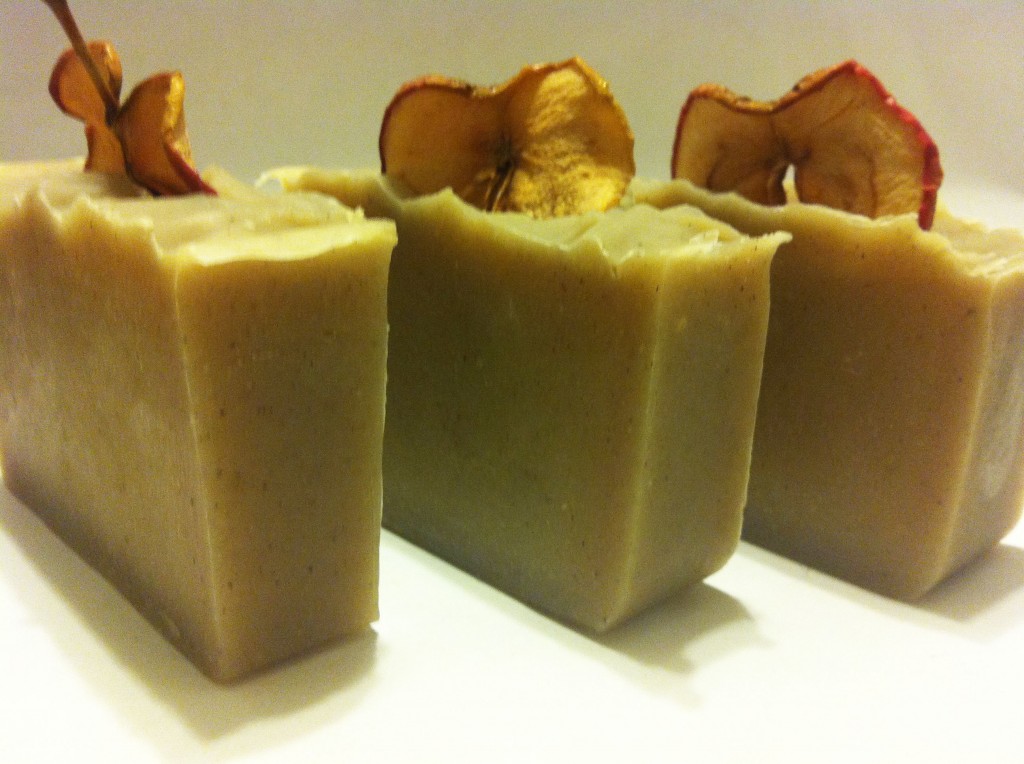
The weekend before last, Steve and I took the kids to Tougas Family Farm to pick apples. I decided to try to use some of the apples in a soap, especially because I had ordered an apple cider fragrance oil from Bramble Berry. I added a tiny bit of cinnamon bark essential oil and cinnamon to the recipe, and the soap came out beautifully.

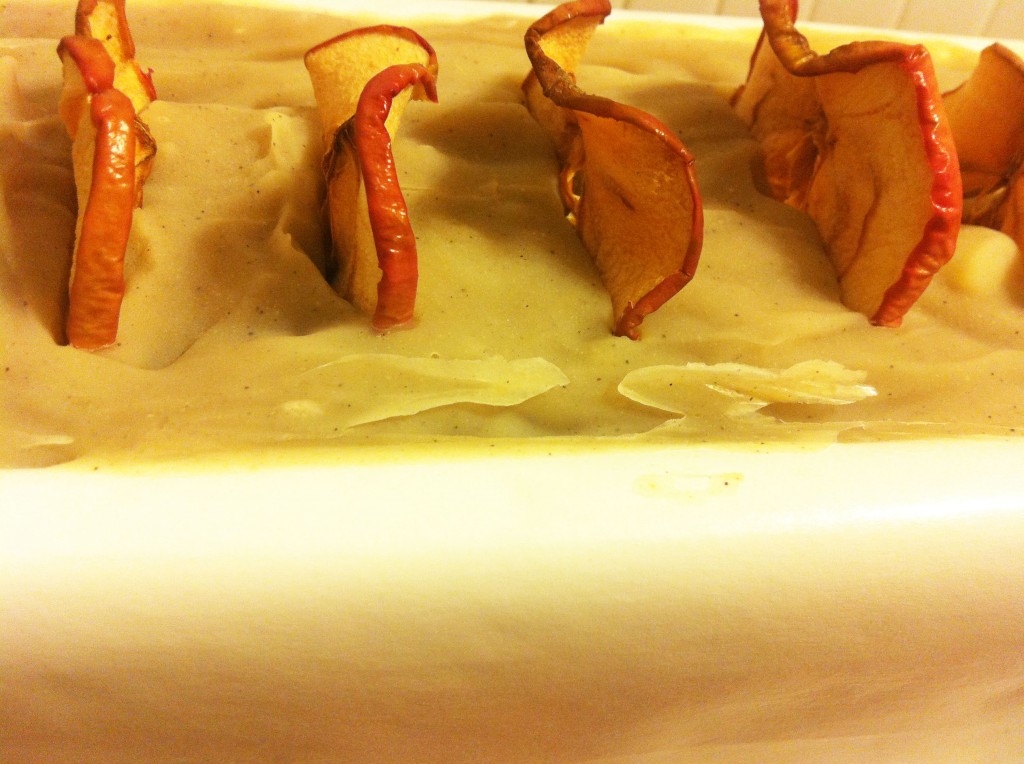
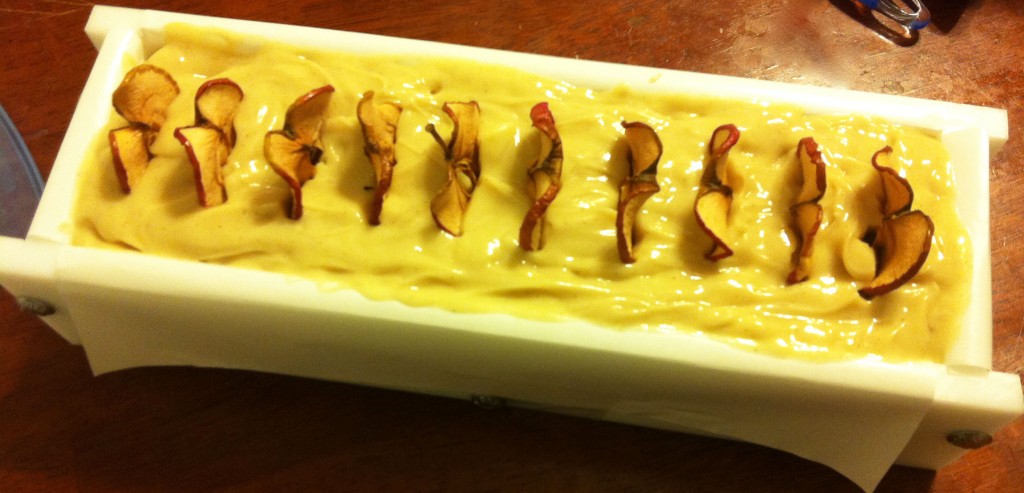
Here is the soap right after I poured it into the mold and stuck the apple slices in. It soaped up really well.

Cinnamon Apple Cider Soap

I wasn’t sure what color the soap would turn. Fragrance oils, fats, and oils used in soap all contribute different properties to the color, and when you don’t use a colorant, sometimes the results are interesting. They are usually some natural shade from beige to brown, but you don’t often know precisely what you’re going to get.

Here is the soap after 24 hours of saponification.

Cinnamon Apple Cider Soap

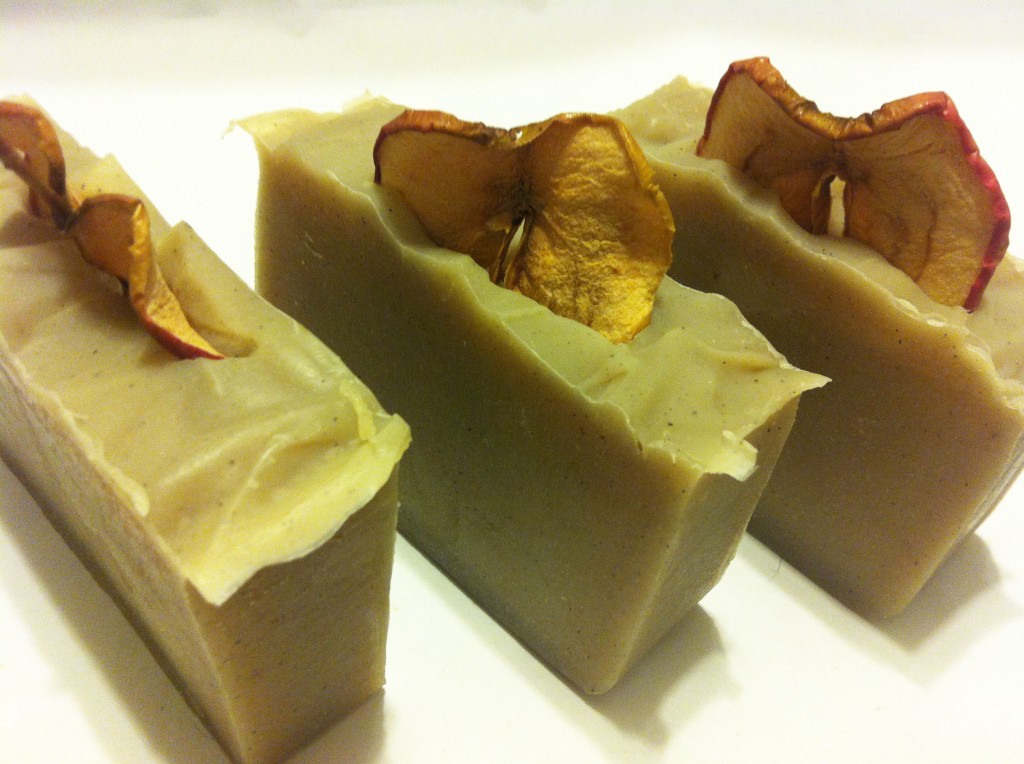
I couldn’t believe how close the color was to the true color of applesauce. The soap looks and smells exactly like applesauce to me. It came out wonderful. I was really pleased.

Cinnamon Apple Cider Soap

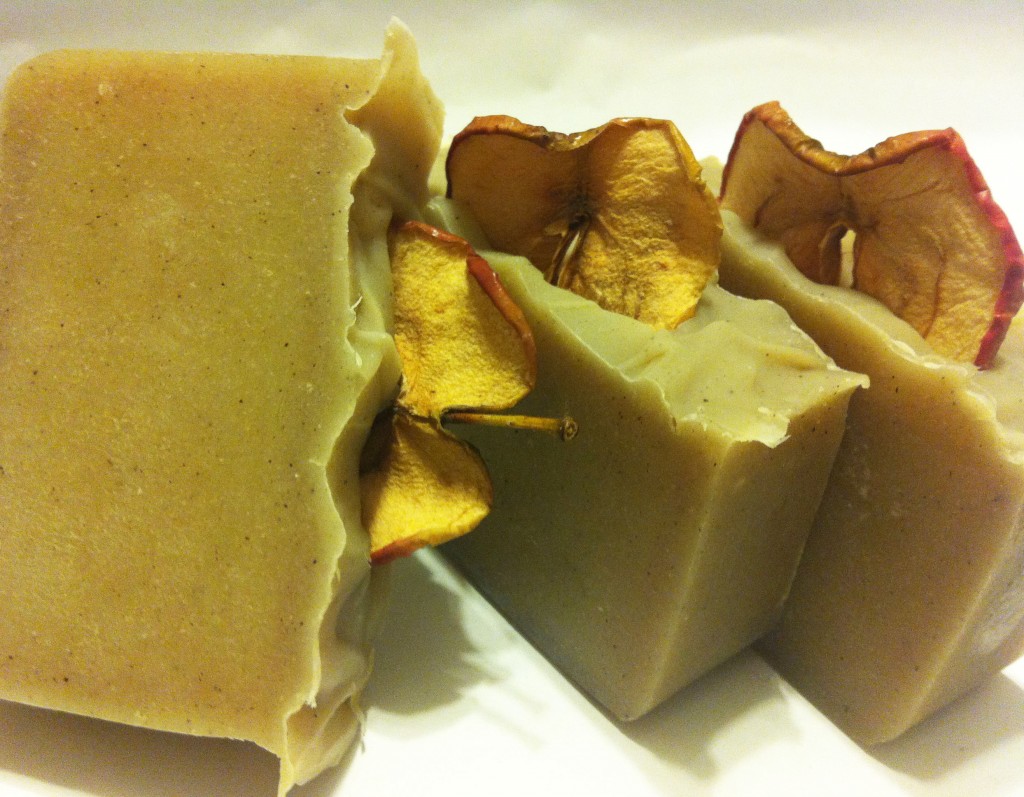
I decided not to trim the bar at all. I like how it the soap looks just as it was cut.

Cinnamon Apple Cider Soap

I love the one bar with the stem.

Cinnamon Apple Cider Soap

It will cure for four weeks, and then I will sell it in very limited quantities in my Etsy store.

The recipe:

  • 35% olive oil
  • 25% coconut oil
  • 25% palm oil
  • 10% shea butter
  • 5% castor oil

I also added four tablespoons of Bramble Berry’s Apple Cider Fragrance Oil, one teaspoon of cinnamon bark essential oil, and one teaspoon ground cinnamon. I dried Tougas Macintosh apples in the oven.

Please check out the other offerings in the store. I’m adding new soaps all the time!

Creative Commons License

Cinnamon Apple Cider Soap by Dana Huff is licensed under a Creative Commons Attribution-NonCommercial 3.0 Unported License.
Permissions beyond the scope of this license may be available at Suds Life: About.
Fun New Soaps

I’ve been trying some fun things with purées, ideas I learned about in Heidi Corley Barto’s The Natural Soap Chef. The first soap is a banana/coconut milk purée-based soap scented with Bramble Berry’s Monkey Love fragrance oil, a recipe you can find in Barto’s book. She calls it Bananas Foster, but I like Funky Monkey better.

Funky MonkeyYou can see little flecks of banana in the soap. It has a sort of interesting, uneven color that might be the result of a partial gel, but it doesn’t look as dramatic as some of the partial gel images I’ve seen of other soap, so I’m not sure. I decided to try to prevent this soap from gelling and put it in the fridge because my previous milk soaps had not turned out well, and this one seemed to be kind of cranky as I was mixing the lye. I like the way it turned out. It smells great, and I think it is going to be a very nice soap to use.

This next soap has an interesting story. Pumpkin pie soap was one of the first soap ideas I ran across that I told myself I HAD to make, and I believe I first encountered it on the Lovin Soap Blog, but it’s a hot process recipe, and I prefer cold process. However, the Soap Queen also has a great CP pumpkin purée soap tutorial. Heidi Corley Barto also has one in The Natural Soap Chef.

Pumpkin Pie Soap

Meet my Pumpkin Pie Soap! I didn’t come up with the idea, but I used my own recipe and technique for producing it.

Ingredients

  • 35% olive oil
  • 25% coconut oil
  • 25% coconut oil
  • 10% shea butter
  • 5% castor oil

I share the percents because I think it’s easier to make the recipe for your own mold if you know percents. You would then just use a lye calculator to figure out how much lye, water, and pumpkin purée to use.

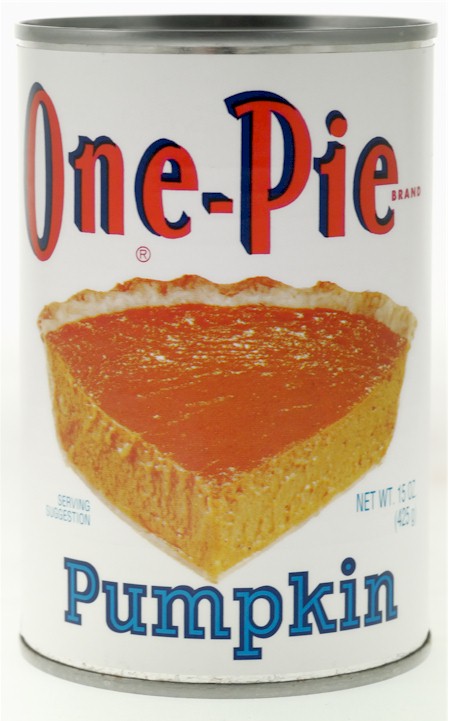
In my soap, I used One Pie Pumpkin.

One Pie PumpkinOne Pie Pumpkin is very special pumpkin. Yankee Magazine calls it New England’s unofficial brand. It isn’t available widely outside of New England, and some of my research indicates that some areas only sell it seasonally during fall and winter for Thanksgiving and Christmas. I haven’t lived in Worcester, MA long enough to find out if that is the case here, too, but I intend to find out. If it is, this could be one very special soap. I really like that the recipe uses an old New England product that been used for generations. It makes the soap more interesting to me. I halved the amount of water called for by the recipe and mixed my lye with water, then I made up the remaining amount of water with One Pie Pumpkin. My recipe called for 5.61 oz. lye and 13.18 oz. water, so I used 6.59 oz. water and 6.59 oz. pumpkin purée. I added the pumpkin directly to the oils and stick blended the mixture to combine, then I added the lye/water and stick blended to a light trace. It blended fairly quickly.

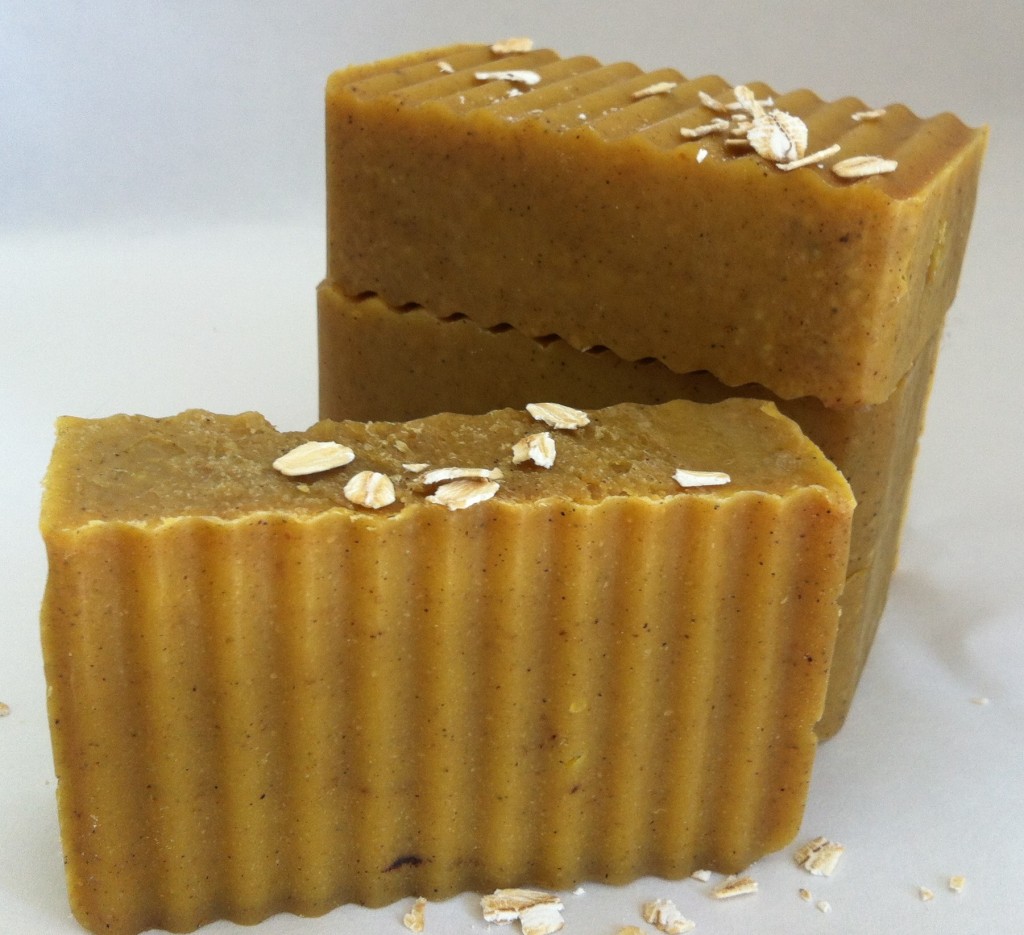
I used Bramble Berry’s Pumpkin Pie fragrance oil for scent. It smells great. I did notice that it accelerated trace in my own soap, so add it at a fairly light trace. I actually didn’t need to stick blend anymore after I added it. Next time I make it, I might add my pumpkin pie spice to the soap and stick blend it before I add the fragrance oil just so the spice is incorporated fully. I had not intended to gel the soap, but it was gelling in the fridge anyway, and it was starting to develop a crack, which I fixed. Since I figured it would gel anyway, I took it out to prevent a partial gel. I don’t have anything to compare it to, since I haven’t made this soap before, but I think gelling it gave it a really nice, rich pumpkin color. The soap looks great and smells amazing. I love many of the soaps I’ve made, but I think this one might be my favorite, just because it smells so great and was so much fun to make, and it also has this interesting New England connection. I can’t wait to use it.

Amy Lowell’s Lilac Soap

Amy Lowell
Amy Lowell via The Poetry Foundation

Amy Lowell is a Massachusetts poet. She loved the return of lilacs to New England in the spring and wrote a beautiful poem about it. I love lilacs, too. My grandmother had a lilac bush in her back yard. They were beautiful and smelled heavenly.

I tried yet another experiment this weekend: lilac soap. Who better to name a New England lilac soap after than Amy Lowell? I had intended to try swirling two colors for the first time, but things didn’t quite work out as I had planned.

Ingredients:

  • 8 oz. olive oil
  • 8 oz. coconut oil
  • 12 oz. palm oil
  • 12 oz. coconut oil
  • 13.2 oz. distilled water
  • 5.472 oz. lye
  • 4 T lilac fragrance oil
  • 2 T alkanet powder

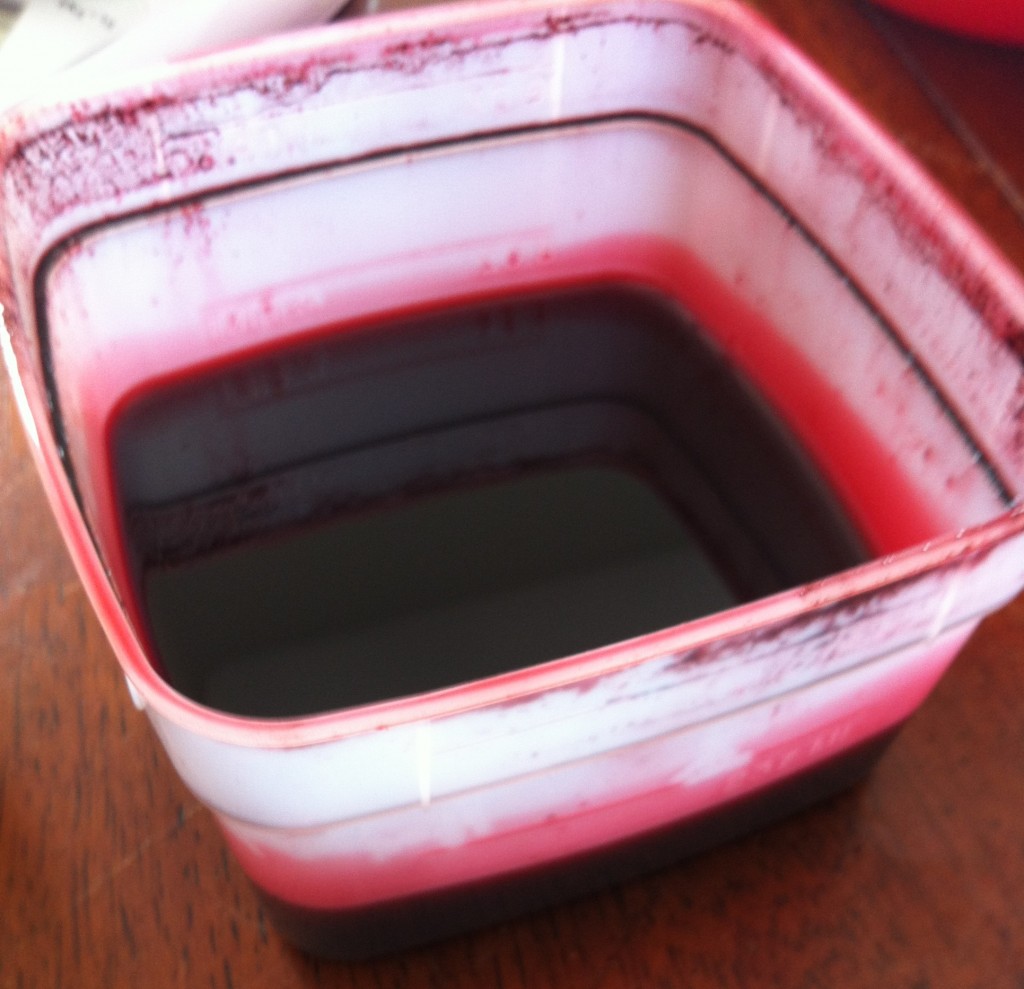
Right about Tuesday of this week, I measured out two tablespoons of alkanet powder and 4 oz. of olive oil into a plastic container, stirred well, and put a lid on the container. I put the alkanet and olive oil infusion in a dark cabinet. I took it out today to use with my lilac swirl soap, intending to make two small batches of soap in different colors. I mixed the oils for each of the colors at the same time, measuring out half of the required amount. I put the infused olive oil in my colored bowl so I could remember which batch was supposed to be colored. In case you were wondering, yes, the alkanet infusion stained the plastic, but it didn’t bother me much because I wasn’t trying to prevent staining. If you use colorants and don’t want to stain your plastic, just use a glass jar for infusing instead.

Alkanet InfusionIt was a little scary to clean up afterward. Perhaps it might be best after all just to use something you can dispose of, like a pickle jar.

I had problems with my lye being too hot again, and this time, I was just using distilled water. The common denominator seems to be the lye, which is a new brand. I think I just won’t buy it again once I’ve used it up. It’s too much of a hassle to put my lye in an ice bath every single time I want to make soap. I would expect it when I’m making milk-based soaps, but not water. The lye I bought from Bramble Berry the first time I made soap costs about the same amount, even factoring in shipping, so I will just be ordering it from them.

I mixed the batch without the alkanet first so that I wouldn’t mix colorant from the hand blender into the light mix. I poured 2 T of lilac fragrance oil into each small batch of soap. The trace was too thick when I tried to pour the soap. The lilac fragrance oil accelerated the trace. At any rate, it was all I could do to spoon out globs of the soap into my mold before it hardened too much to use. I had no idea what I was going to get when I cut it open, but I think that’s true whether you spoon it out or swirl it, especially the first time. I just smashed it into mold as quickly as I could and hoped when I cut it the next day all would be well.

Well, I can say this: it could have been worse. I at least have usable soap, even though it isn’t very pretty.

Lilac SoapWhere to begin? Well, the light color is really not very pretty at all, and I suspect that its yellowish tinge comes from the shea butter I used. It actually looks prettier in these photos than it does in person. Trust me. It’s kind of a gross yellow.

Given that the color isn’t very pretty, I wish I had just colored the whole batch purple. Live and learn. As a result of trying to do too much (swirl, in this case), I wound up having the soap seize up on me, and I desperately shoved the soap into the mold, but pockets formed where there was no soap, and it was really ugly when I cut the bars.

Lilac Soap
Look at that nasty air pocket!

I suppose everyone has a batch of soap seize up on them at least once, but at least now I know that working with the lilac fragrance oil is going to be tricky, and I will need to bring my temperatures down a little to slow down the time it takes to trace and add the fragrance at a lighter trace. I also learned that swirling is really hard with floral fragrance like lilac, so I may just need to make the soap one solid purple color instead.

Lilac Soap

I also had some problems with soda ash, which is probably because it seized up, and I wasn’t able to put it to bed as soon as I should have. I had to cut the bars down quite a bit to make them somewhat presentable, as most of them had air pockets on the sides where the soap globs didn’t mash together well.

The soap smells heavenly, just like my grandmother’s lilacs, and I tried lathering up with some of the cuttings as a test. The lather is smooth and creamy. The soap has cosmetic issues to be sure, but it is something that could be used, even if I don’t think I could give it away or sell it (unless I discounted it like those outlet stores do with clothes that have something wrong with them).

I’m sorry, Amy! Next time your soap will be worthy of your name!

Creative Commons License

Amy Lowell’s Lilac Soap by Dana Huff is licensed under a Creative Commons Attribution-NonCommercial 3.0 Unported License.
Permissions beyond the scope of this license may be available at Suds Life: About.
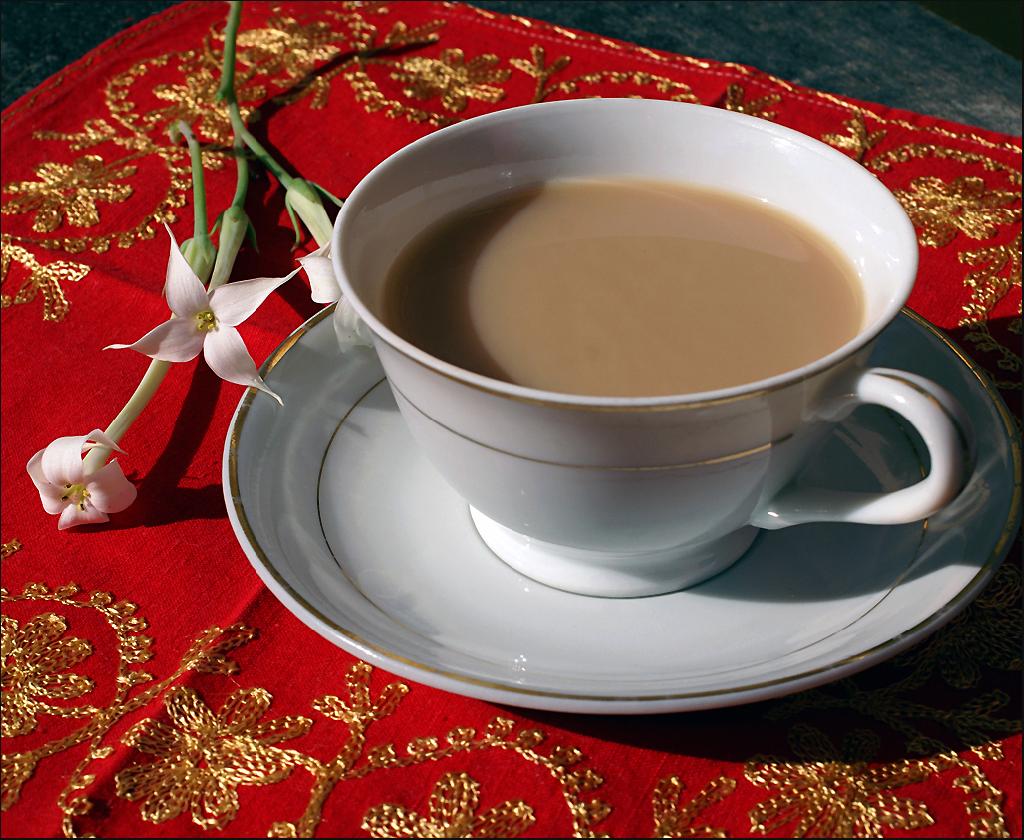
Chai Tea Soap

As you might remember, I had planned to make chai tea soap last weekend, but my chai tea fragrance oil hadn’t arrived yet. I think I received it on Tuesday of this week. Anyway, I don’t fault Bramble Berry for taking their time and shipping fragrance oils ground. It’s much safer when shipping flammable oils. I’d hate for a fire to start. But I was kind of bummed out that I couldn’t make my chai tea soap. Next time, I will order earlier.

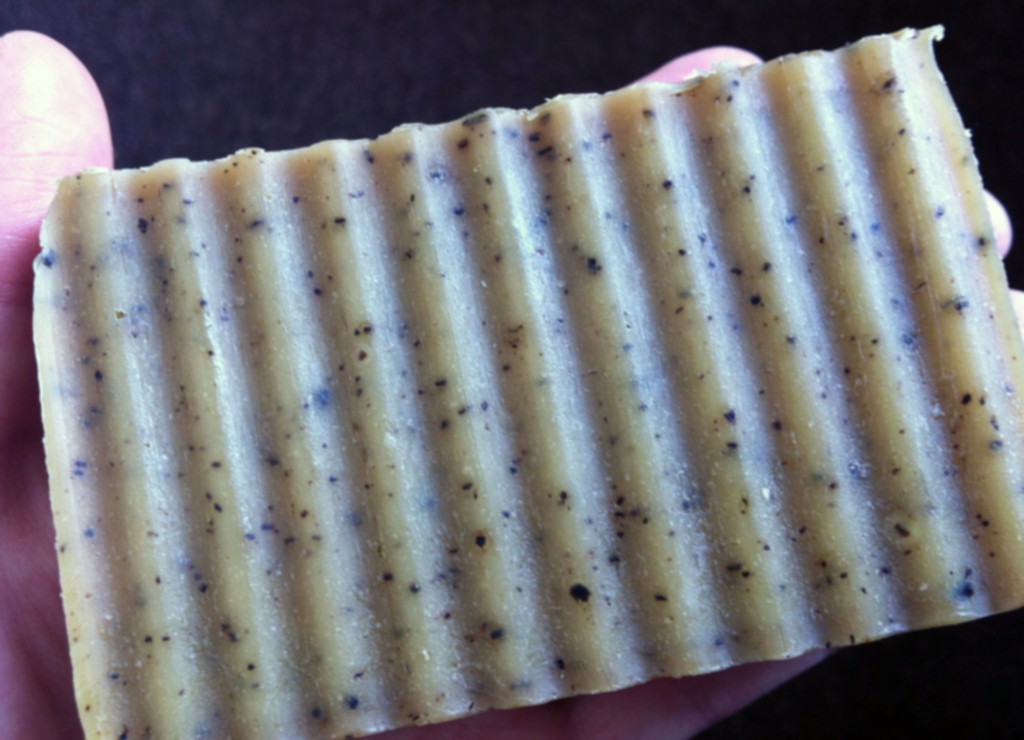
I made my chai tea soap on Friday instead, then cut it using my brand new crinkle cutter on Saturday.

Chai Tea SoapIngredients:

  • 8 oz. olive oil
  • 8 oz. coconut oil
  • 12 oz. palm oil
  • 12 oz. shea butter
  • 5.472 oz. lye
  • 13.2 oz. chai tea
  • 4 T chai tea fragrance oil
  • tea leaves from 3 chai tea bags

On Thursday night, I made the chai tea in a plastic container using distilled water, boiled, and 3 chai tea bags. I steeped the tea on the counter until it cooled to room temperature, then I put it in the refrigerator. I’m really glad I did that, as you will see in a moment.

After I got home from work Friday, I got out all my supplies and mixed my lye into the chai tea. The temperature shot way up, and it stalled right around 140°. I finally decided to put it in an ice water bath. I have never seen any warnings about tea. Everyone says using milk is tricky, and you should start with frozen milk and add the lye slowly. I didn’t realize the tea would do that. It could be some of the flavorings in chai tea in particular have that effect. There was a vanilla flavor and of course the spices added to the chai tea I used (Twinings French Vanilla Chai, if you are curious).

I was working with a new brand of lye, and it is shaped in little pastilles, which are a little neater in one respect—there is no fine dust left in the container when I add it to the liquid. However, they wanted to roll everywhere, so I would recommend using a bigger container than you even think you will need for lye that comes in little pastille shapes just so that you can collect all of it rather that watch it winging across the kitchen table like I did.

Once I managed to cool off the lye, I noticed my oils were a little too warm. It’s always something, isn’t it? I let them cool off for a minute, then I just added the lye. The soap reached trace fairly quickly. At a light trace, I added the fragrance. I didn’t notice any sort of acceleration or reaction, and the fragrance oil mixed very well with the soap. I cut open the tea bags I had used to make the chai tea and put the tea leaves into the soap at a heavier trace. I stirred them in, then poured the soap in my mold.

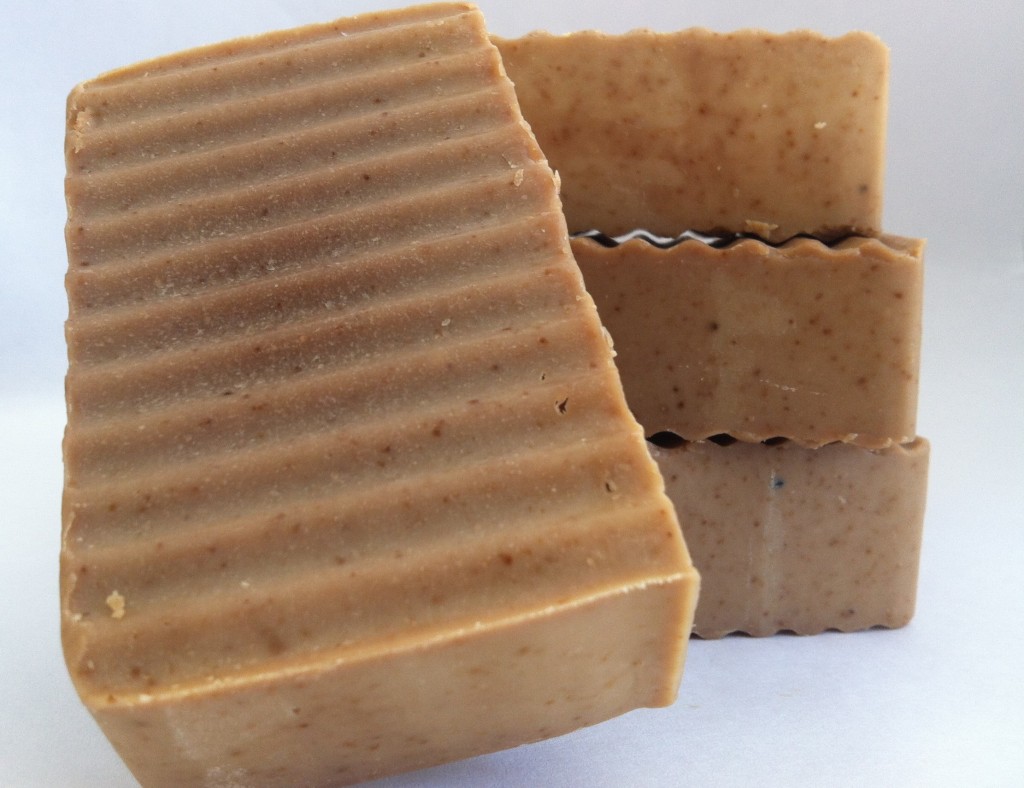
Chai Tea SoapThe crinkle cutter was great to work with. It made a cute design with no extra effort on my part, and it helped me cut my soap into more uniformly sized bars. The slots on my cutter mold are wider than my straight cutter, so sometimes my soap is slightly different sizes. The crinkle cutter just fits in the slots, which makes the soap easier to cut to the same size. It’s a good, quality cutter, and I can recommend it to anyone making soap.

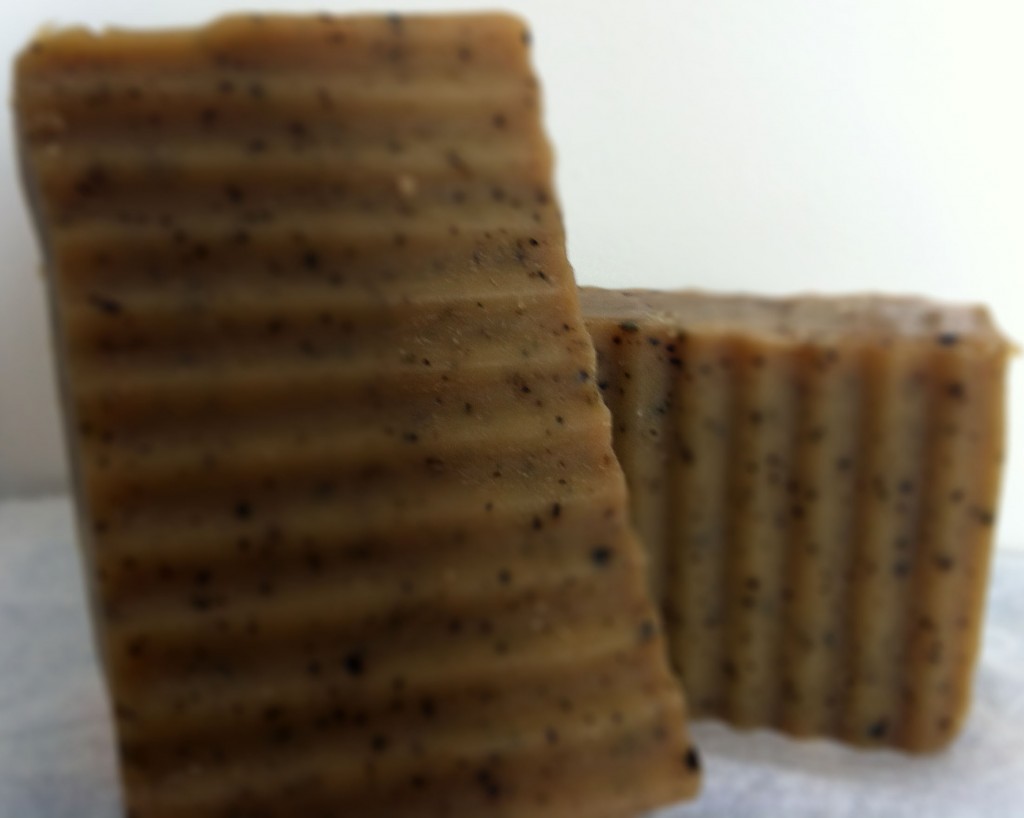
The soap came out a pretty caramel color, and the flecks of tea leaves provide a nice decoration. My husband really liked the fragrance. I can’t say it smells precisely like chai tea to me (I drink chai all the time, and this fragrance is missing a sort of spicy smell), but it does smell good, and the vanilla tones of the chai scent came through. The fragrance may change as the soap cures, too, so that is something I need to keep in mind.

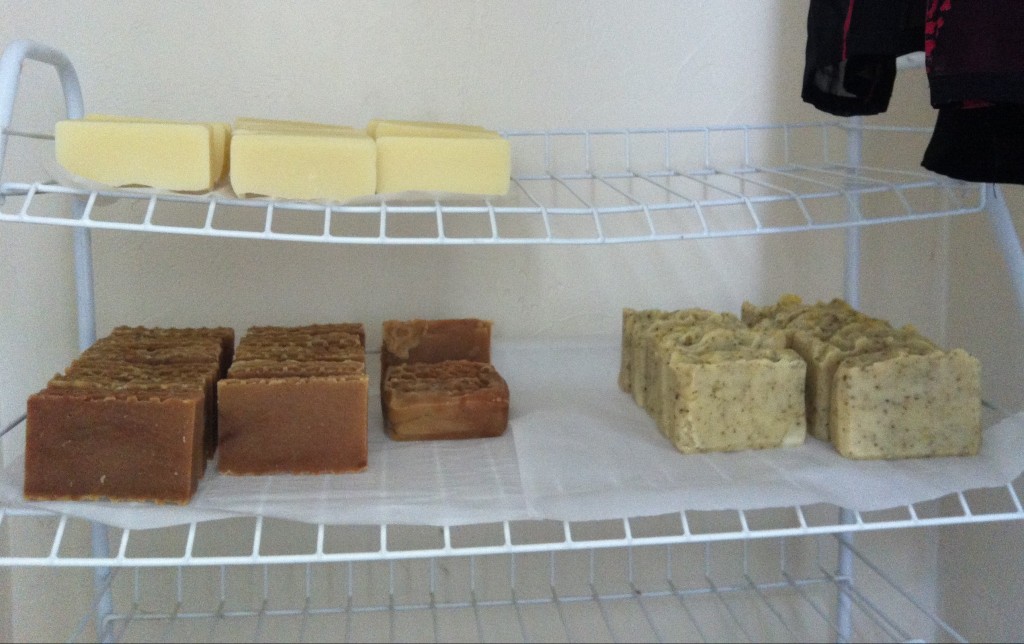
Chai Tea Soap CuringI put the soap on my curing rack after removing the first batch I ever made, which has now cured for four weeks and can be used. I think this batch of soap is probably the most uniformly pretty batch. I would feel comfortable selling every single bar from this batch, whereas several bars from my honey cinnamon oatmeal batch are funny looking because they were stuck in the mold, and some of my first batch of lemongrass sage have spots not colored by the essential oil. I think I have to lay credit at the feet of the crinkle cutter. I will probably be using that cutter a lot.

Creative Commons License

Chai Tea Soap by Dana Huff is licensed under a Creative Commons Attribution-NonCommercial 3.0 Unported License.
Permissions beyond the scope of this license may be available at Suds Life: About.
The Great Chocolate Milk Soap Experiment

The chai tea fragrance oil I ordered to make my chai tea soap this weekend didn’t arrive in time.

Boo!

But when life gives you lemons, you make lemonade, right? I could still make soap with things I had on hand or that I could easily pick up at the grocery store. I can’t find a place around here that sells essential oils or fragrance oils, so it had to be something that would be OK without added scent.

I decided that this weekend could be the weekend I experiment with using milk in soap, and I created a chocolate milk soap recipe I really wanted to try.

Chocolate Milk SoapWorking with both milk and chocolate can be more difficult, however, so I had to change some things about my process.

Ingredients

  • 13.2 oz. olive oil
  • 12 oz. coconut oil
  • 6.8 oz. palm oil
  • 4 oz. shea butter
  • 0.625 oz. unsweetened baking chocolate
  • 13.2 oz. whole milk
  • 5.637 oz. lye

First, I measured out the whole milk, put it in a freezer bag, and froze it. This is a suggestion for working with milk (although she mentions it with goat milk) from Heidi Corley Barto’s in The Natural Soap Chef. When you use liquids other than water, it’s a good idea to follow suggestions of more experienced soapers like Heidi, and she’s not the only person I’ve seen mention working with frozen milk. The milk should be at least a frozen slush when you use it. Make an ice bath in your sink, and put the slushy milk into the ice bath. Then carefully, slowly add the lye, stirring as you go. Add a bit, stir a bit. Go very slowly. If the temperature of the lye mixture starts to climb above 140°, add more ice to the ice bath.

Prepare the chocolate with the oils. It should be melted. You can melt it in the microwave if you’re careful. Check this link for tips on melting chocolate. When the lye/milk has reached 100°, add it to the oil mixture. The rest of the process as the same as making any other cold process soap: use a stick blender to help the soap saponify, and once it reaches trace, pour it into the mold of your choice. My recipe fits a three-pound loaf mold.

I knew working with milk would be different, but as it turned out, the main difference seemed to be the amount of time for each step. I think I put too much ice in the ice water bath, and my lye heated up, but then cooled down to about 80° and stalled there, so I put it in a warm bath. Well, a hot one. And I managed to bring it up to 98°, but it wouldn’t budge any more, so I decided maybe I should add it to the oils. It look longer than usual to reach trace. The soap didn’t feel as warm as it normally does when I picked up the mold to put it in the closet where I keep my soap. It seemed to take longer to reach a gel stage, too. I’m not sure if this is just normal for working with milk, or if it was due to the fact that I had to warm up my lye, or what.

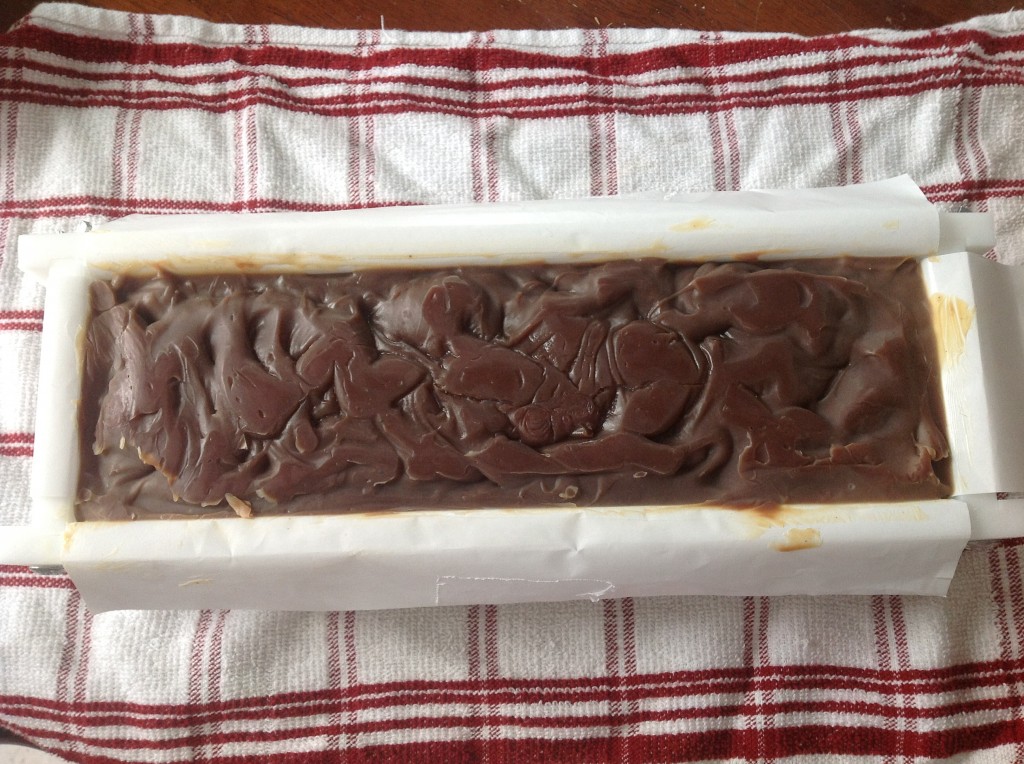
When I poured it into the mold, it did look exactly like chocolate milk. Really thick chocolate milk. Like chocolate pudding, actually. I fretted over it because it was slower going than the other soap I’ve made, but once it started to reach gel stage, I felt better.

But it darkened up quite a bit by the time it had cooled, as I figured it would.

Chocolate Milk Soap in the Mold
Cooled Chocolate Milk soap in the mold

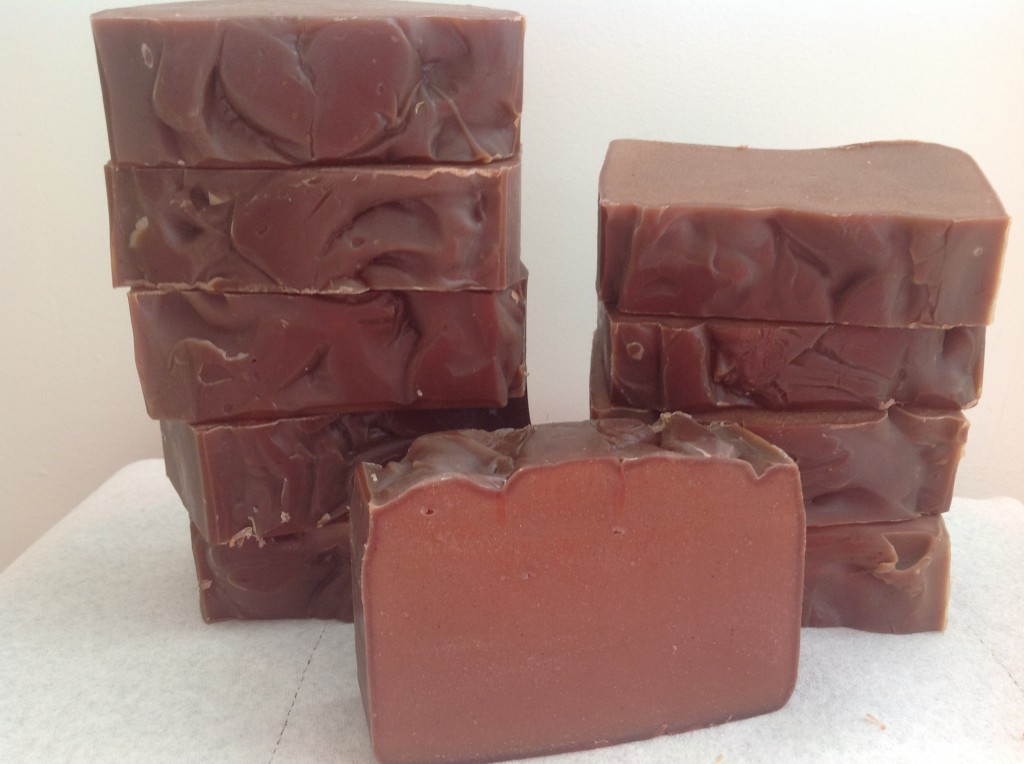
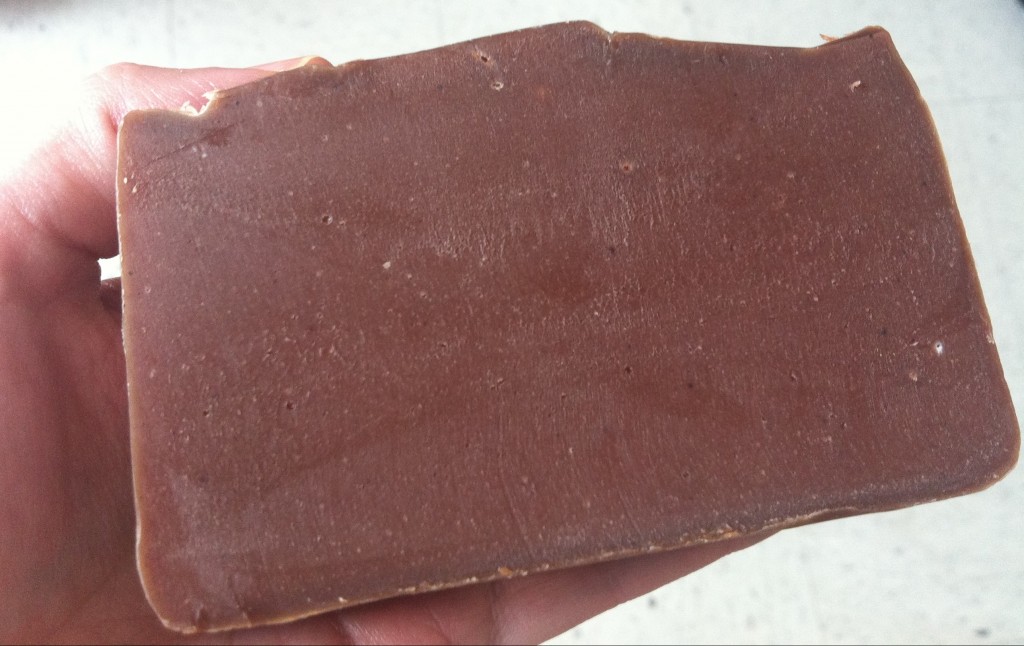
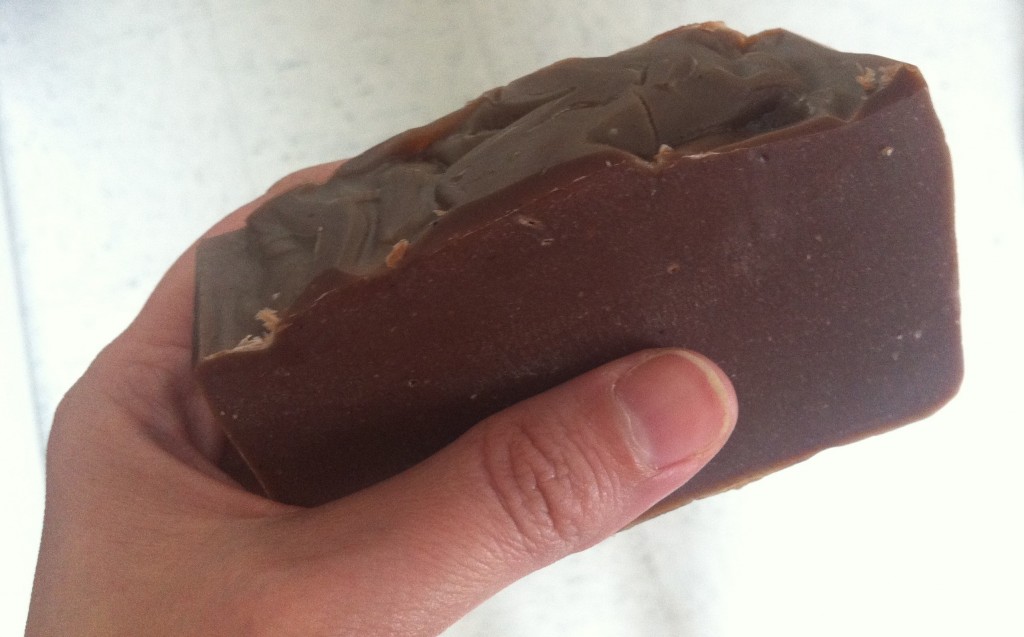
When I cut it into bars, I noticed that there was a sort of dark brown rim around the bar, while the middle was lighter. I think it was due to the fact that the soap isn’t completely hardened yet.

Chocolate Milk SoapA few hours later, the color had darkened to a deeper brown.

DarkerI noticed a couple of air bubbles, too, but you know, it’s chocolate milk, and who doesn’t blow bubbles in their chocolate milk, right?

It has a light scent that reminds me more of chocolate cake than milk, but my husband thought it smelled like chocolate milk. I lathered up and washed my hands with a tiny ball of the soap I had made from some trimmings, and it has a nice creamy lather. I was worried the chocolate would discolor the lather, but it didn’t seem to. I will have to test it again after some time passes just to make sure.

Yummy!
Yummy!

Creative Commons License

Chocolate Milk Soap by Dana Huff is licensed under a Creative Commons Attribution-NonCommercial 3.0 Unported License.
Permissions beyond the scope of this license may be available at Suds Life: About.
Lemongrass Sage Soap

This weekend I made a lemongrass sage soap using my own recipe.

Lemongrass Sage Soap
Still in the mold.

Ingredients

  • 18 oz. olive oil
  • 14 oz. coconut oil
  • 8 oz. palm oil
  • 5 oz. shea butter
  • 2 oz. castor oil
  • 15.7 oz. distilled water
  • 7 oz. lye
  • 2 oz. lemongrass essential oil (add at trace)
  • 3 T sage (add at trace).

I tried a trick I read about in Heidi Corley Barto’s The Natural Soap Chef and infused some of the olive oil with sage prior to using it. I’m not sure I’m going to do that again because I had a lot of trouble straining it. I know part of the problem was that I was just impatient, but unless it imparts some quality I don’t know about to do it like that, it was a little more trouble than it was worth for me. I did mix the sage into a paste with the olive oil. I’m not sure if you have to do that, or what happens if you don’t. I suppose you could experiment and just mix it into the soap dry to see what happens.

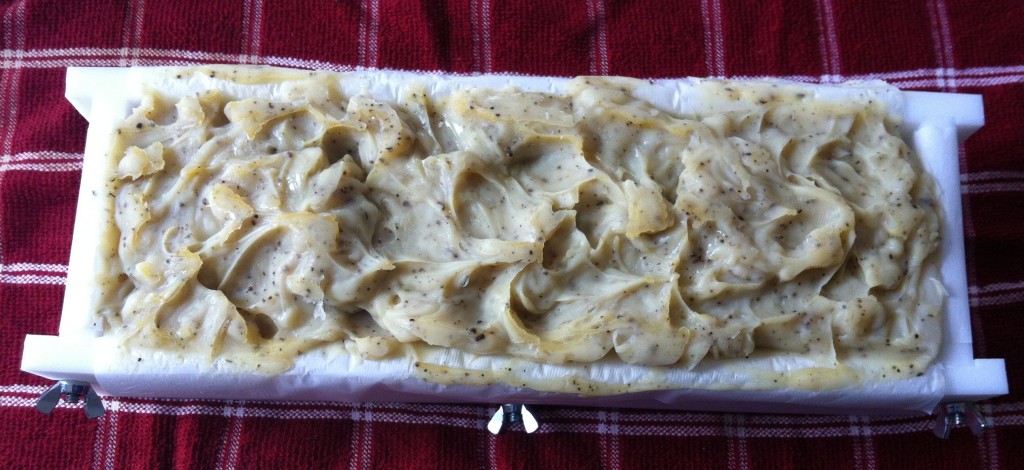
I had a pretty heavy trace when I added the lemongrass oil, and it really made the soap thicken up. I would recommend adding it at a lighter trace. The soap was a little difficult to pour into my mold, and you might have better luck if you add the lemongrass oil earlier than I did. I added in sage at the same time.

When I poured the soap into the mold, I decided at the last minute to try adding some decorative peaks and swirls, as I have seen other soapers do. My daughter Maggie said the resulting soap looked “deformed.” That really made me laugh.

My husband has been saying the soap smells good enough to eat, and here he was laughing about the warnings in soap books about not eating the soap.

Lemongrass Sage Soap
Finished lemongrass sage soap.

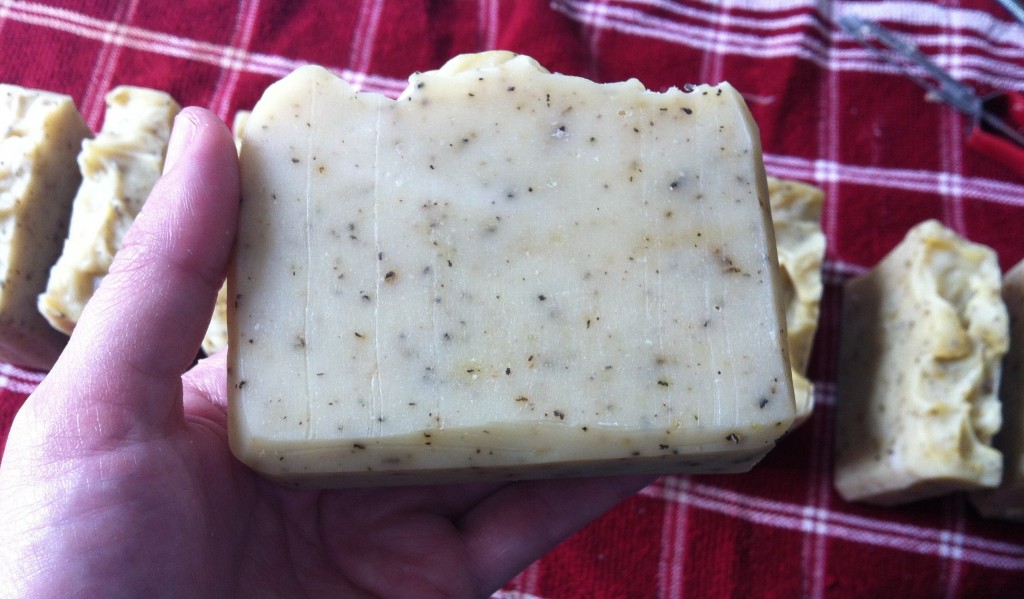
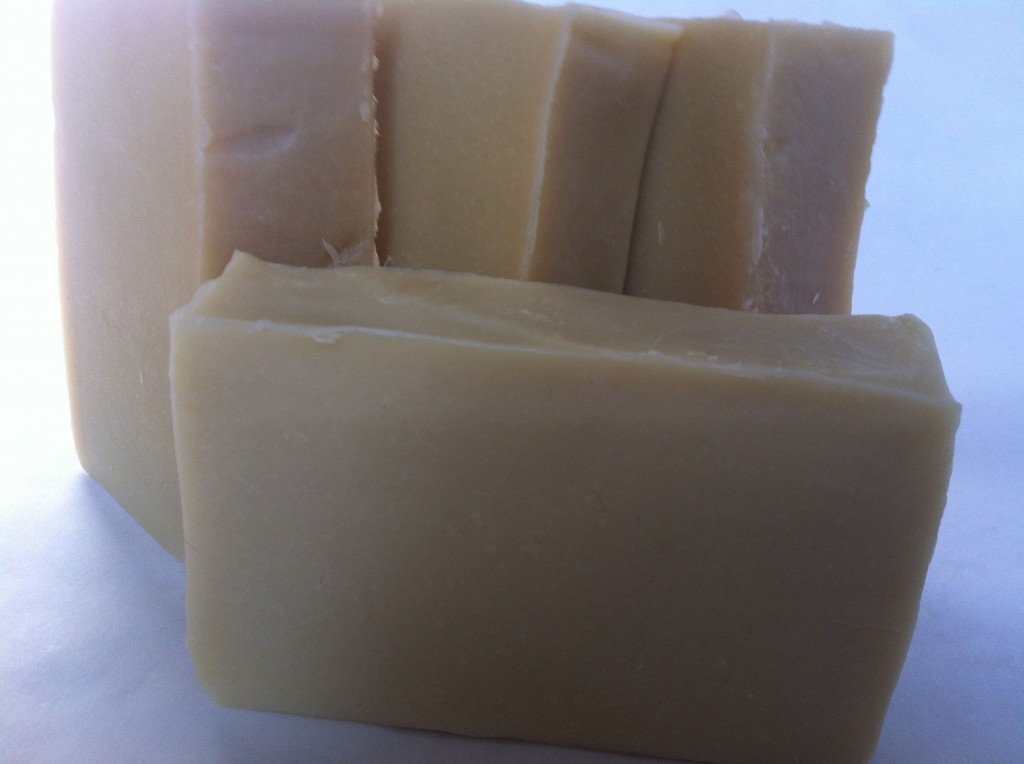
I think I could have stirred the lemongrass oil in a little better. There were some lighter colored areas in the soap, and they were not lye pockets or air bubbles. They are not watery, either, so I don’t think it’s an issue with separation. They are the same color the soap would be if the lemongrass oil hadn’t added a yellowish tint. I think I just didn’t mix the lemongrass and sage completely. Given that I did have some trouble at that stage, I think I understand how it happened and how to prevent it in my next batch. Also, I discovered that lemongrass oil doesn’t like to mix well with soap, so it seems likely that I just didn’t stir it enough. It was getting so thick so fast after I added the essential oil, however, that I was afraid to wait too long to pour it into the mold. Next time, I will add the oil at a lighter trace. Or I might even try a fragrance oil instead of an essential oil. The fun is in experimenting and seeing what happens! However, I should mention that lemongrass oil is supposed to be good for acne and oily skin, so that’s one reason to go for the essential oil over the fragrance oil.

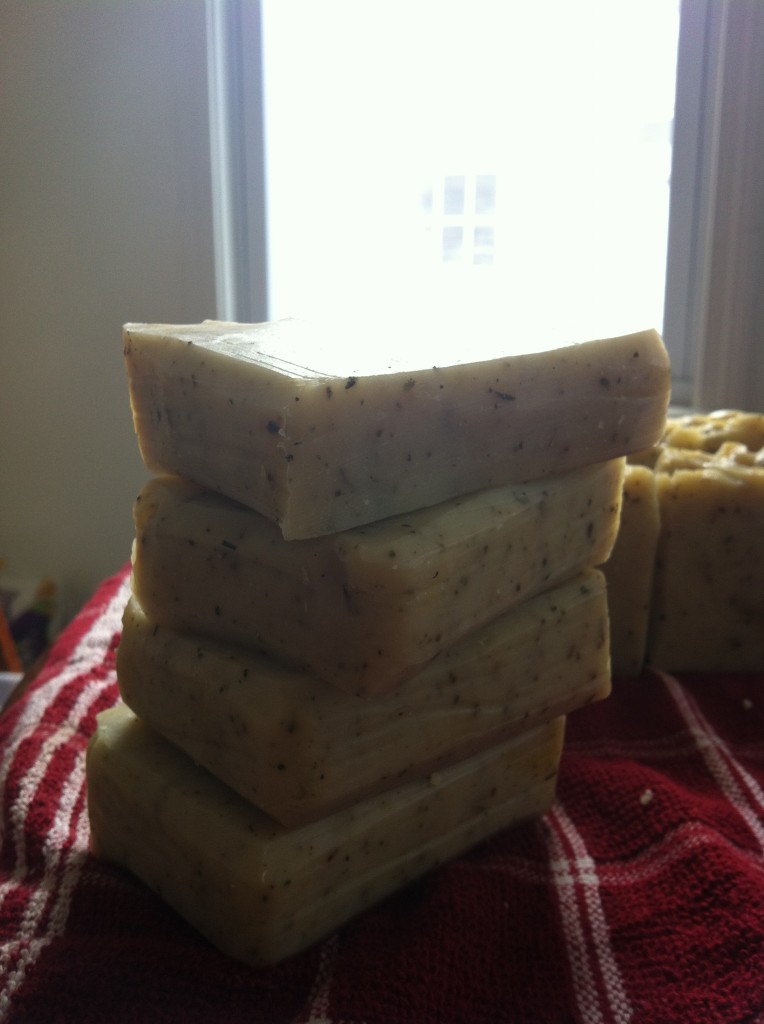
Stack of Lemongrass Sage

The soap still came out pretty enough that several of my Facebook friends who saw the picture of it that I posted requested some. Also, I have decided I like making soap enough to open an Etsy store, especially because 1) I should recoup some of the money I’m putting into it, and 2) if I make soap every weekend, I’m going to have too much, even if I give it away. But given that I have only been soaping three weeks, it will likely be months before I have enough stock to sell.

I ordered a crinkle cutter from Bramble Berry for my next batch of soap. I’m so looking forward to making the Chai Tea Soap in Heidi Corley Barto’s book. The recipe is not mine to share, but I will photograph the results.

I used my husband’s old shoe rack and created a soap curing rack in one of our closets.

Soap Drying Rack

It’s out of the draft and light (when the door is shut, and I’m not checking on my soap). I had the idea after seeing this amazing soap curing cabinet that another soaper’s husband made for her.

Creative Commons License

Lemongrass Sage Soap by Dana Huff is licensed under a Creative Commons Attribution-NonCommercial 3.0 Unported License. Permissions beyond the scope of this license may be available at Suds Life: About.
Honey Cinnamon Oatmeal Soap

This was my first personal recipe, and the soap turned out great!

Ingredients

  • 19 oz. olive oil
  • 14 oz. coconut oil
  • 6 oz. palm oil
  • 5 oz. shea butter
  • 2 oz. grapeseed oil
  • 2 oz. castor oil
  • 1.35 oz. sweet orange essential oil
  • 0.7 oz. cinnamon bark essential oil
  • 3 T finely ground oats
  • 1 T honey
  • 16 oz. distilled water
  • 7.2 oz. lye

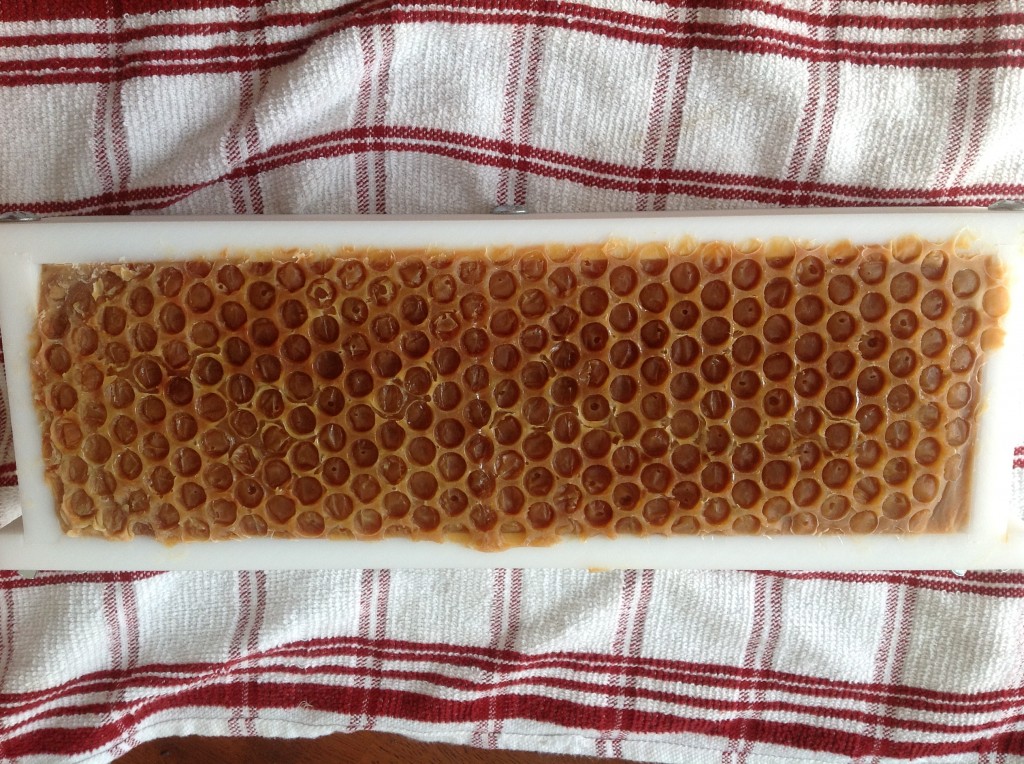
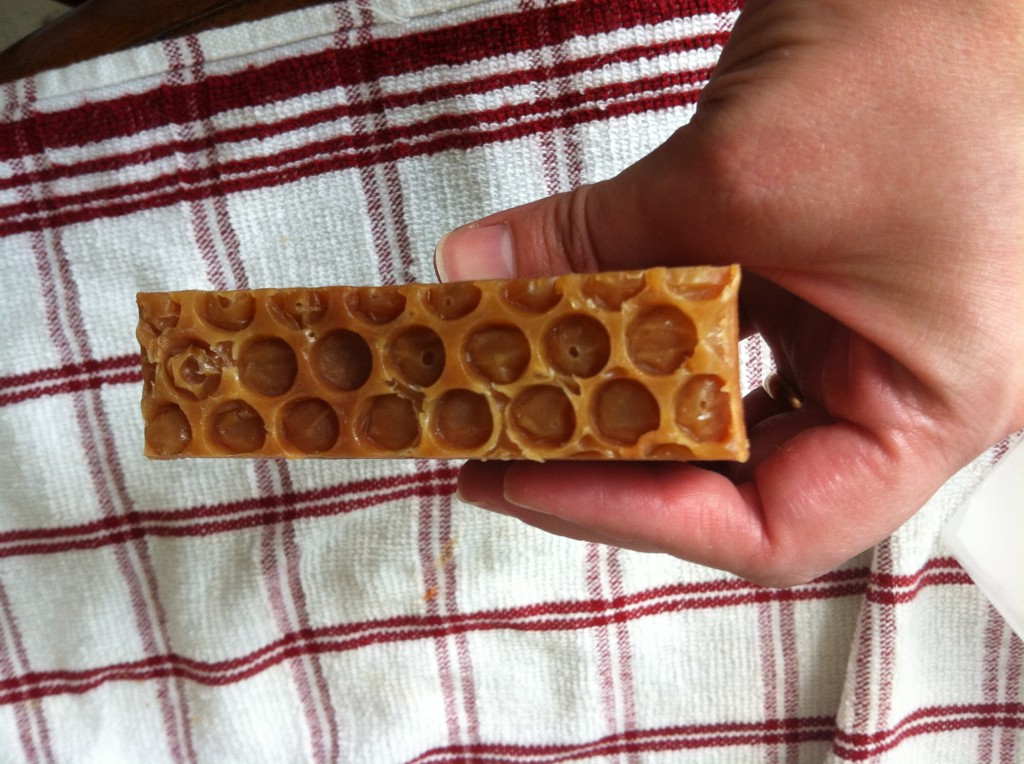
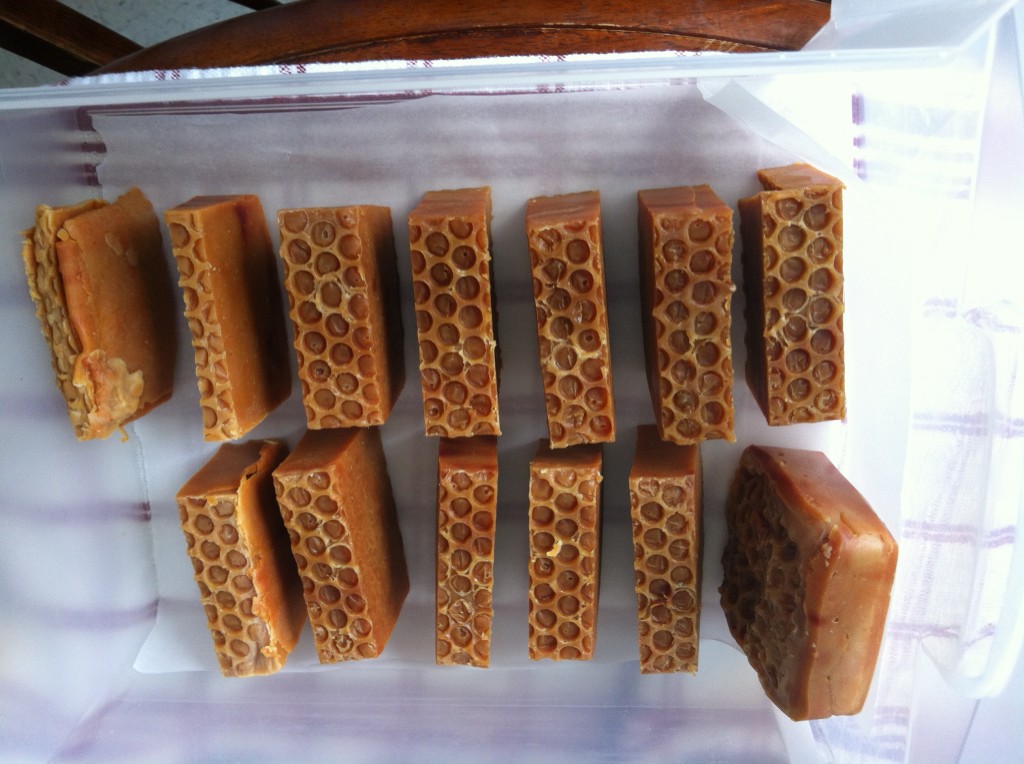
First, I lay bubble wrap in the bottom of my mold so the soap would have a honeycomb appearance on the bottom. I wish I had lined the mold with parchment paper, too. Despite the fact that my mold’s manufacturer said lining was unnecessary, it was terrible trying to remove the soap from the mold. I had to pop it in the freezer for an hour, and even after that, I had to wedge it out with a knife, which kind of made my soap less pretty. Lesson learned. Always line!

I didn’t want to fiddle with the essential oils and oats when my soap was tracing, so I went ahead and measured them first, then combined them into one container and set them aside. I ground my oats with a coffee grinder, put them in another container, and set them aside. Then I went ahead an measured out the tablespoon of honey and set it aside, too.

I poured 16 oz. water into a container, set it aside, and carefully measured 7.2 oz. of lye into a new container. Then I slowly added the lye to the water, stirring all the while. I kept stirring until the liquid was clear. Then I stuck my thermometer into the lye so I could watch the temperature.

I know there are different schools of thought on warming oils. It was hot here in Massachusetts yesterday, so my coconut oil was already melted, but if it hadn’t been, I’d have melted it in the microwave. I did melt the shea butter in the microwave. Sue me. Despite the fact that I did not take care to make sure the oils were the same temperature as the lye, the soap turned out well.

I measured out my oils into different containers, then combined them into one big plastic bowl and kept stirring. A note for beginners like me: use a scale to measure everything. Don’t try to use a measuring cup and do it by volume. You could be a little off that way. I was a little worried that my shea butter was starting to solidify again while I waited for the lye to reach 100°F. I could see little tiny solid pieces, miniscule really, but I prayed and kept stirring. For all I know, that’s not a bad thing. I’m a newbie.

Once the lye reached 100°F, I carefully added it to the oil mixture and stirred for a few moments. Then I used my stick blender to speed up the process. At a light trace, I added the honey. I guess I should have diluted the honey. My finished soap had some brown spots.

Dark Spots
You can see the dark spots in the corner and sides.

According to one online troubleshooter (dead link removed—sorry!), this can also happen when your soap goes through a very hot gel phase. Like mine did.

Gel Phase
Ay chi wawa! That was hot!

I had read that honey does funny things. Perhaps I didn’t need to cover the soap with a towel. However, I did read that the dark spots might go away once the soap is cured, and also that the soap is still fine to use. Whew! I think they sort of give it character.

At trace, I added the essential oils and ground oats and stirred thoroughly to mix everything in well. I covered the top with bubble wrap for the honeycomb effect, then put my soap to bed.

I actually made a mistake in my recipe. I added 20 oz. of olive oil instead of 19. I’m not sure what it did to my batch, aside from make more soap. I’ll have to wait and see if there were any unintended effects, but the soap looks just fine.

Finished uncut soap
Pretty! But stuck in the mold!


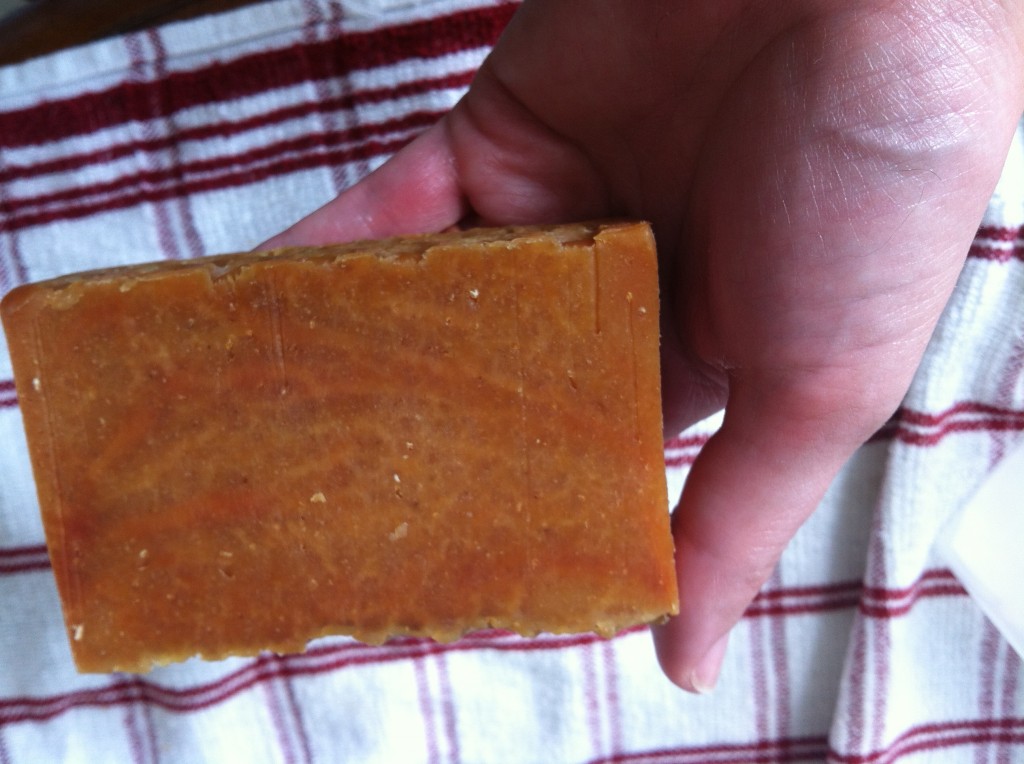
I have a mold that comes with a cutter, so once I finally wrestled my soap out of the mold, I sliced it into bars. They’re kind of quirky and not all the same size.

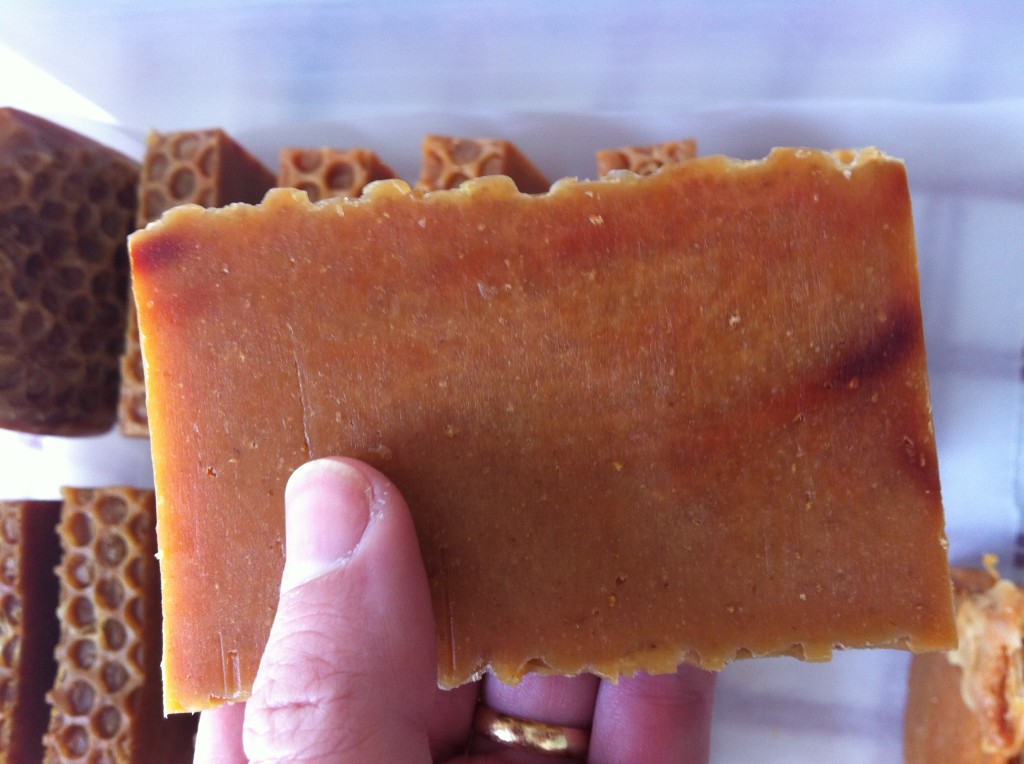
Bar of soap
This one looks nice.


But like I said, I learned my lesson about the lining, which should prevent some of the odd looking bars next next time.

Finished bars
Let’s cure this soap!


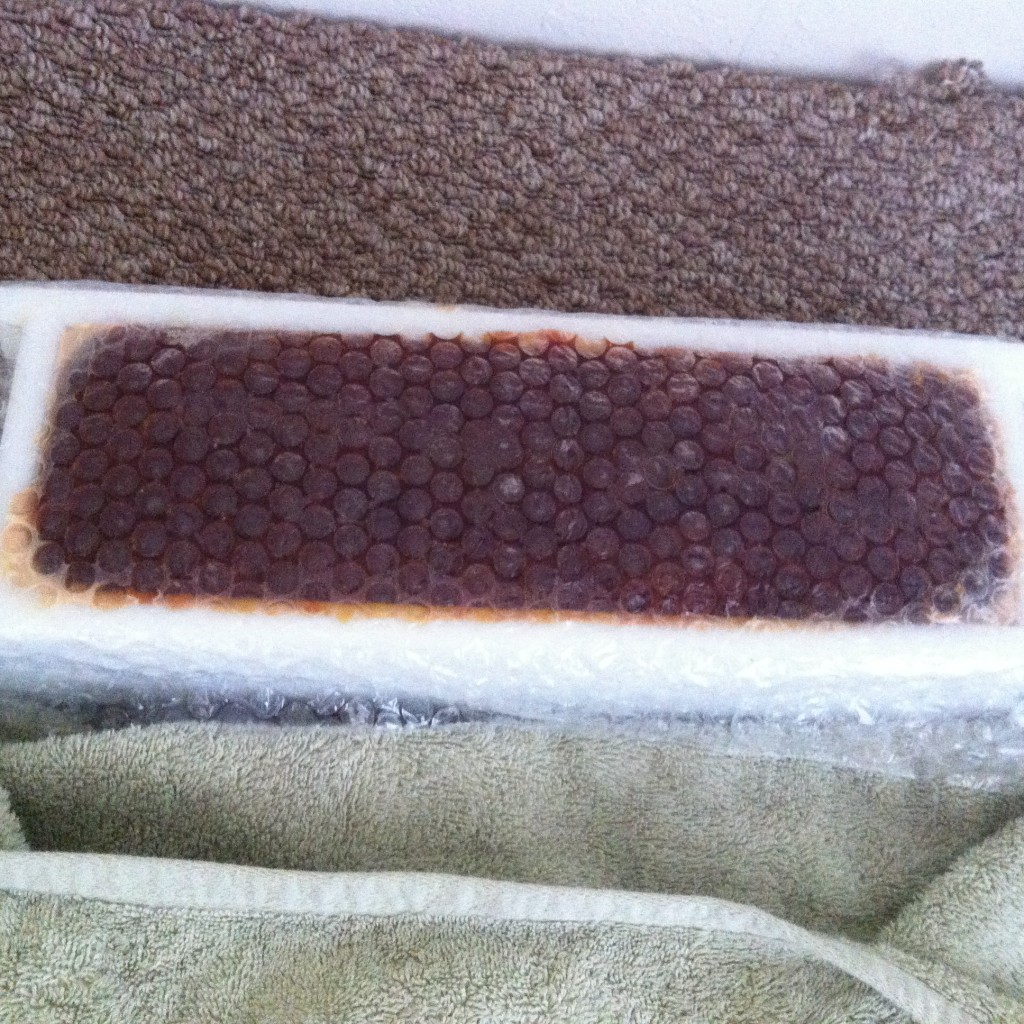
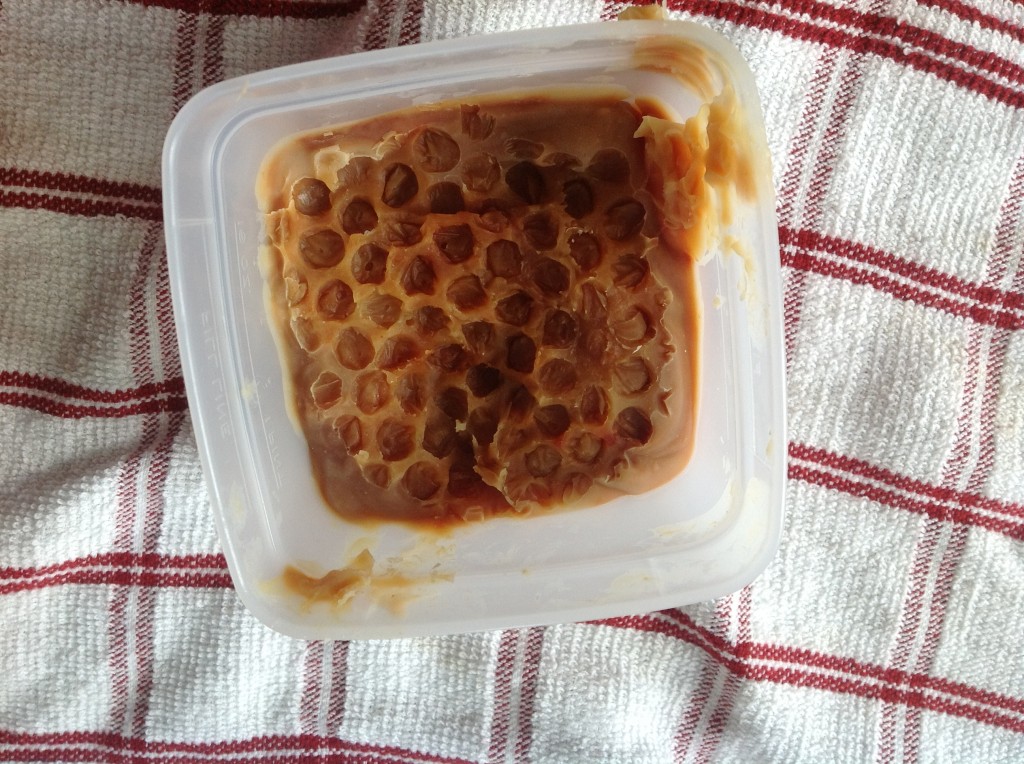
You’re probably wondering about that huge bar of soap on the far right. Right? It may be the result of adding the extra ounce of olive oil, or it could be that I’m a newbie and can’t figure out how much oil will make the exact right amount to fit my mold, but I had that much soap left over after my mold was full, so I poured into a plastic container, and put bubble wrap on it, too.
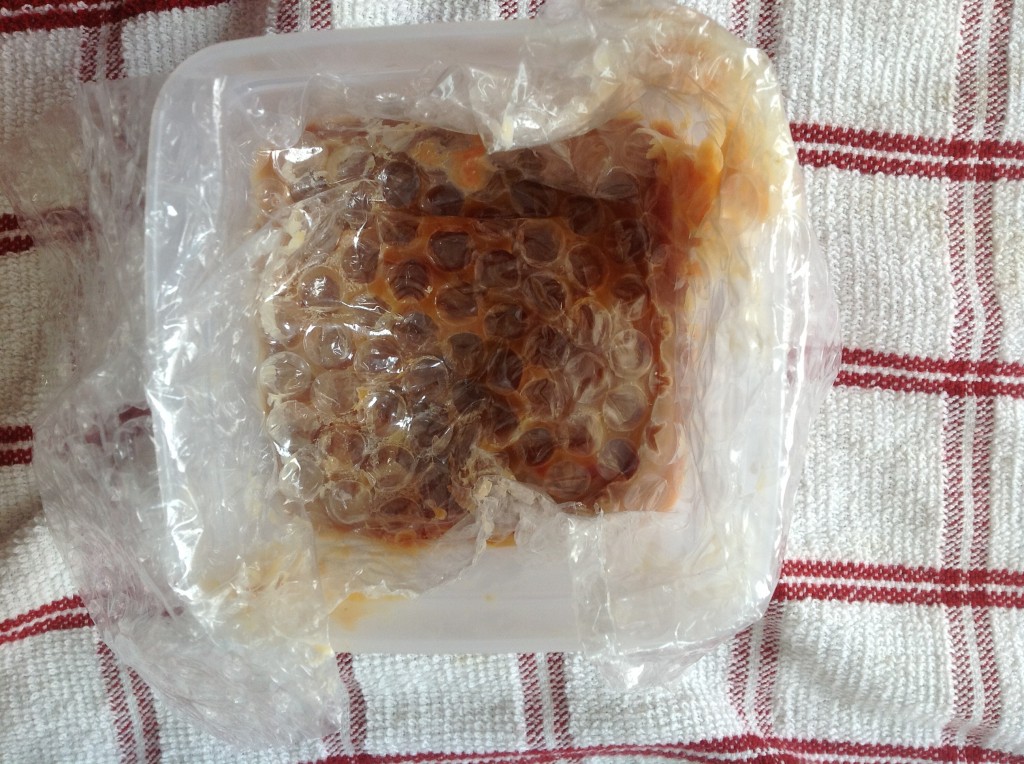
Funny leftover bar
Funny leftover bar of soap.


And it came out pretty well.

Finished funny bar
Finished leftover bar in the mold.


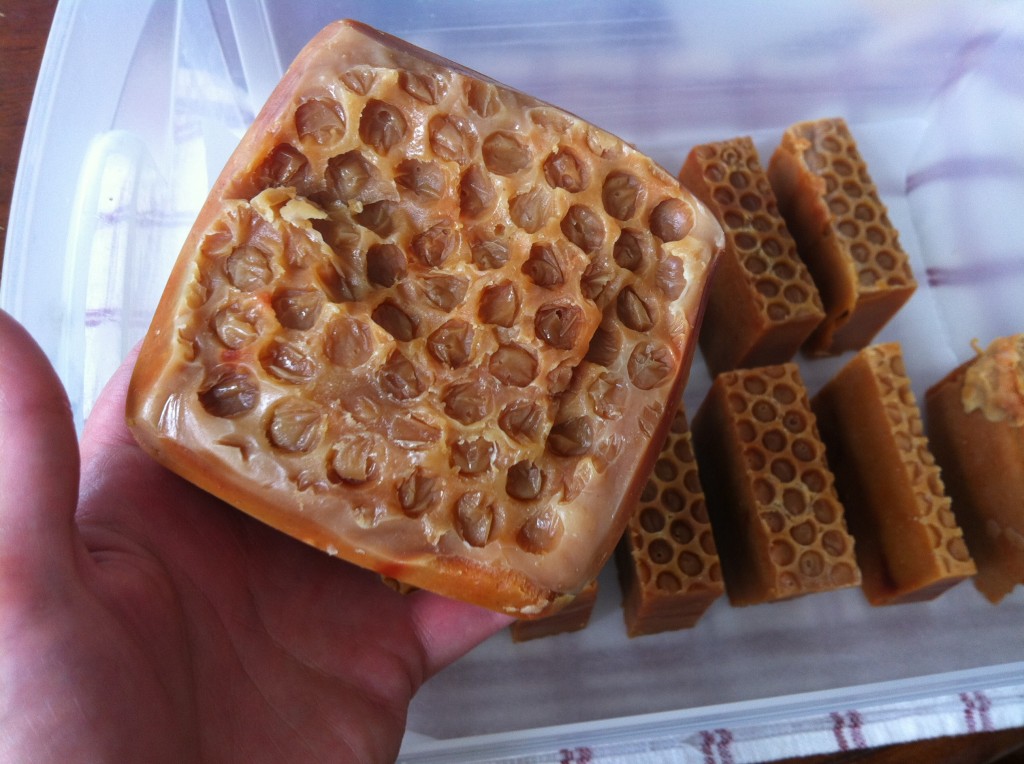
It was a little easier to get out of the mold, but it still gave up a little fight. I used a peeler to make it look a little nicer around the edges.

Funny soap edged

That is one huge bar of soap.

Still the honeycomb effect turned out well.

Honeycomb
Honeycomb!

Overall, I’m very pleased with how the finished soap looks, despite the brown spots. I was working with honey, which can be kind of cranky, and I was using a recipe of my own, so who knew what would happen? It smells absolutely divine, by the way. The combination of the honey and essential oils is amazing.

By the way, this soap had an INS value of 155, which is close to Dr. Bob’s ideal of 160. So that’s good? I guess. Also, the calculator I used to create the recipe predicts the recipe will produce soap with a medium hard bar, very good cleansing, great conditioning, good foam, and average stable lather. I wasn’t sure whether to worry about lather stability over much or not.

Washing up my supplies told me that the soap lathers up really well and feels good on my hands. I can’t wait to use it.

Creative Commons License

Honey Cinnamon Oatmeal Soap by Dana Huff is licensed under a Creative Commons Attribution-NonCommercial 3.0 Unported License. Permissions beyond the scope of this license may be available at Suds Life: About.