Hot Process Soap

I have very little experience with hot process soap, but I really wanted to give it a try. I think the rustic look of some hot process soaps is quite pretty. I had an idea for a soap, and I thought it might look better if it were hot process rather than cold process, so I decided to give it go.

First, my recipe:

  • 40% olive oil
  • 25% coconut oil
  • 25% palm oil
  • 5% castor oil.

This is my “test” recipe, which also has the advantage of being a good basic recipe.

I made up the lye mixture with full water and set it aside. Then I added the oils to the crock pot.

Oils

I grew really impatient waiting for them to melt. They probably took about 15 minutes to melt on high heat.

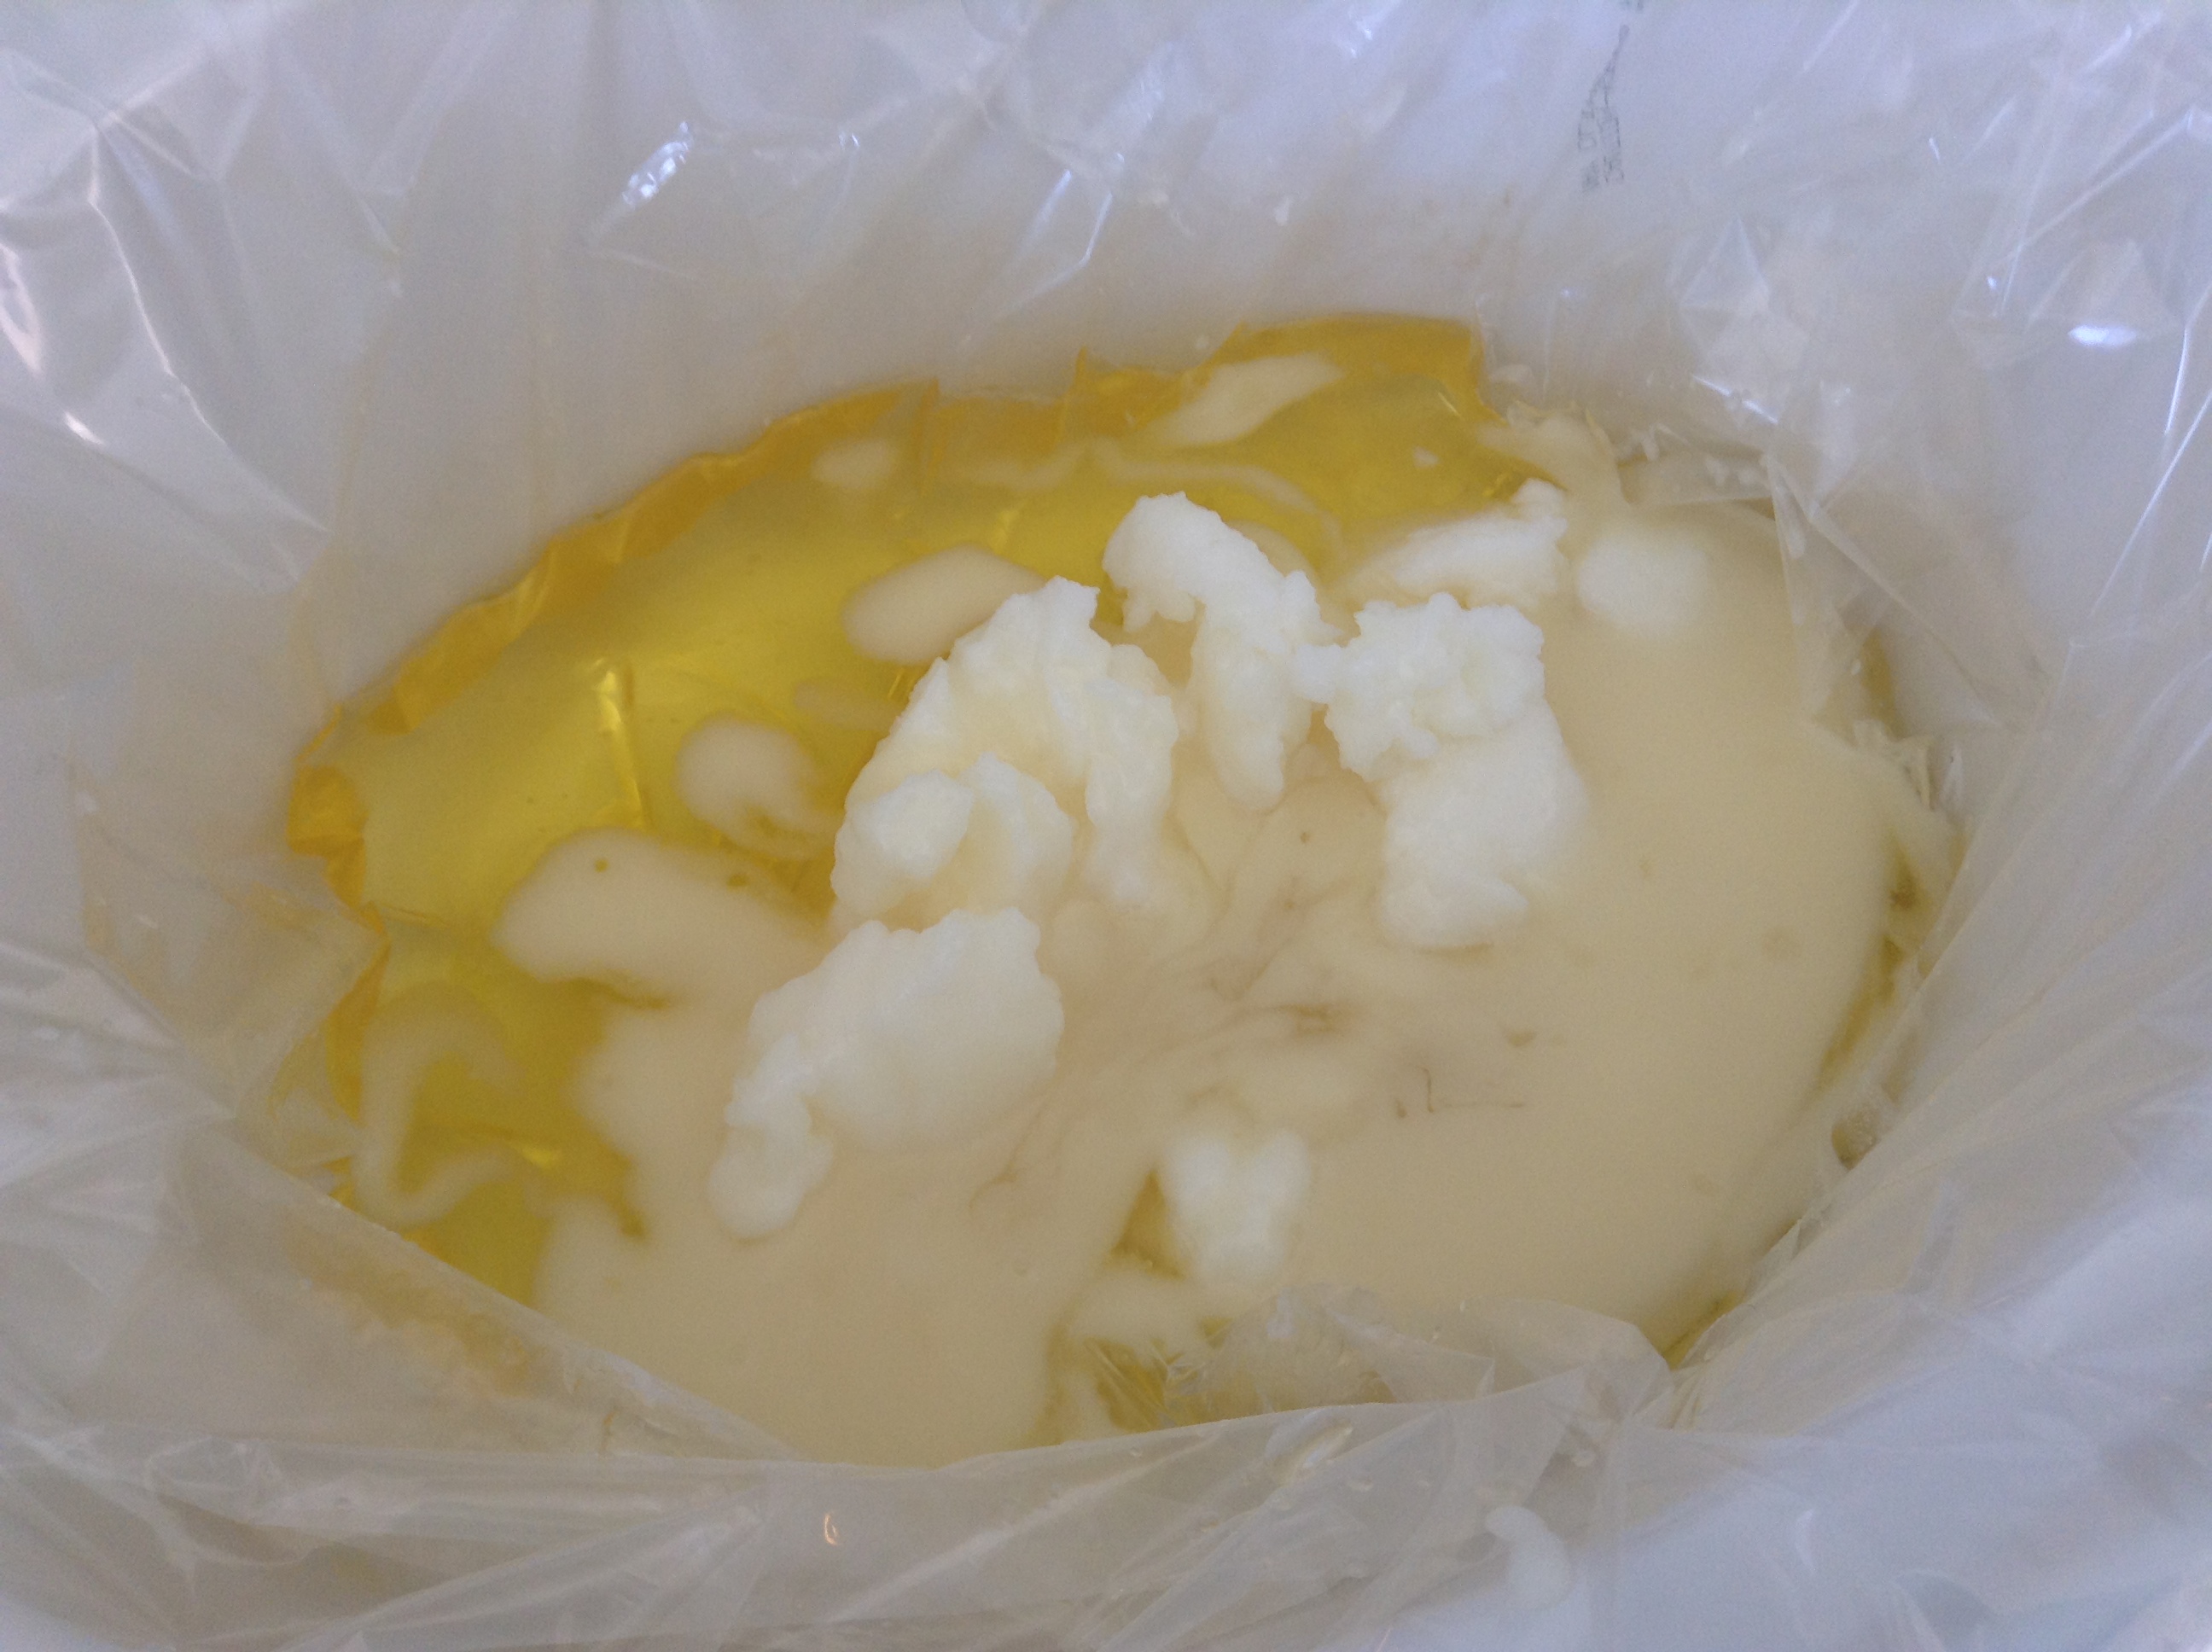
Then I added my lye. I thought I was being really smart lining my crock pot. I forgot about the stick blender blades. Still, very little of the soap leaked into the crock pot itself. Next time, I just won’t bother. After all, with hot process, the soap is fully saponified, so the lye is not going to be a problem. I didn’t add my fragrance to the soap while it was in the crock pot, so there was no danger of fragrance leeching into my food later.

I blended to light trace. It took maybe a few seconds. You can barely see the soap trails on the top.

Trace

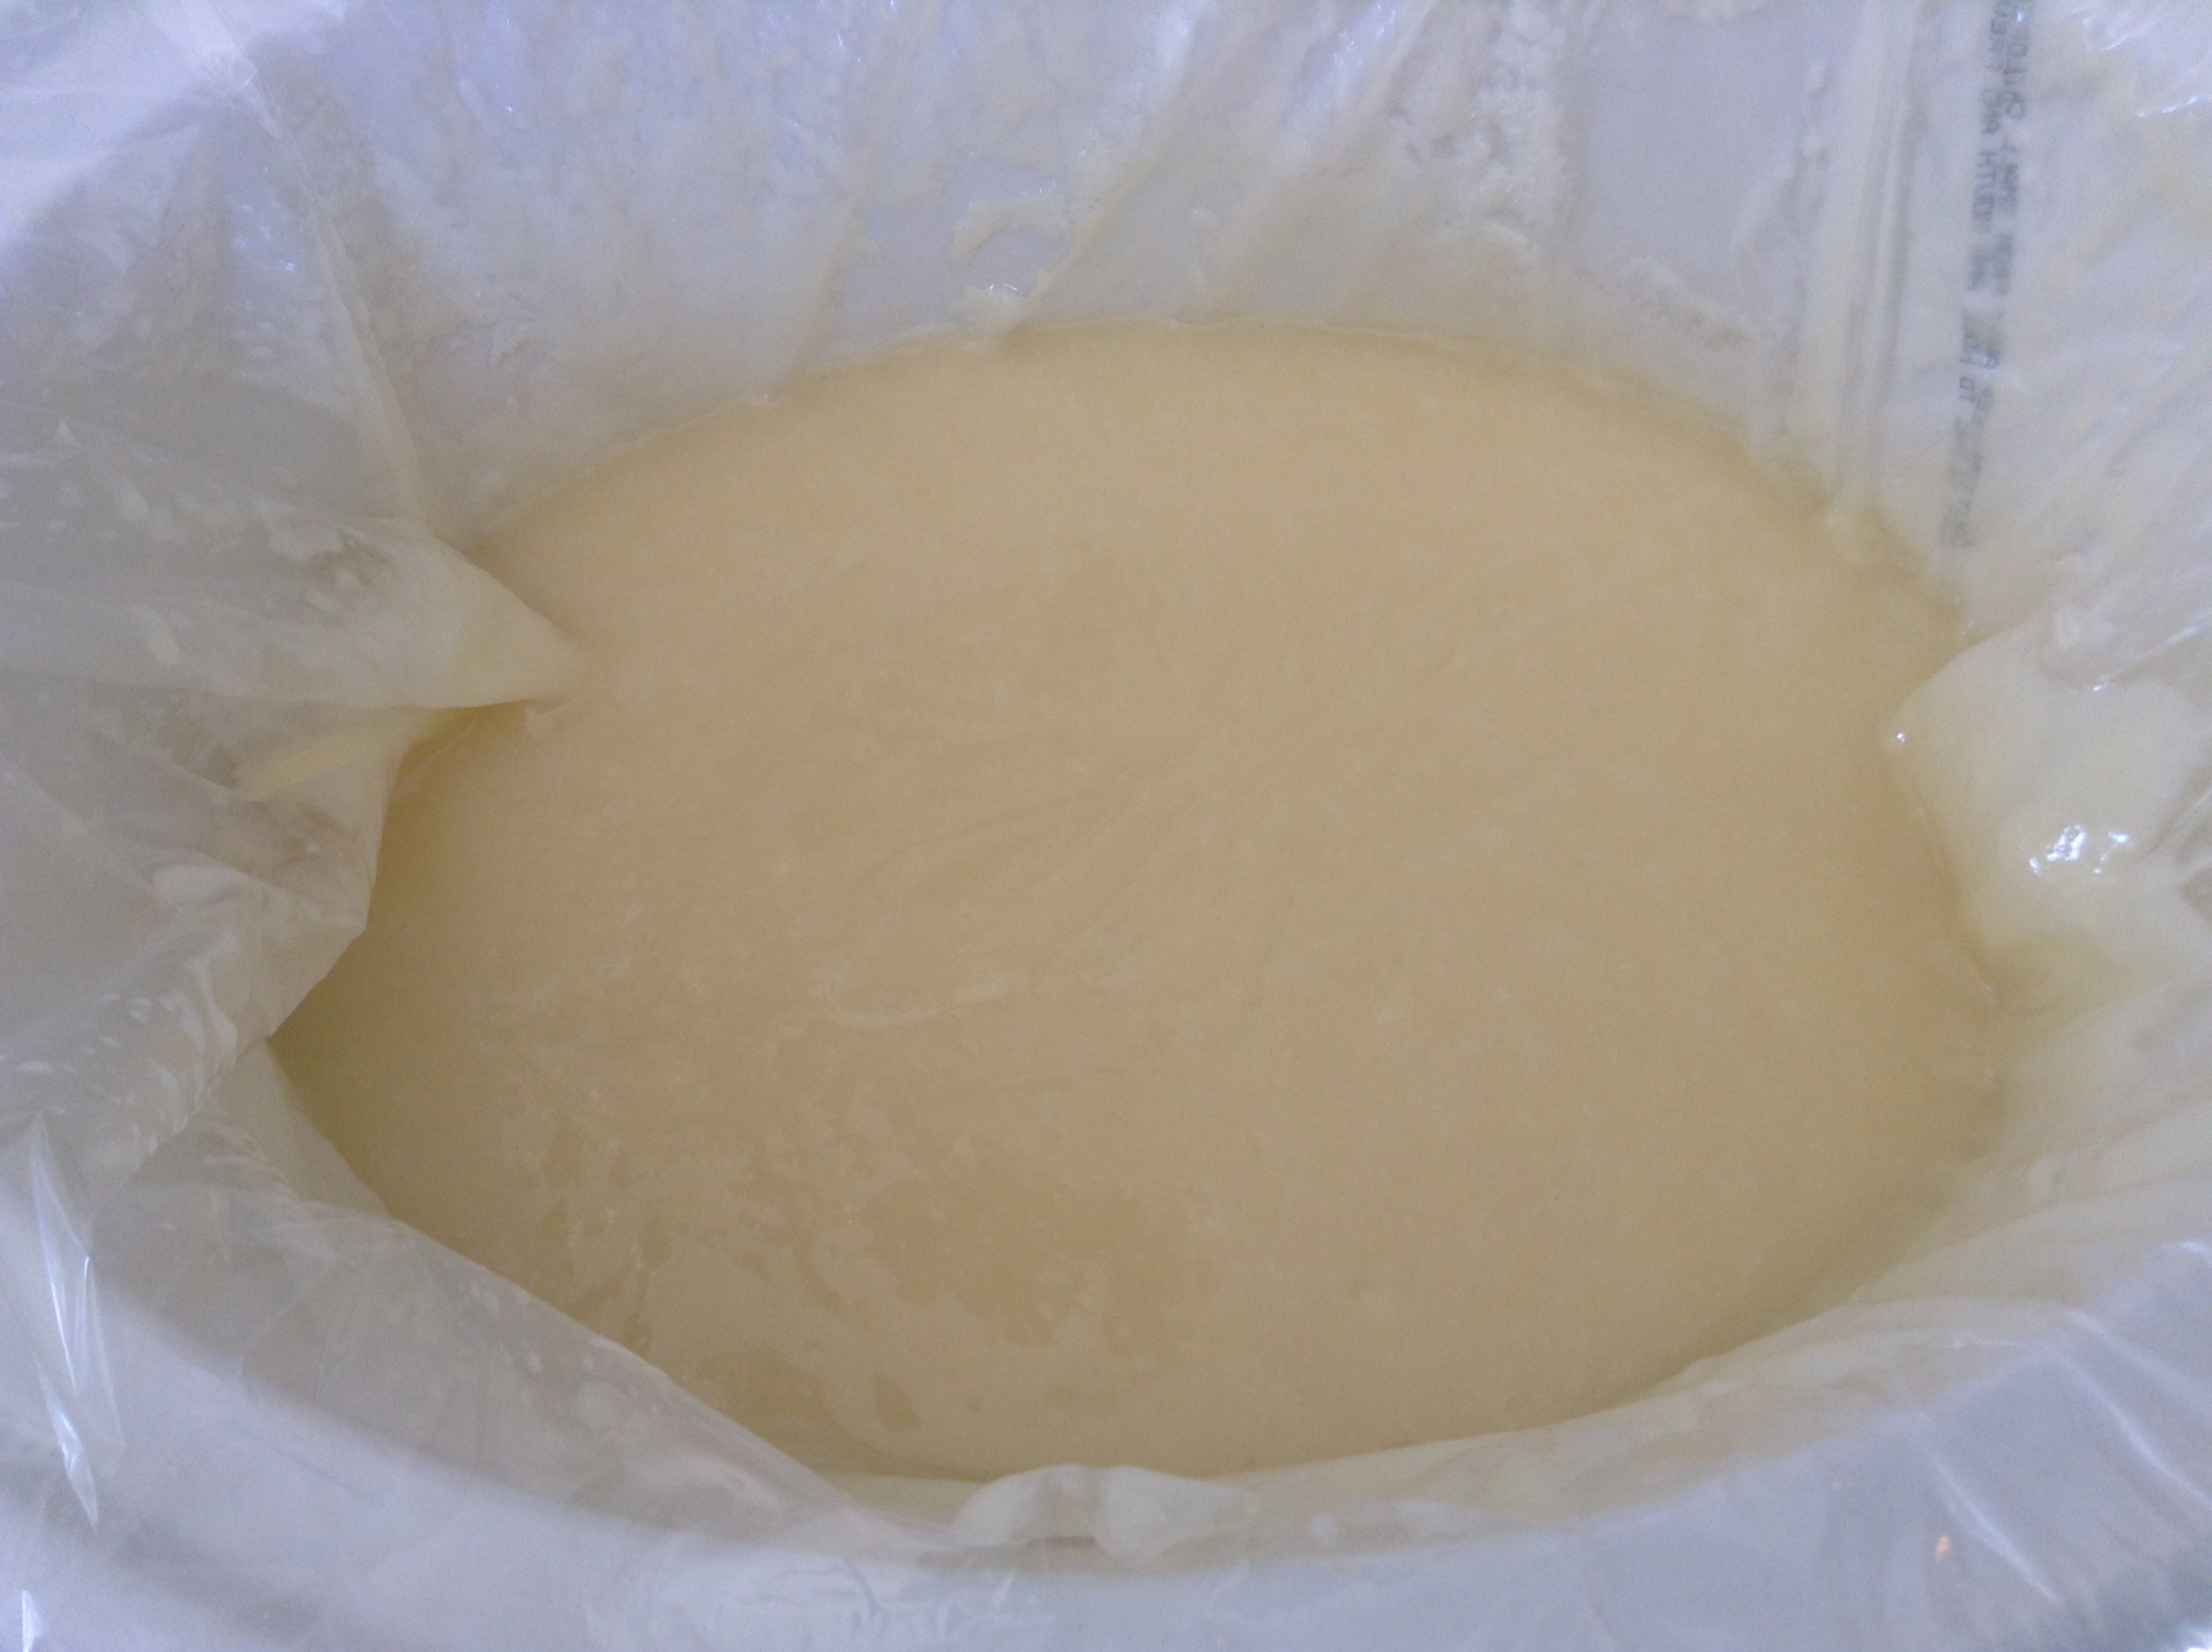
Next, I stirred it a bit before letting it sit to cook. At this point, I turned the crock pot to low. Notice you can see a bit of the separation you are supposed to look for.

Thicker trace

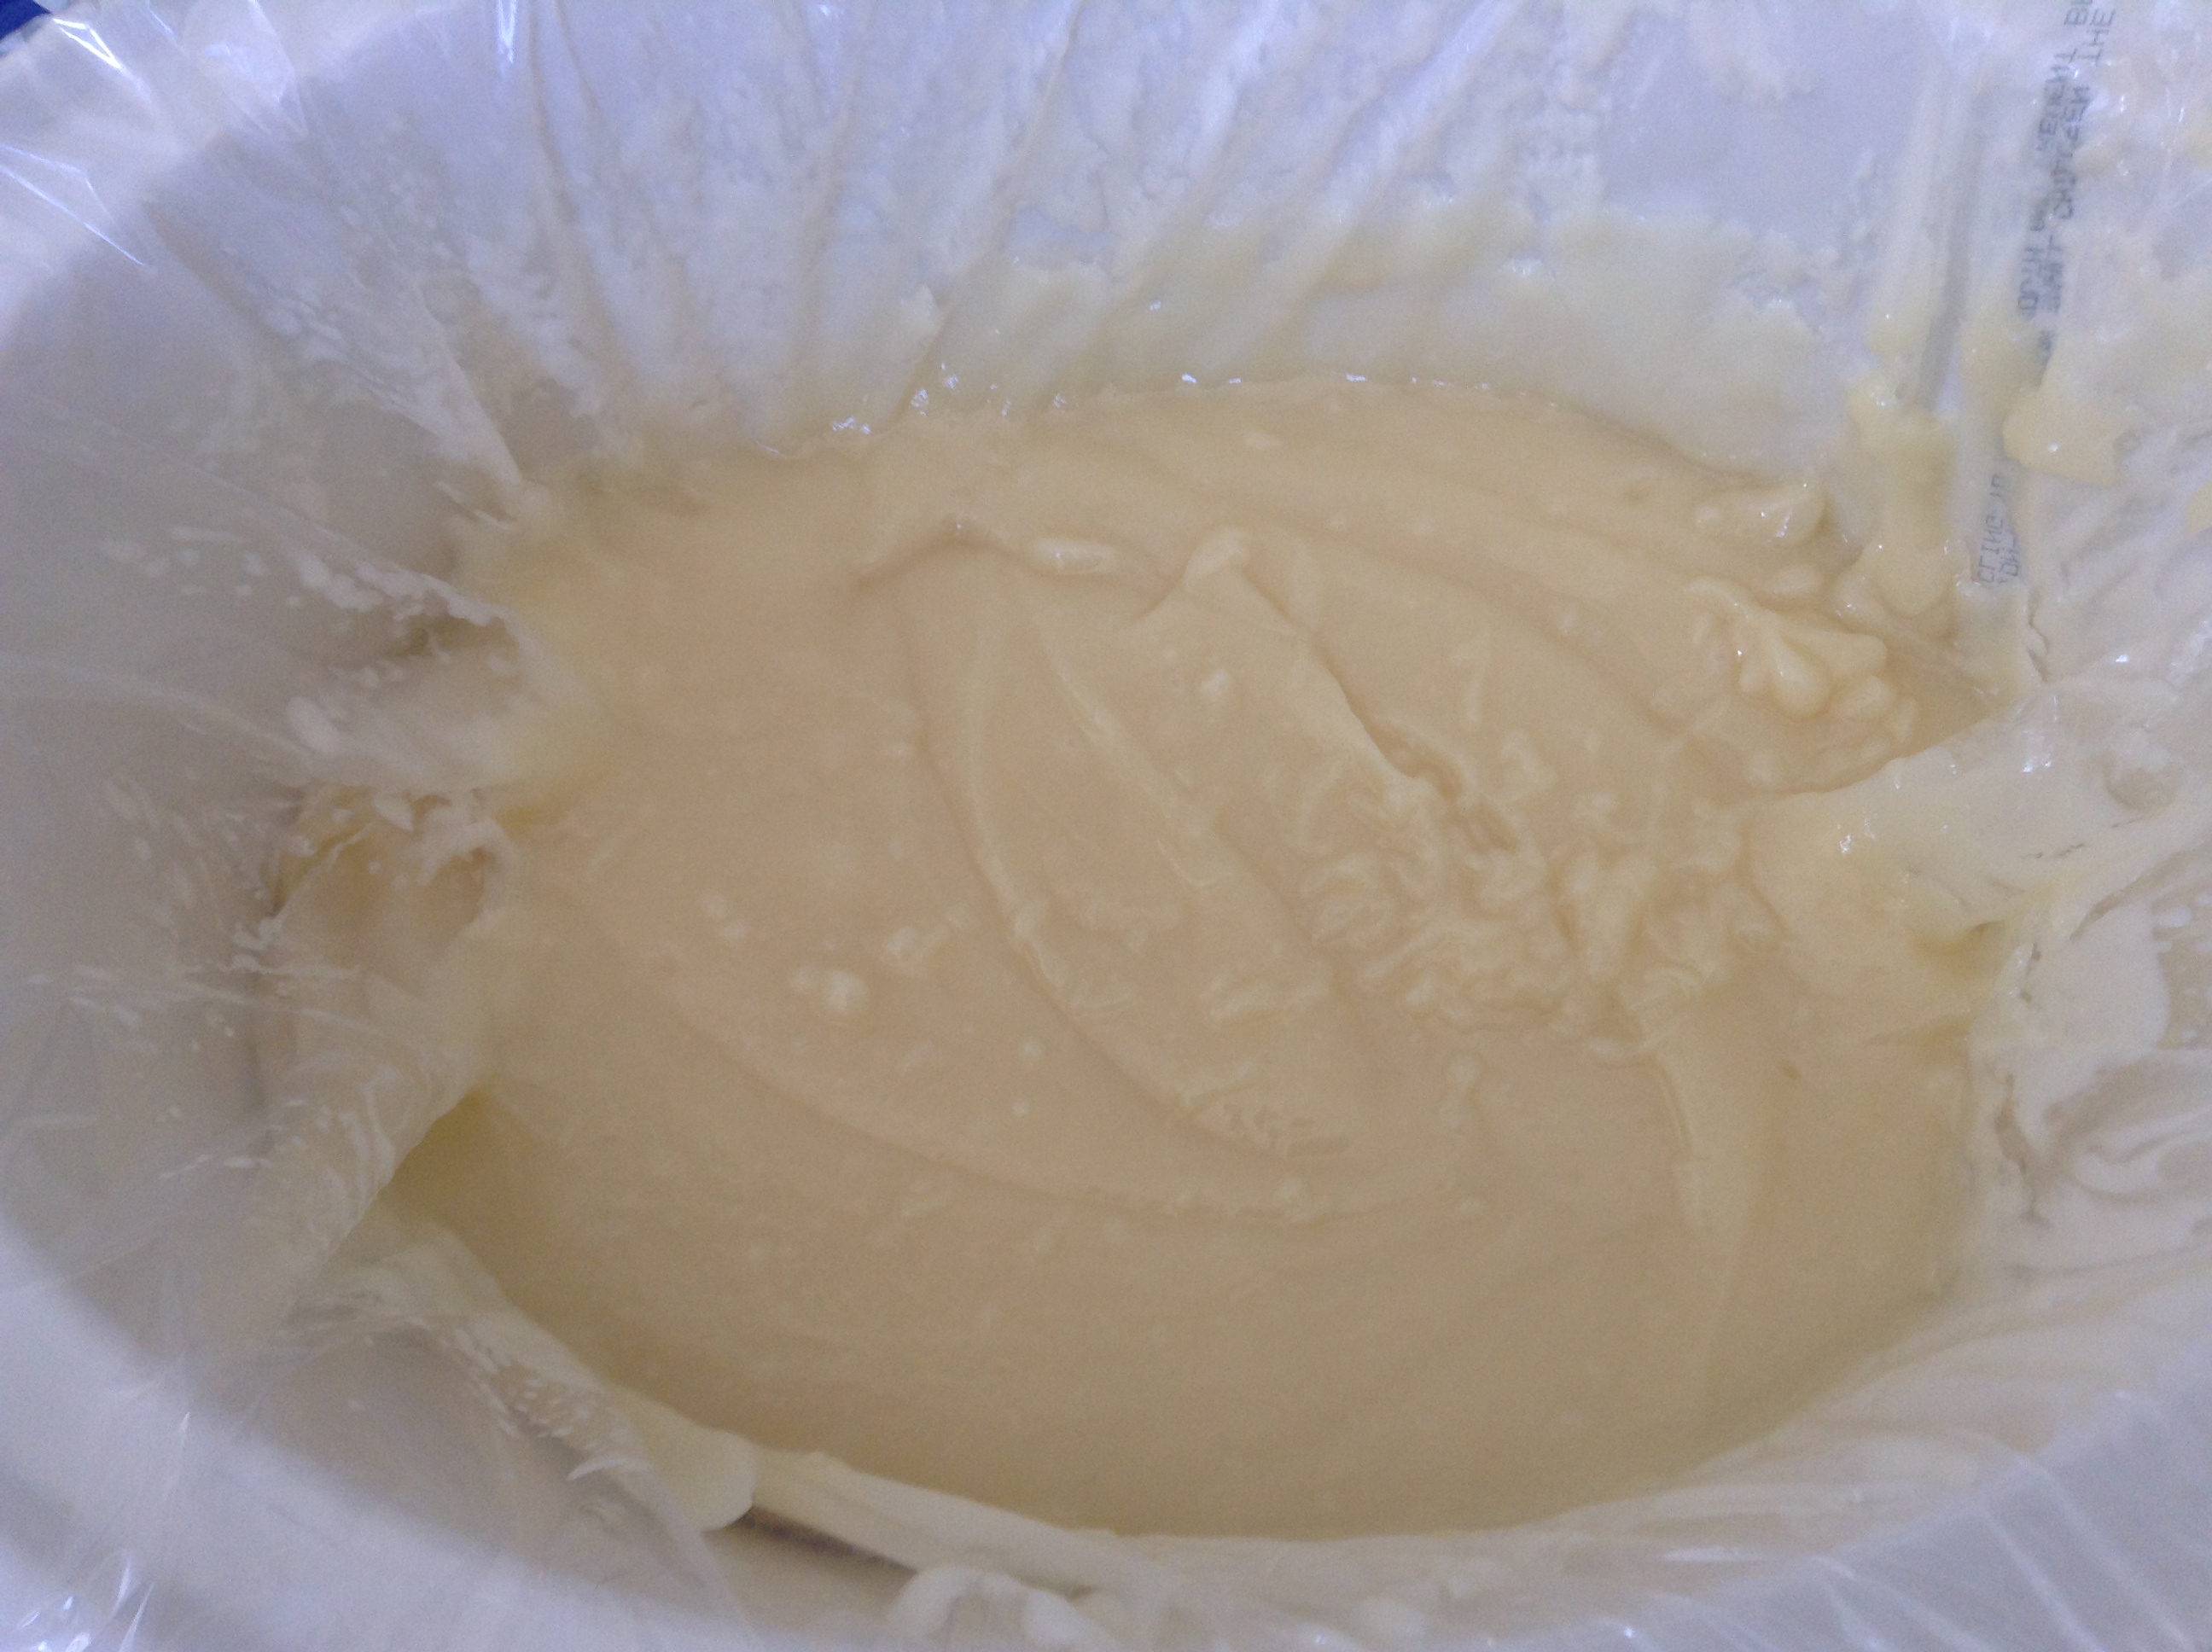
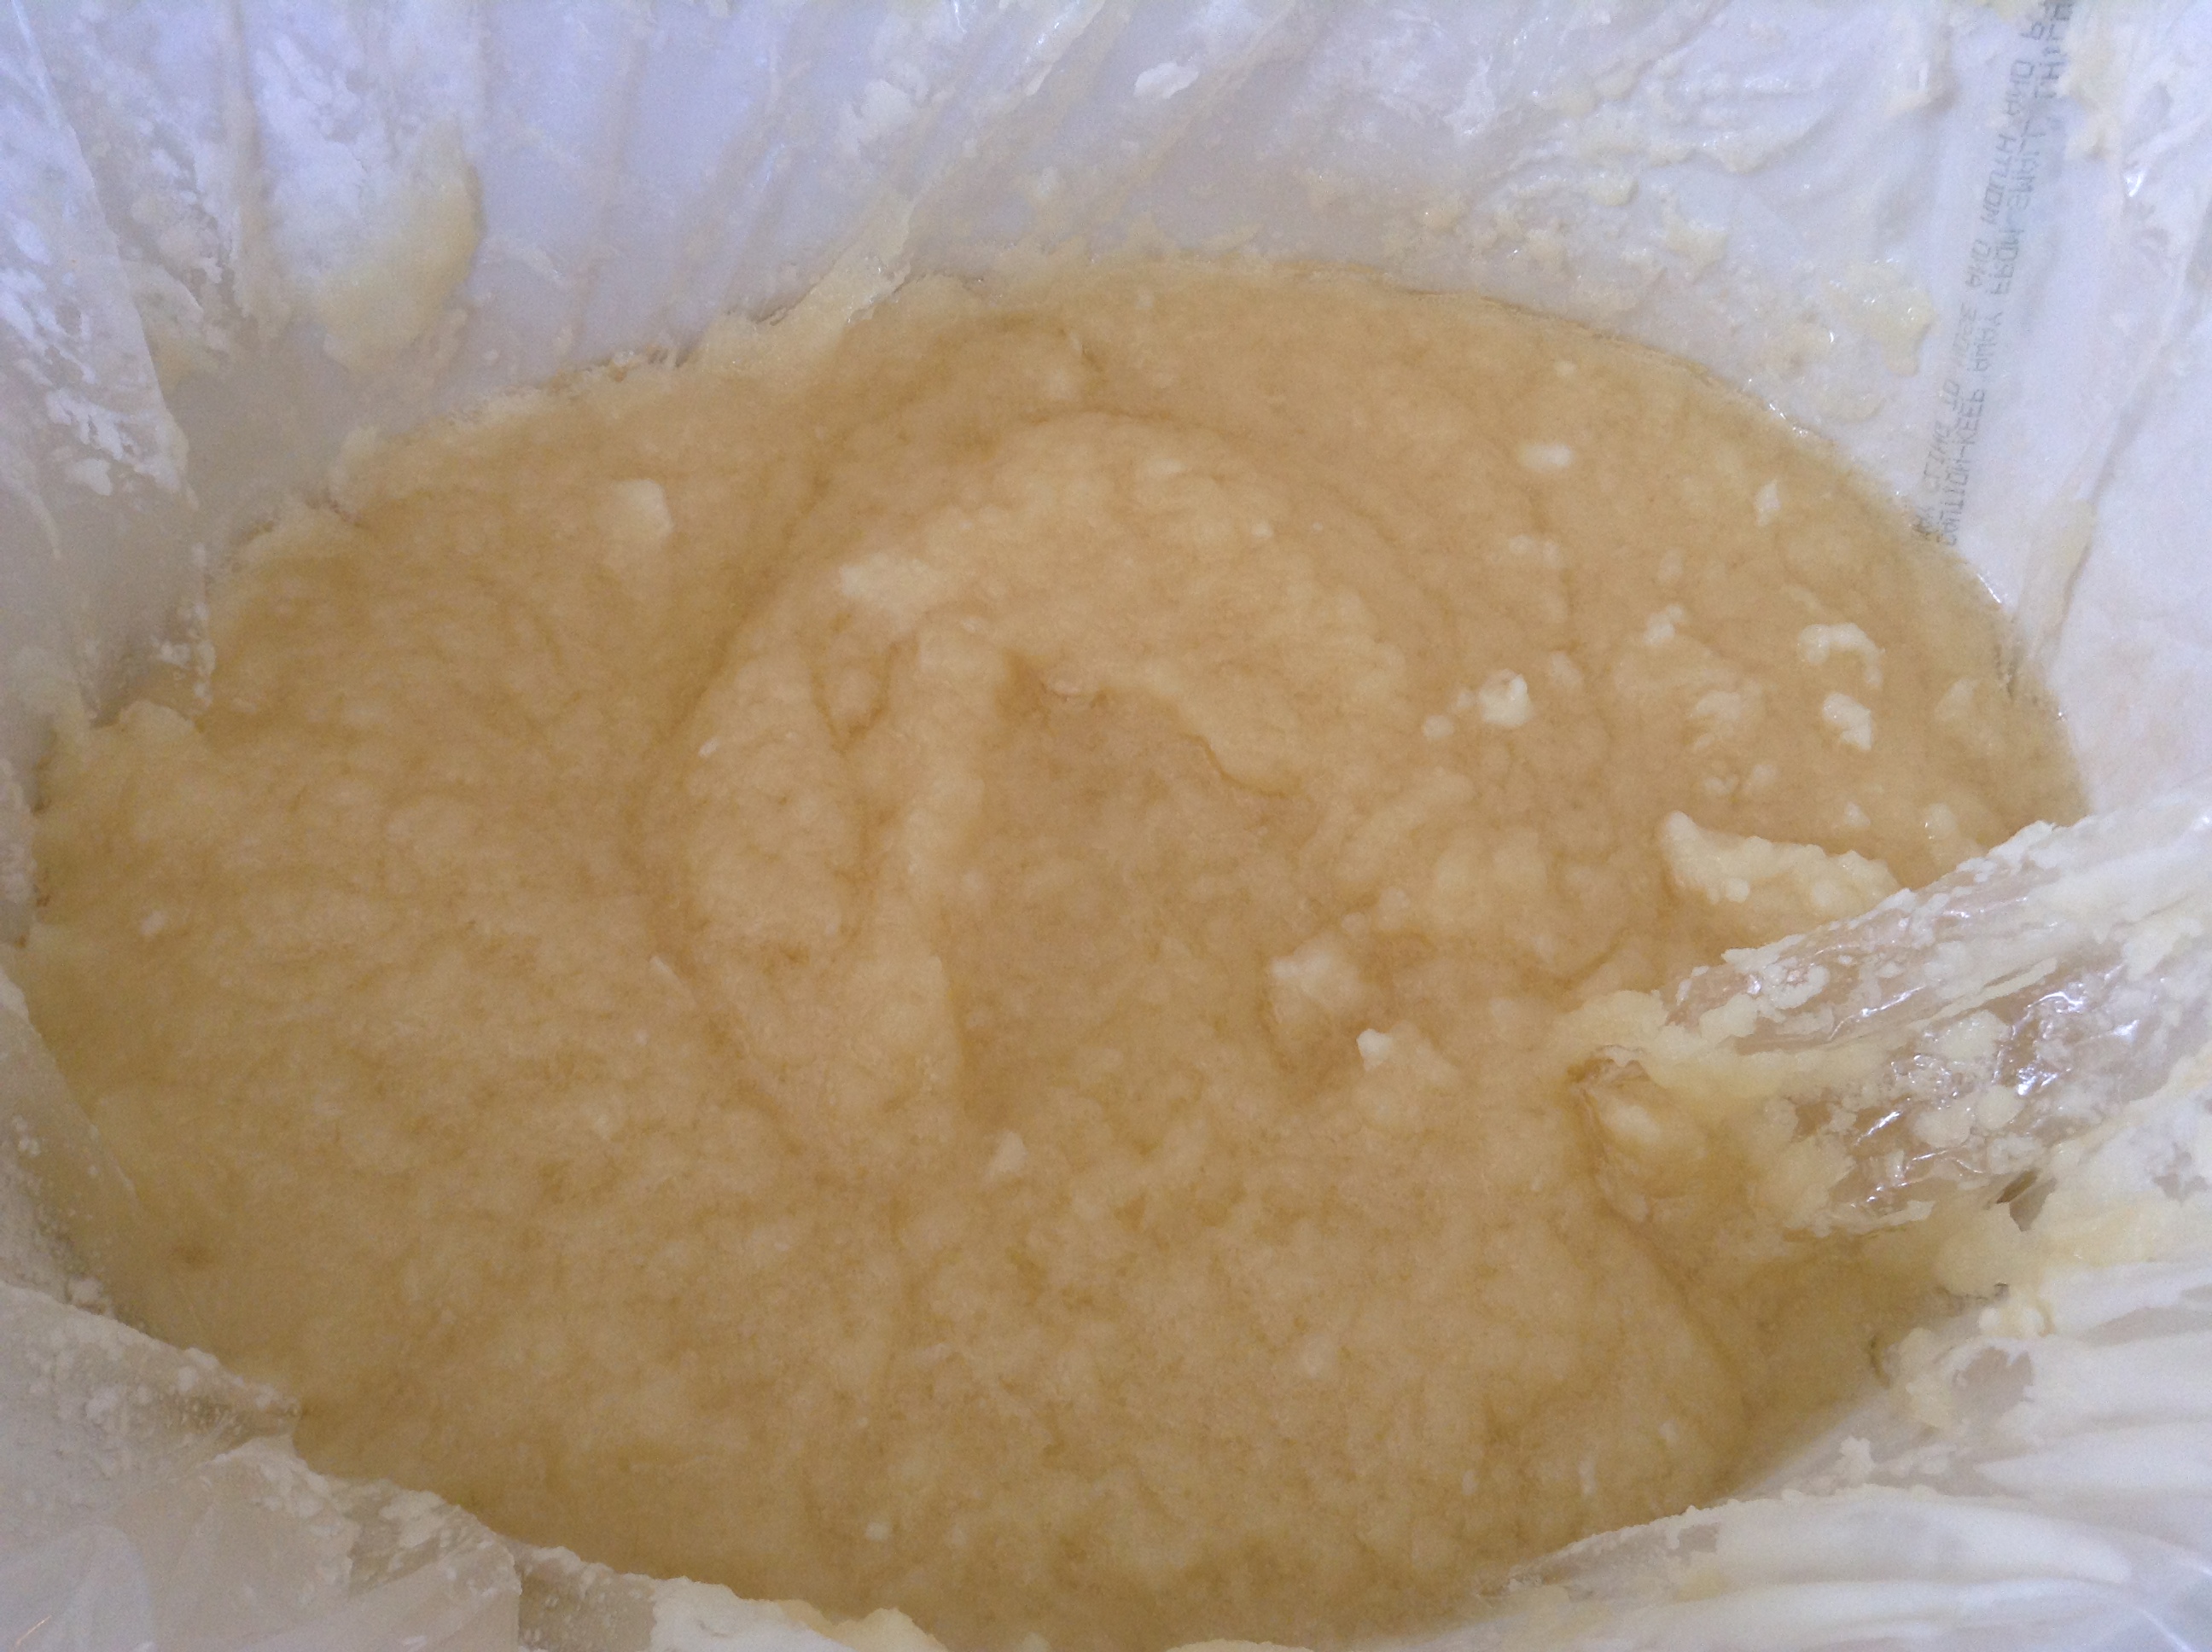
I let it cook for a bit, perhaps 10 minutes, and when I came to check on it, it was thickening up quite a bit. At this state, it was maybe the texture of thick pudding or mashed potatoes.

Thickening up

I actually checked on it quite often. I was nervous about leaving it alone. I should have paid better attention to timing here, but since I was checking it so frequently, I really looked more for “signs” instead of watching the clock. I started to notice it was gelling near the edges, like it was supposed to do.

Gelling

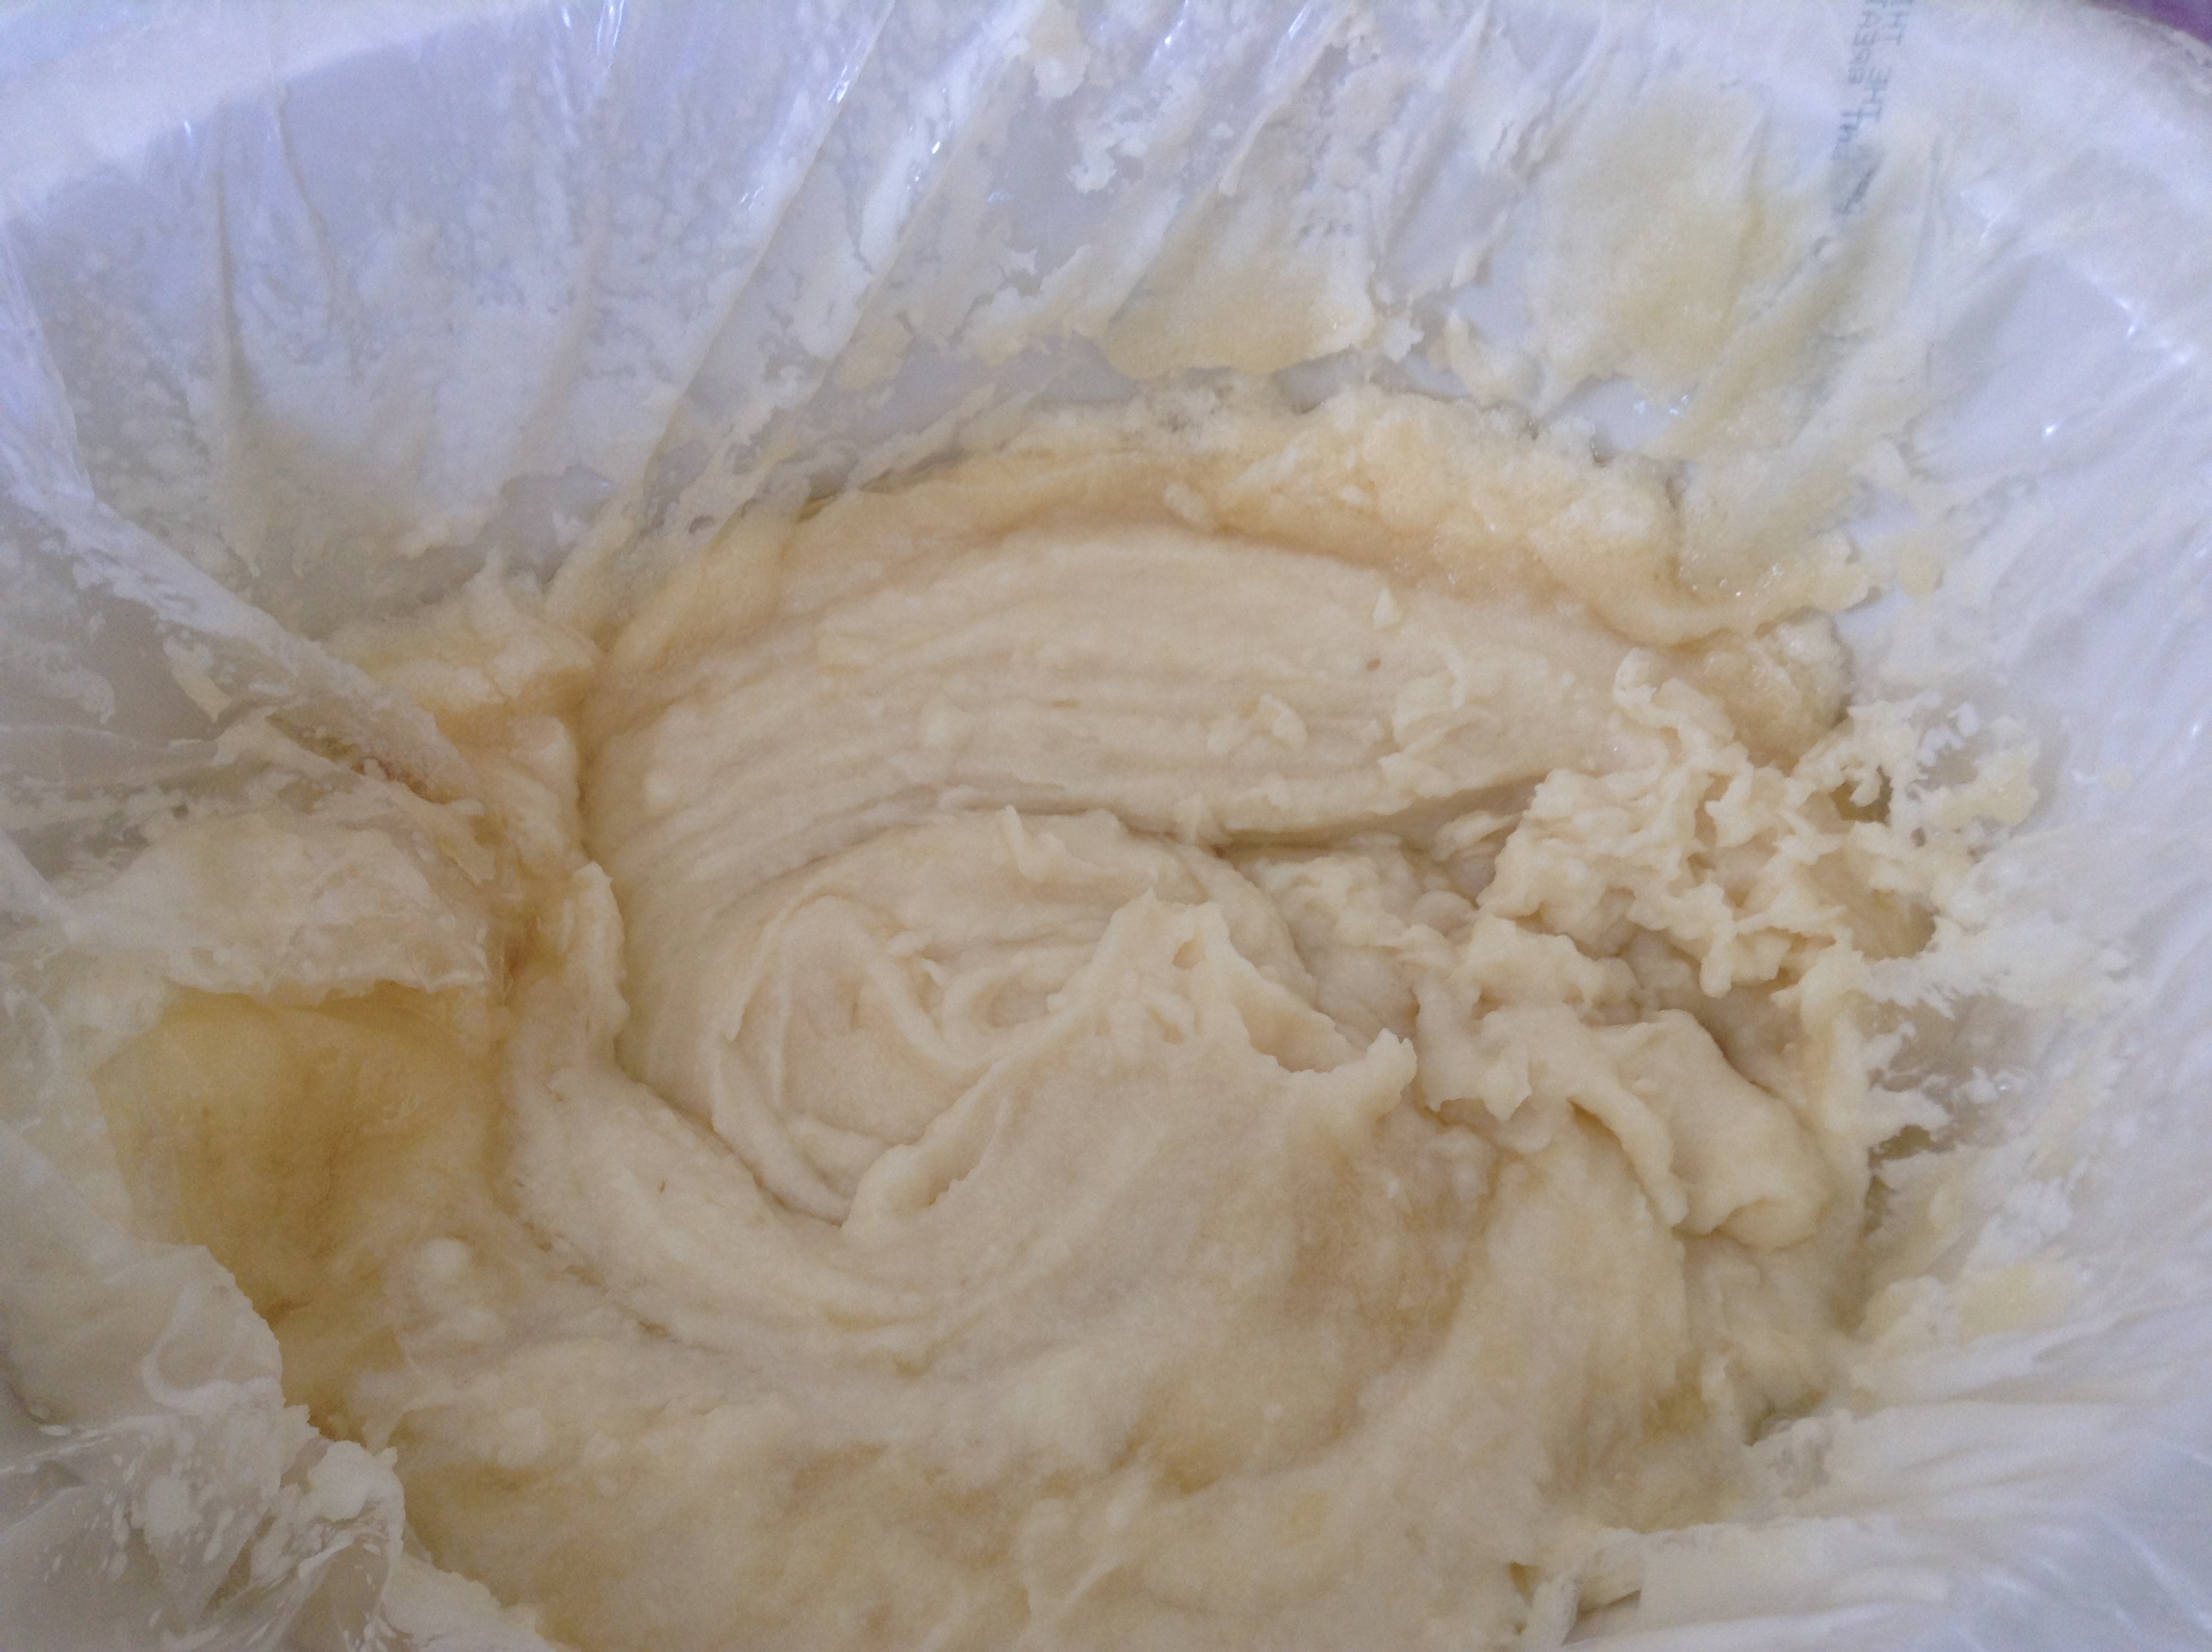
So, I stirred it up, and the gelled soap combined with the soap in the middle looked more like applesauce.

Applesauce

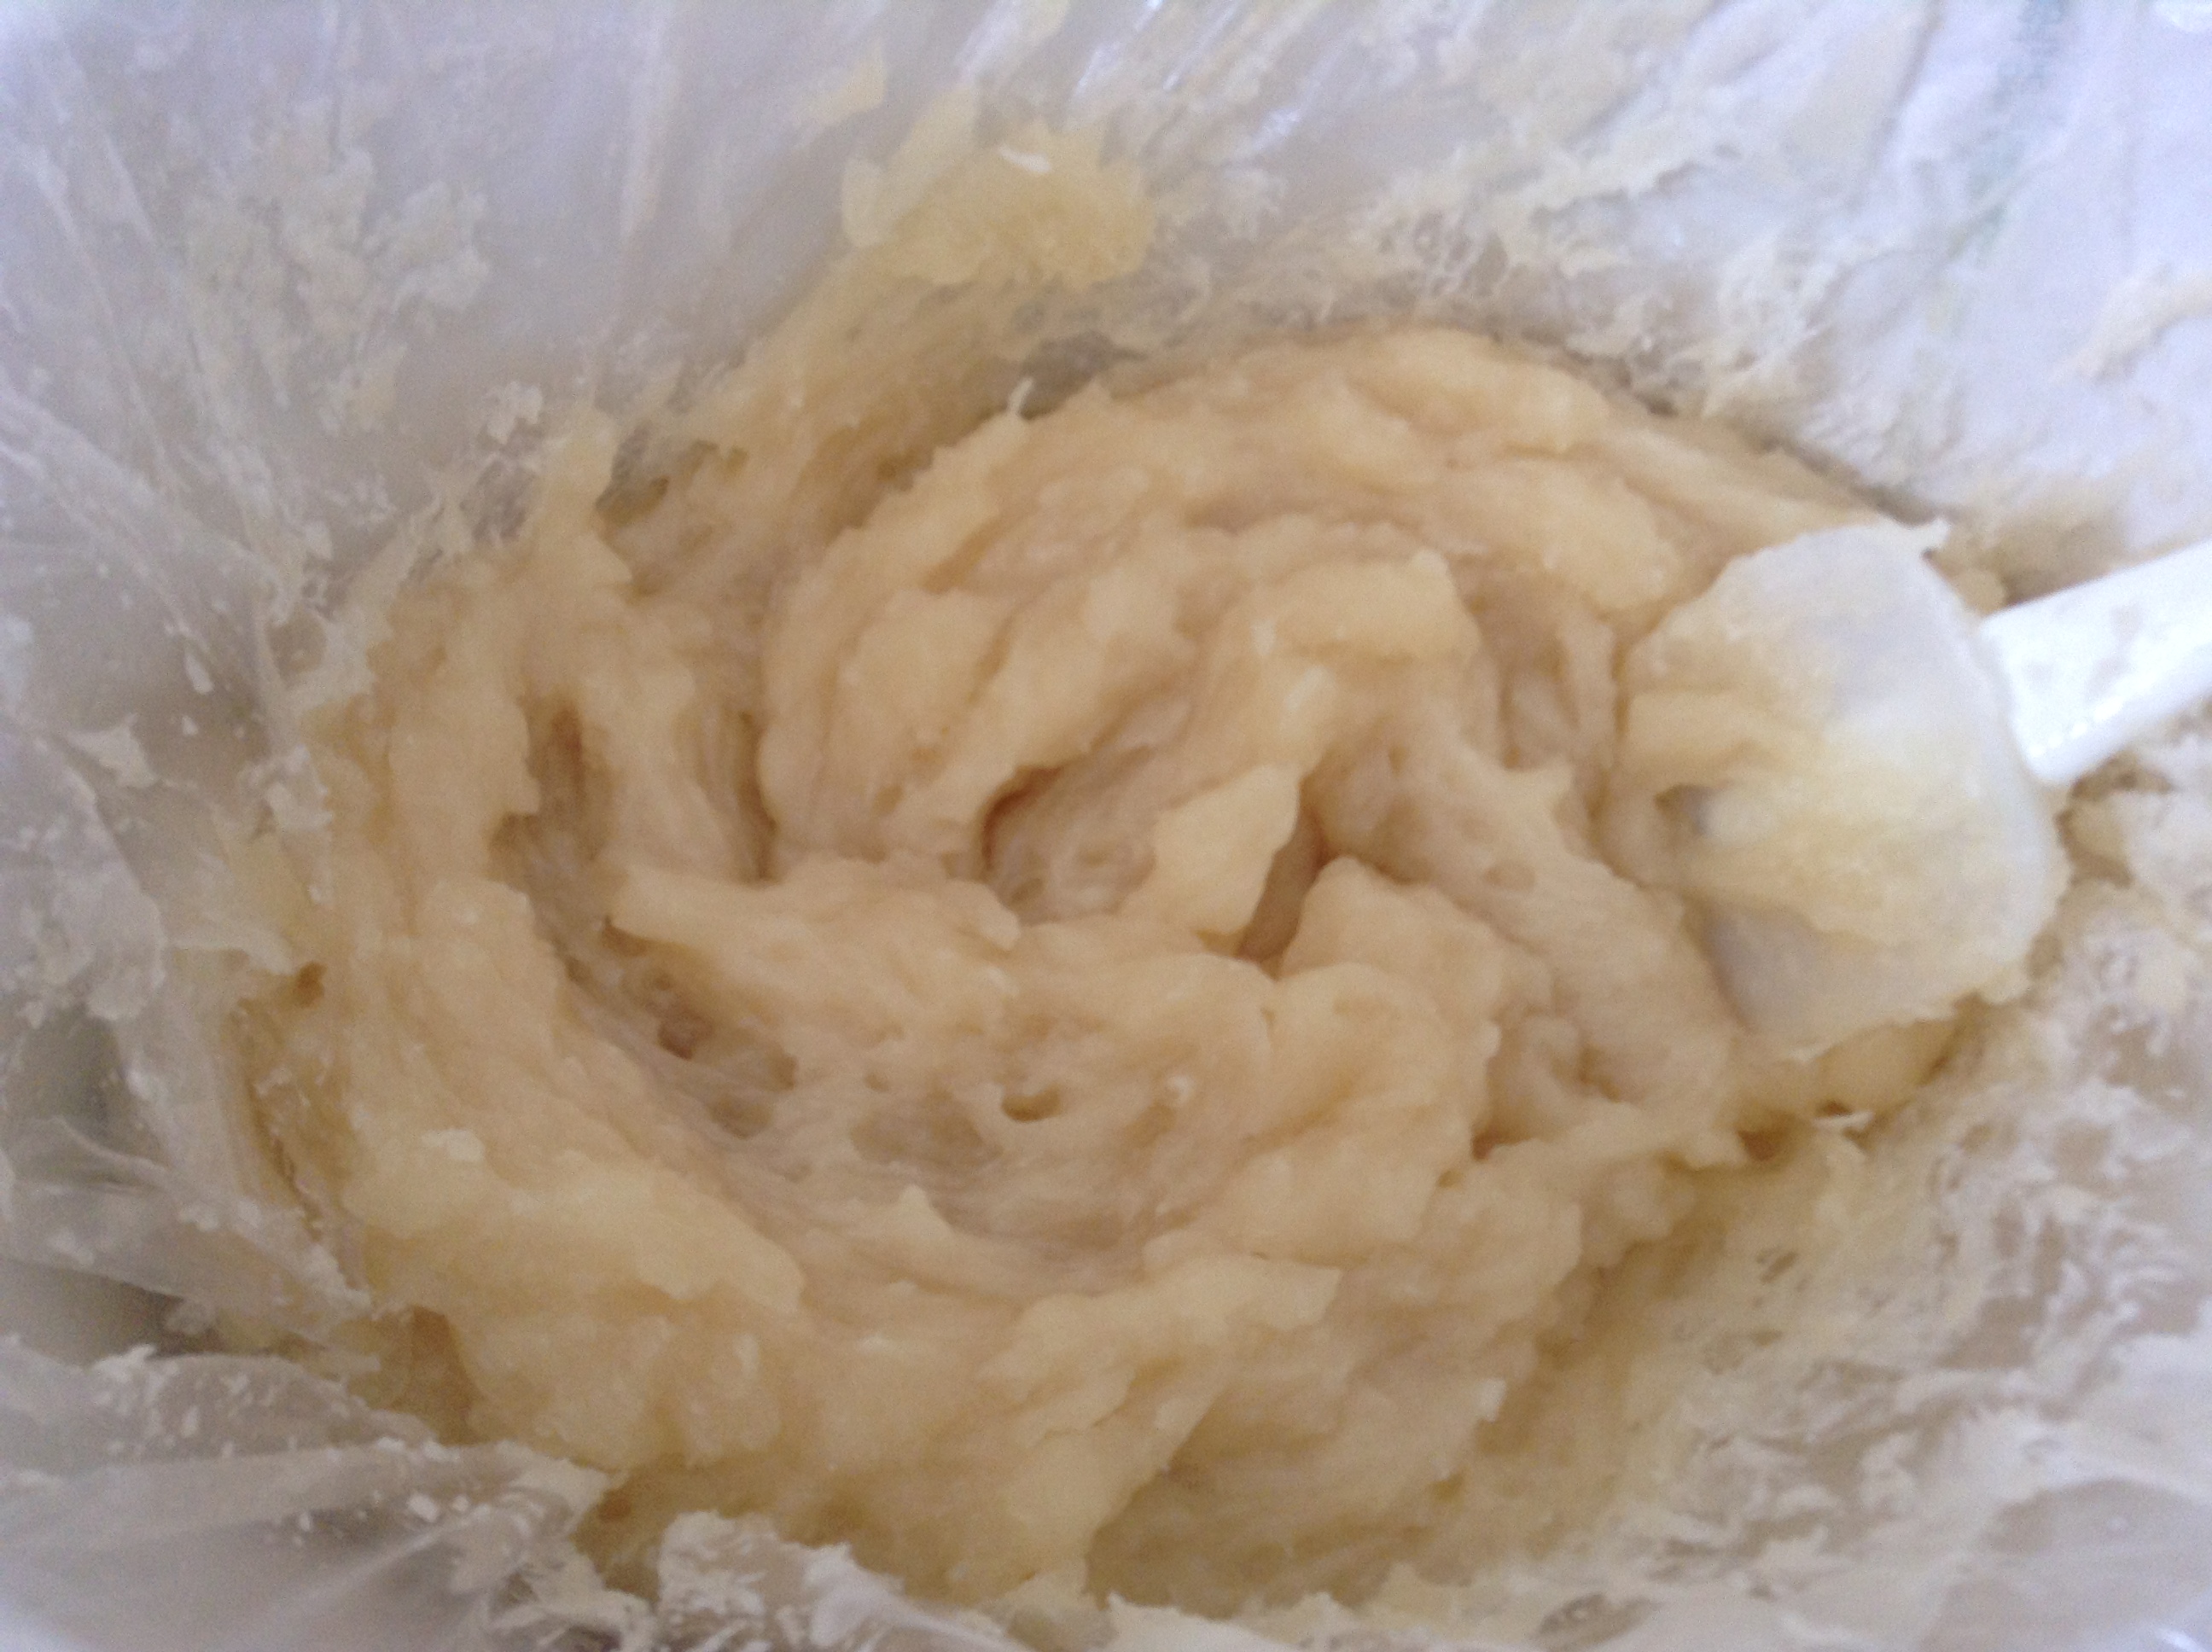
I cooked it a bit longer, looking for signs it was turning fluffy. Sure enough, I started to see the fluffy stage.

FluffyThen when it started to pull away from the edges, I did a zap test. It wasn’t quite done yet, so I let it cook a bit longer and did a second zap test. This time, no zap.

Fully cookedI scooped the soap out of the crock pot and put it into a bowl. This is where I think I could use some advice from more experienced hot process soapmakers. I wanted to let the soap cool a bit so it didn’t burn off the delicate orange essential oil I wanted to use (though, to be fair, it was 10x orange oil).

I think I let it cool too much. I read at TeachSoap that it’s a good idea to add a bit of sunflower oil (or, I suppose another carrier oil) to help cool the soap and make it more pliable as I mix the fragrance. Do any of you do this? Does it work? Because I tried to wait until my soap was right around the flashpoint for orange essential oil, and I think it was too cool. I had some trouble getting it into the mold, which I understand is just part of the nature of hot process soap, but I am wondering if the oil would have helped. Any advice is appreciated.

I added the orange essential oil, and it was very hard to mix. My soap is going to have a really cool mottled look because I couldn’t get the oil to mix as thoroughly as I had planned.

Essential oilAfter I mixed the oil, I plopped it in the mold, and tried to stop fiddling with it, but I wasn’t successful.

In the mold
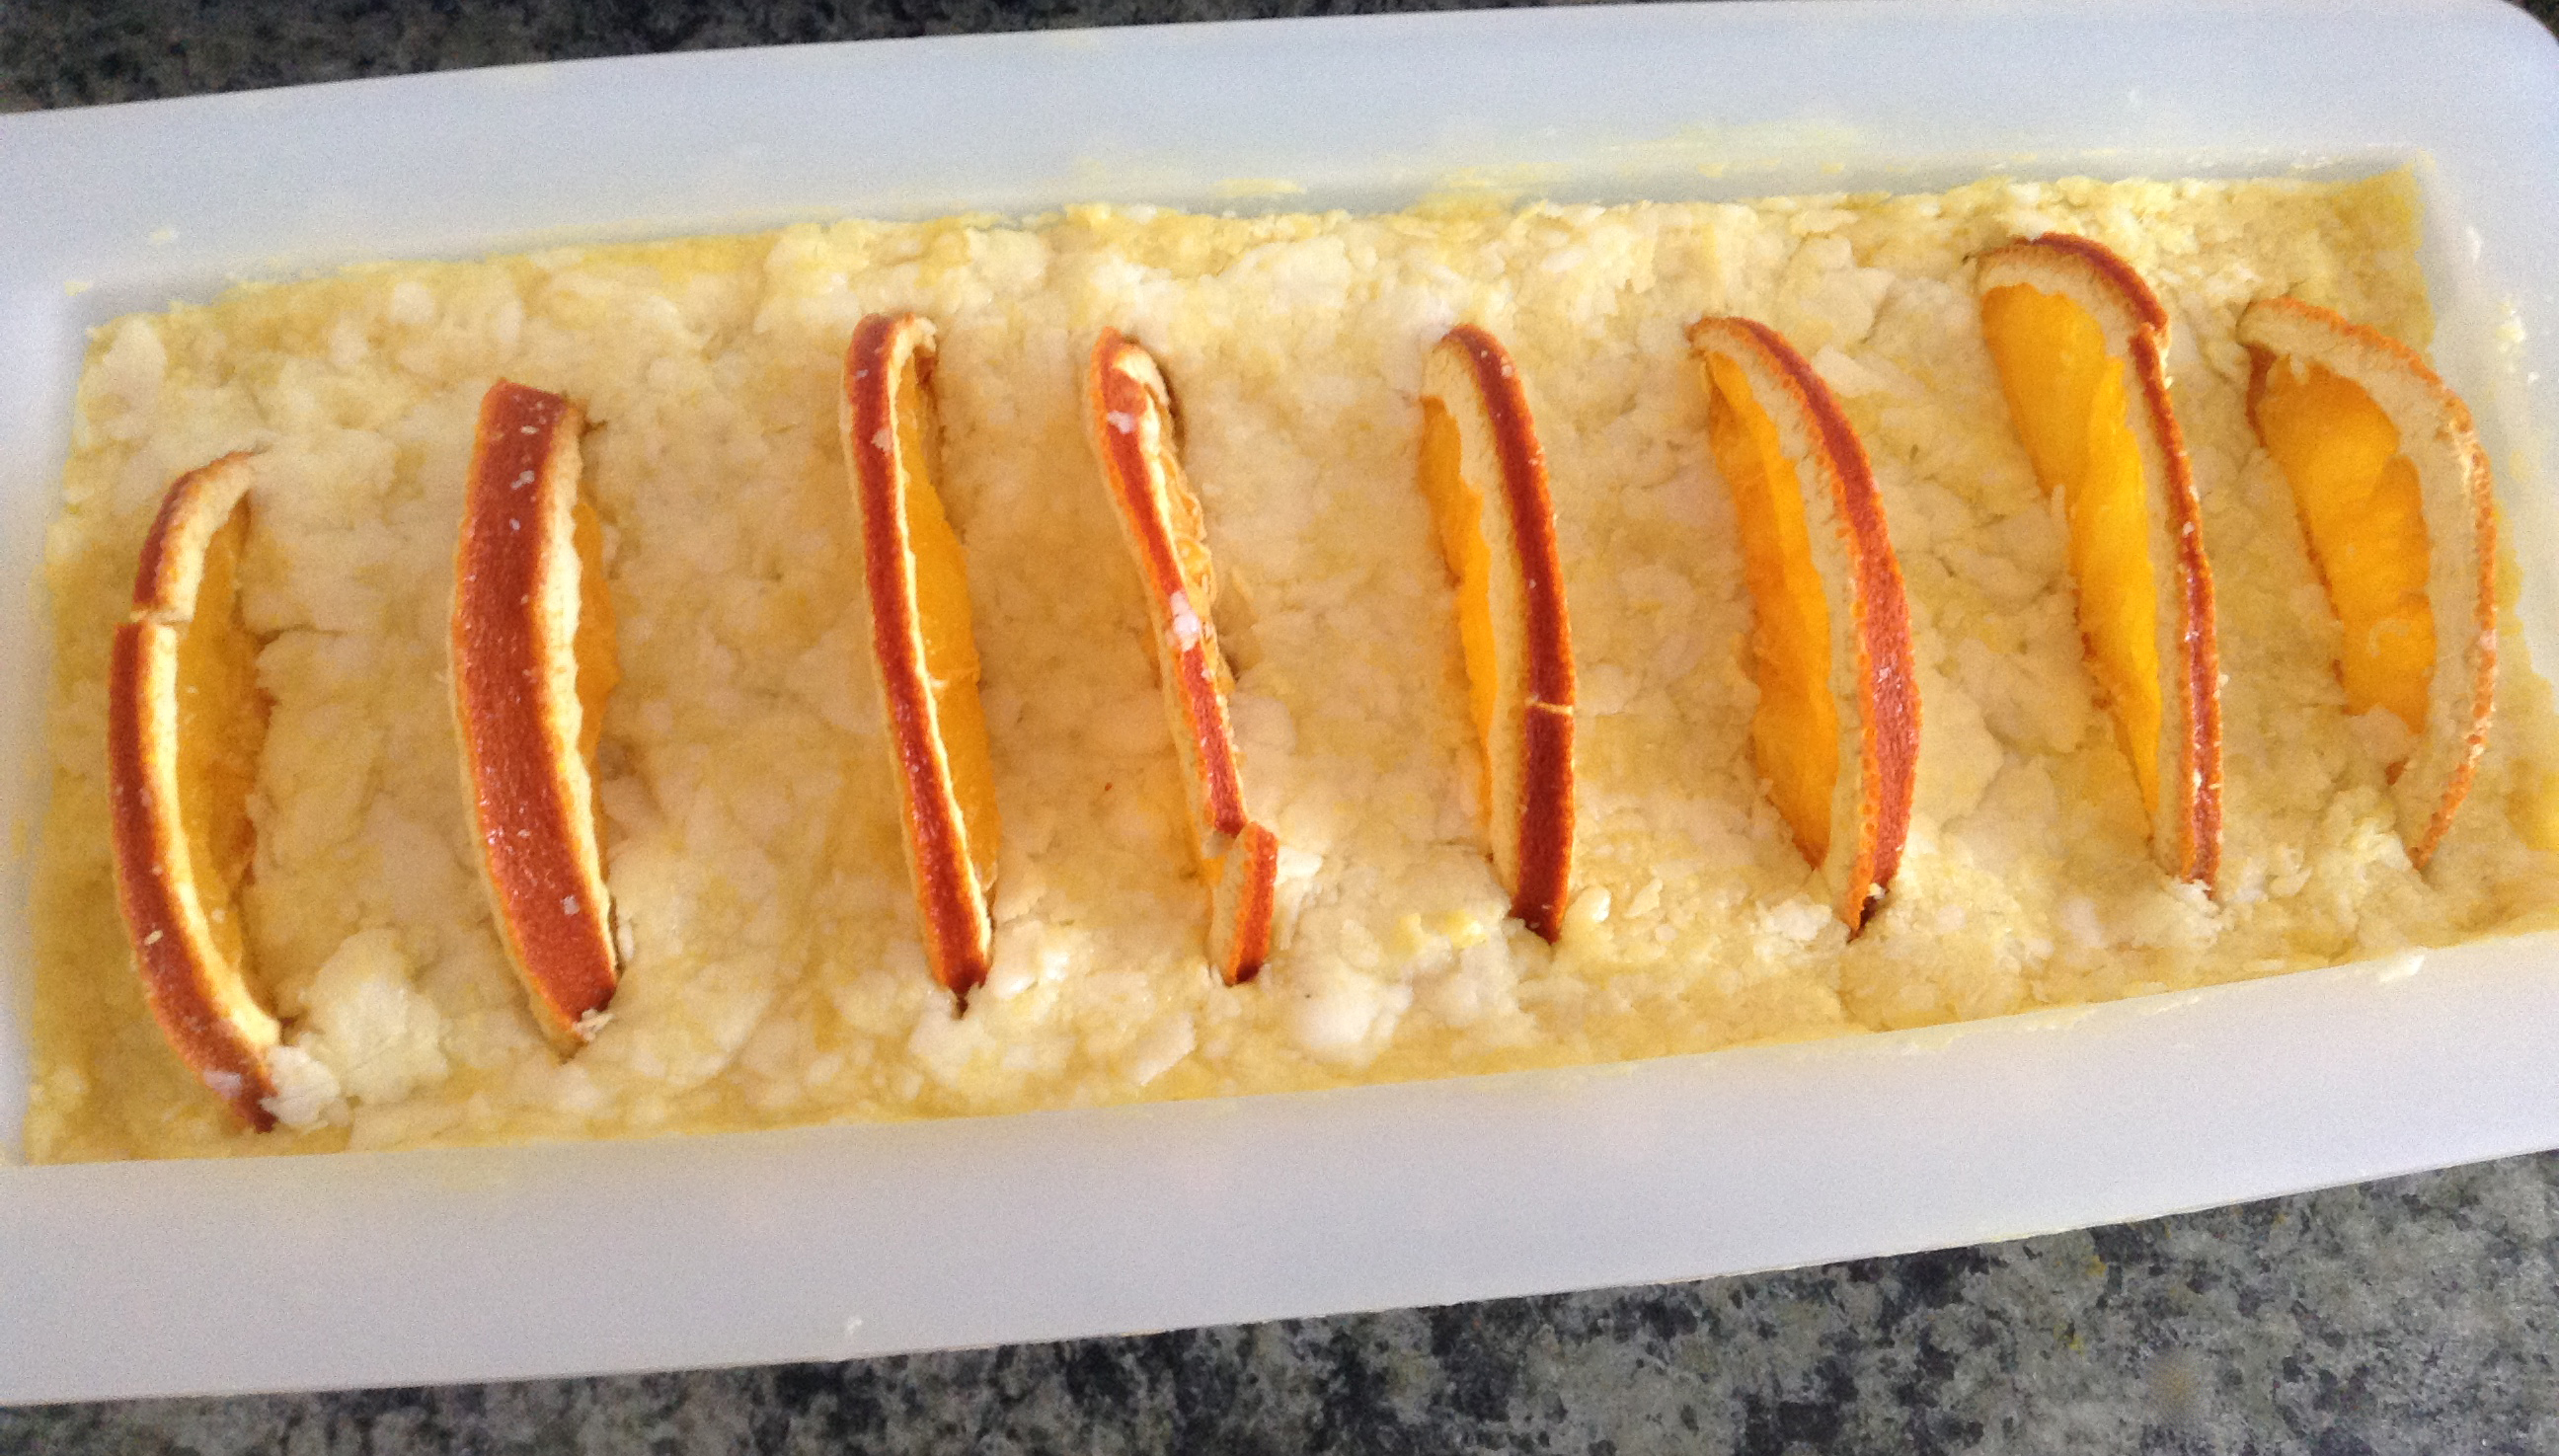
As you can see, I put some dried orange slices in the tops of the bars. Pretty!

Here is another view of the soap in the mold.

In the mold

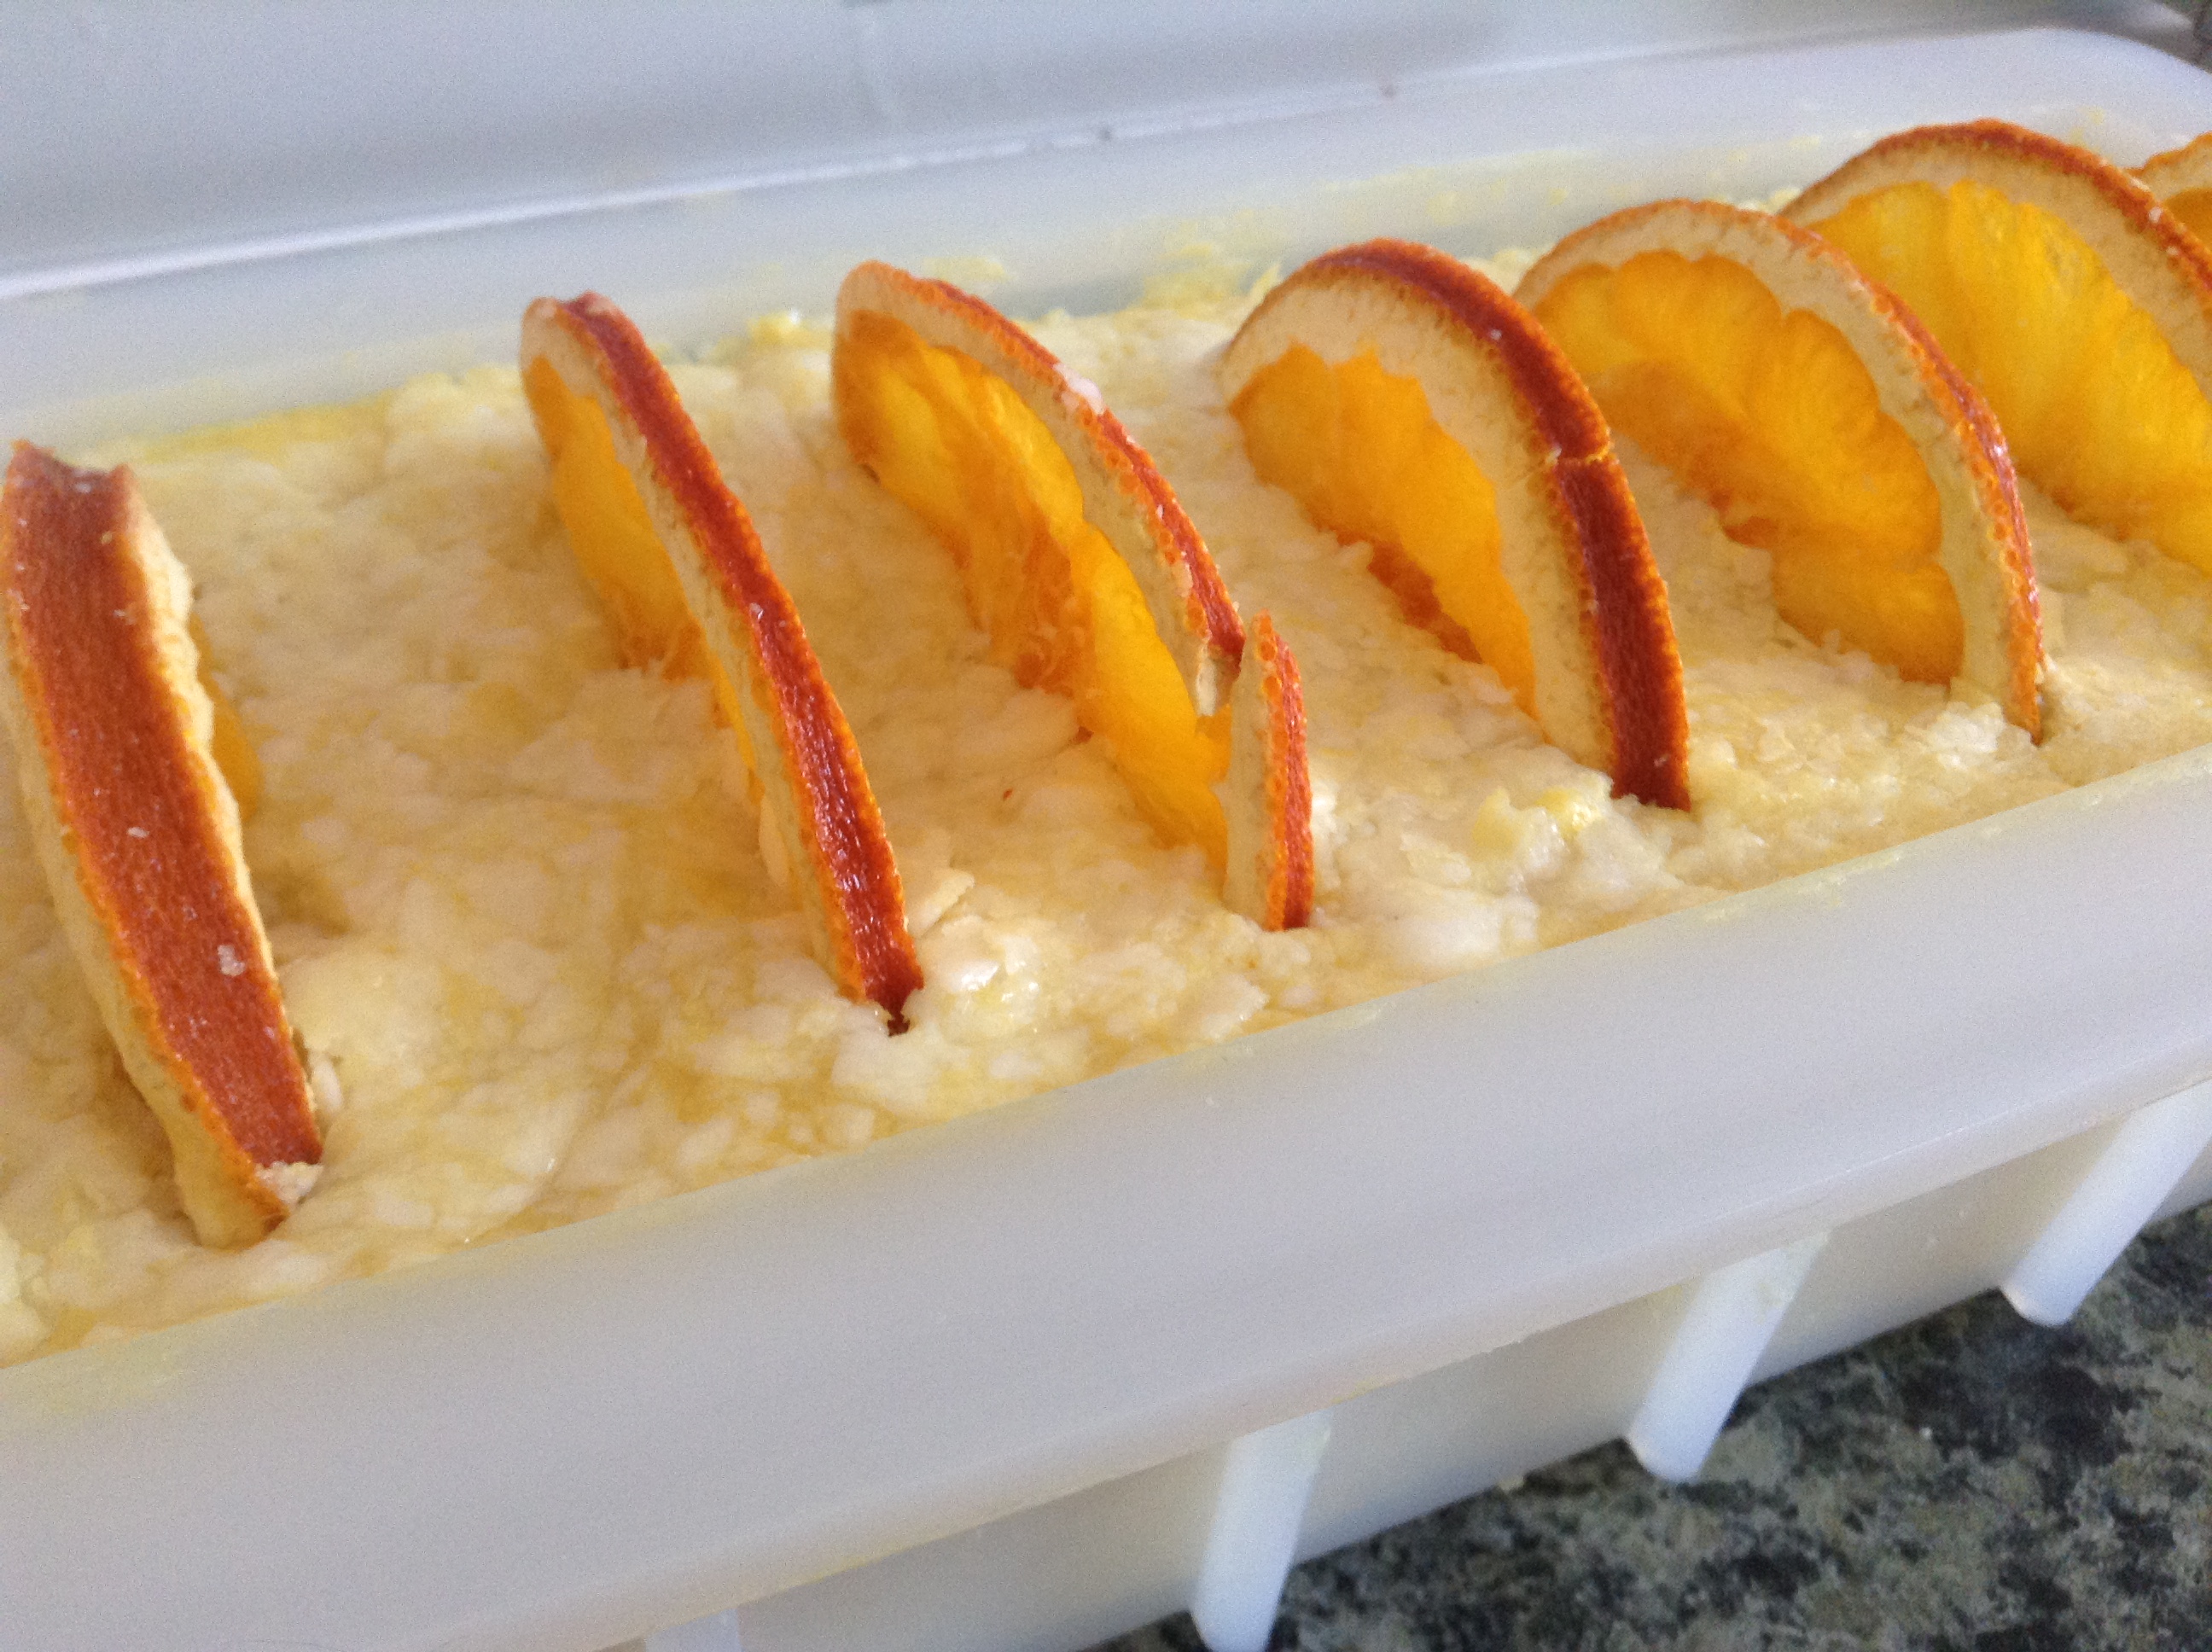
Eventually, I quit fussing with it and let it set up. I unmolded it and decided to let it harden a bit more before I cut it. You can tell I fussed with it too much because I got soap all over my oranges. Boo! I decided to clean them off after I cut the soap. The pictures are a little darker because the light wasn’t as good by the evening when I took them.

Unmolded

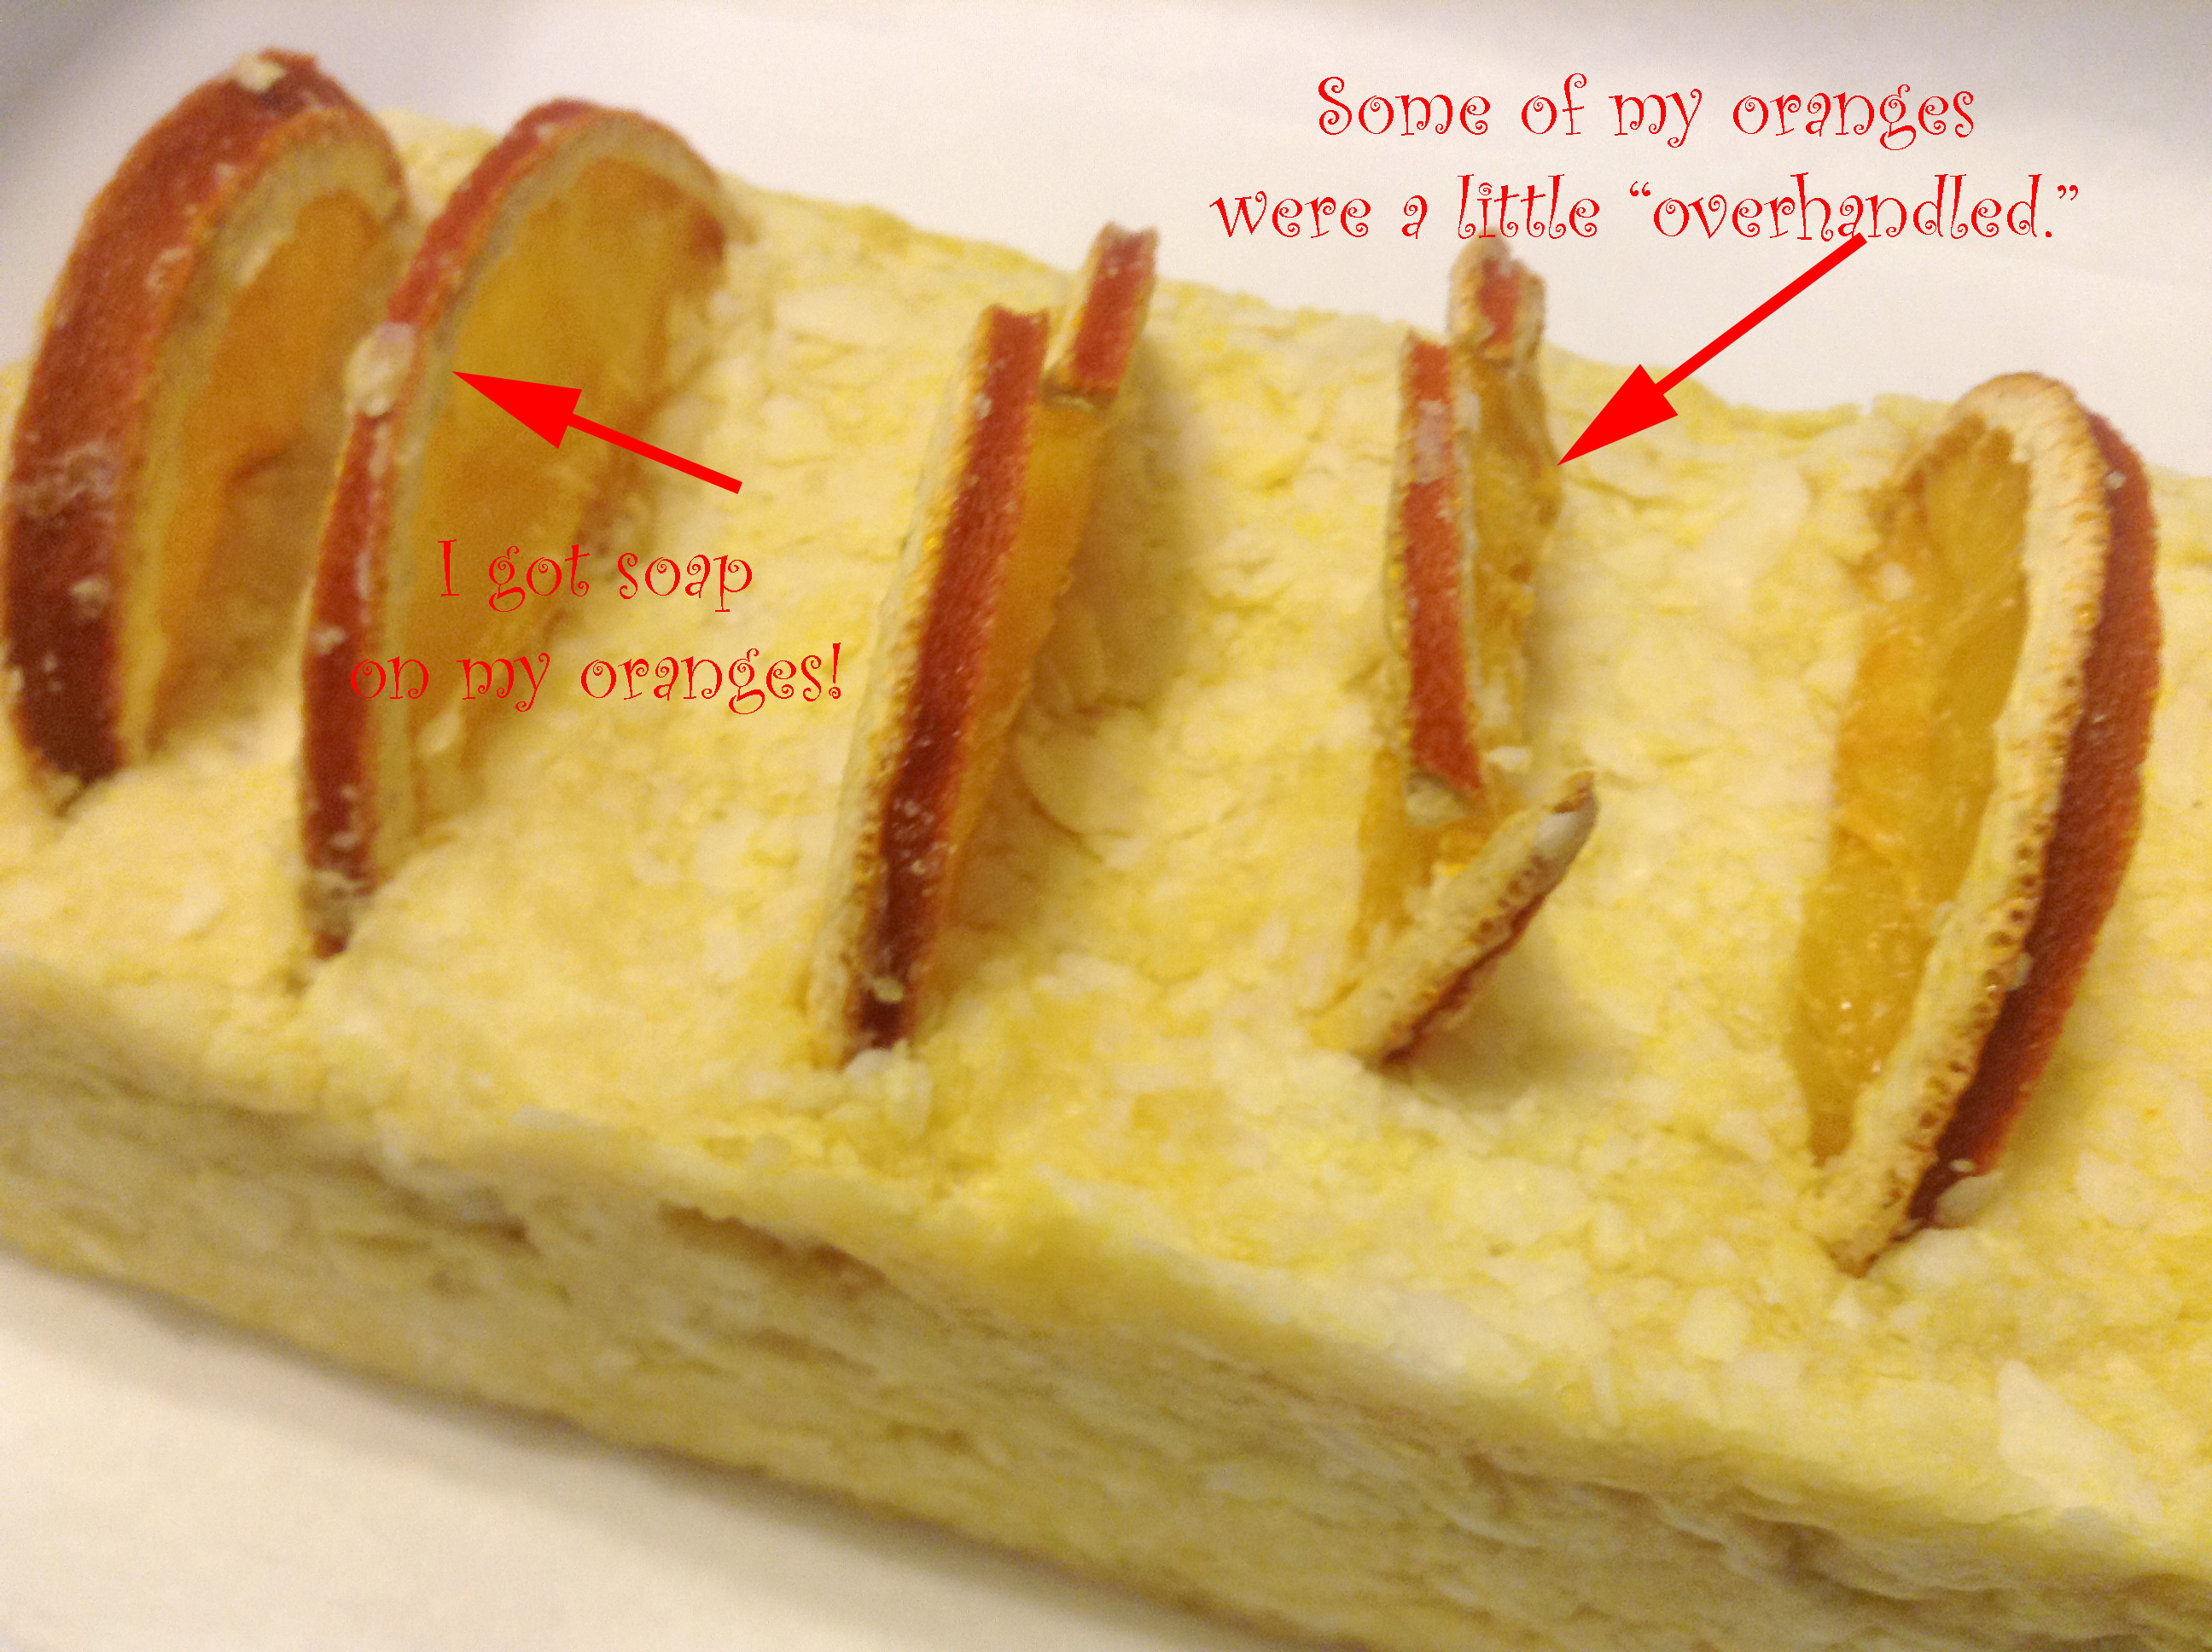
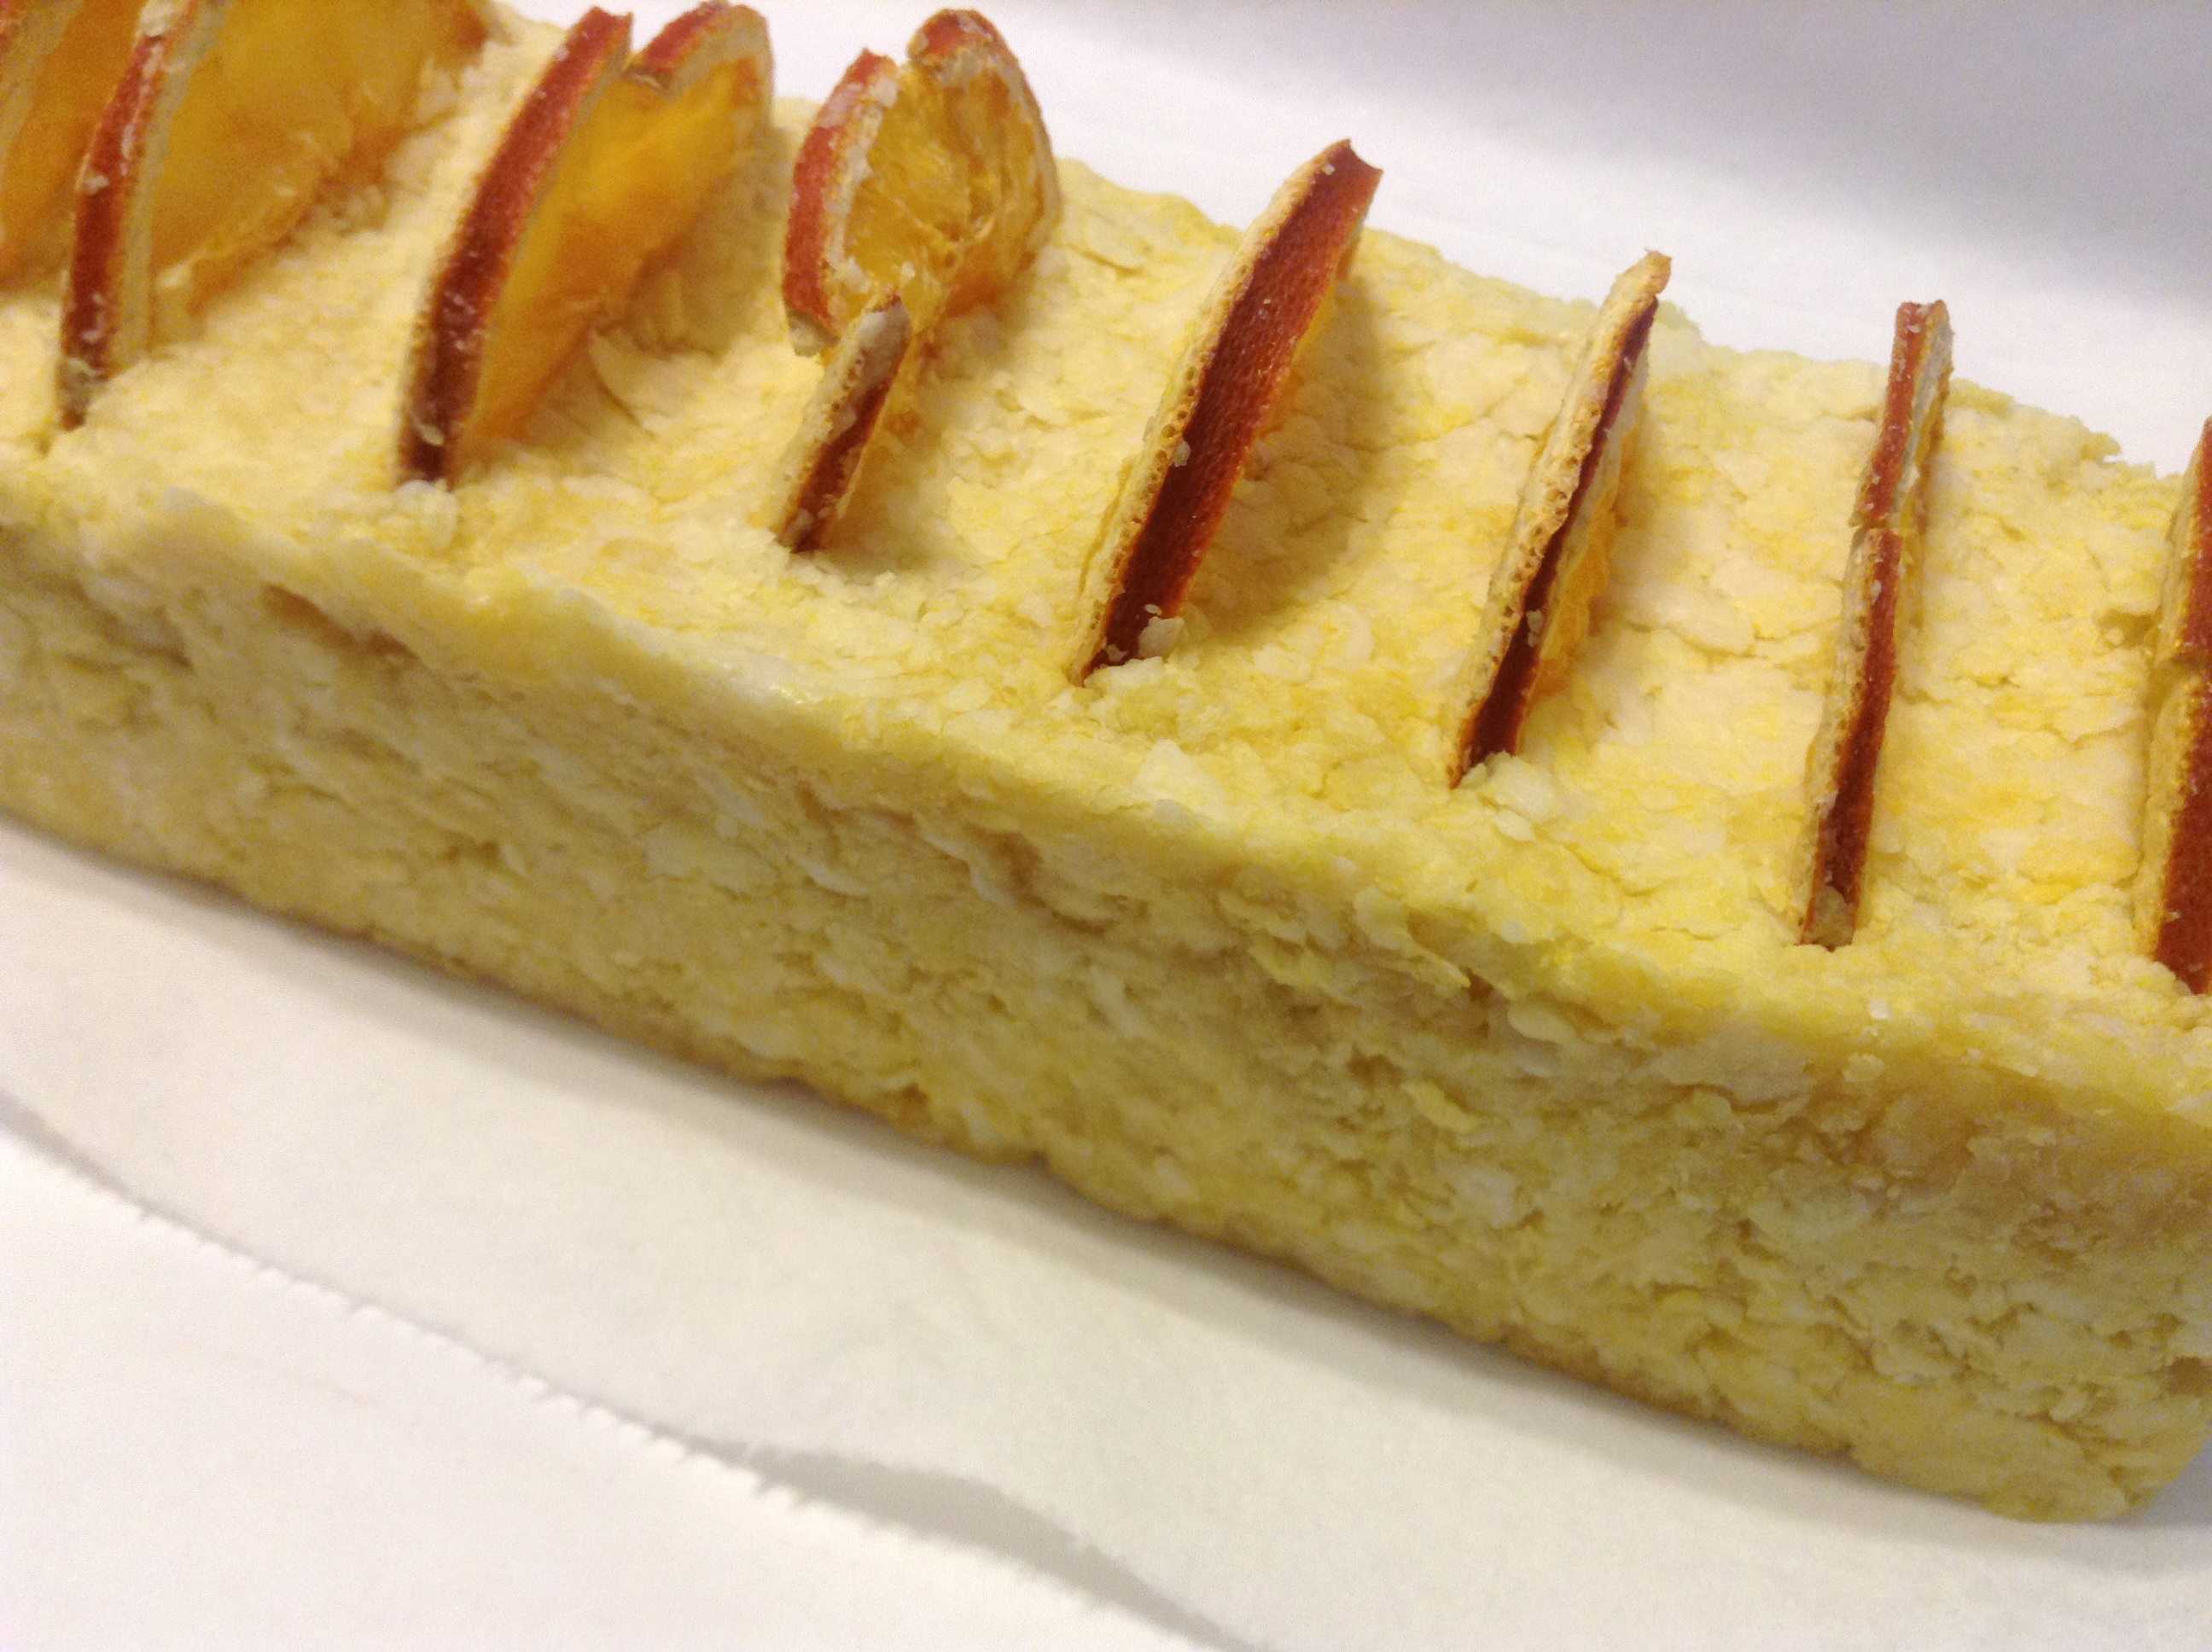
Here is another view of the soap loaf with the manhandled (womanhandled?) oranges in clear view.

Soap loaf

I am really digging the mottled look. It made me wonder if this is how Gossage’s soap got its famous “mottled” look. I know they experimented with adding colorants, but I couldn’t find out if their manufacturing process was hot process or not. I can’t find a picture of Gossage’s soap (just the packaging), so I’m not really sure what it looked like.

After the soap was cooled, I cut it as I normally do with my soap log cutter. Here are the results.

Finished Soap

I am thinking of calling it Sunrise. I am not sure if I will sell it or if I will just give these away. However, I am giving one bar away here. Just follow the instructions to enter. Good luck!

a Rafflecopter giveaway

Honey Cinnamon Oatmeal Soap

This was my first personal recipe, and the soap turned out great!

Ingredients

  • 19 oz. olive oil
  • 14 oz. coconut oil
  • 6 oz. palm oil
  • 5 oz. shea butter
  • 2 oz. grapeseed oil
  • 2 oz. castor oil
  • 1.35 oz. sweet orange essential oil
  • 0.7 oz. cinnamon bark essential oil
  • 3 T finely ground oats
  • 1 T honey
  • 16 oz. distilled water
  • 7.2 oz. lye

First, I lay bubble wrap in the bottom of my mold so the soap would have a honeycomb appearance on the bottom. I wish I had lined the mold with parchment paper, too. Despite the fact that my mold’s manufacturer said lining was unnecessary, it was terrible trying to remove the soap from the mold. I had to pop it in the freezer for an hour, and even after that, I had to wedge it out with a knife, which kind of made my soap less pretty. Lesson learned. Always line!

I didn’t want to fiddle with the essential oils and oats when my soap was tracing, so I went ahead and measured them first, then combined them into one container and set them aside. I ground my oats with a coffee grinder, put them in another container, and set them aside. Then I went ahead an measured out the tablespoon of honey and set it aside, too.

I poured 16 oz. water into a container, set it aside, and carefully measured 7.2 oz. of lye into a new container. Then I slowly added the lye to the water, stirring all the while. I kept stirring until the liquid was clear. Then I stuck my thermometer into the lye so I could watch the temperature.

I know there are different schools of thought on warming oils. It was hot here in Massachusetts yesterday, so my coconut oil was already melted, but if it hadn’t been, I’d have melted it in the microwave. I did melt the shea butter in the microwave. Sue me. Despite the fact that I did not take care to make sure the oils were the same temperature as the lye, the soap turned out well.

I measured out my oils into different containers, then combined them into one big plastic bowl and kept stirring. A note for beginners like me: use a scale to measure everything. Don’t try to use a measuring cup and do it by volume. You could be a little off that way. I was a little worried that my shea butter was starting to solidify again while I waited for the lye to reach 100°F. I could see little tiny solid pieces, miniscule really, but I prayed and kept stirring. For all I know, that’s not a bad thing. I’m a newbie.

Once the lye reached 100°F, I carefully added it to the oil mixture and stirred for a few moments. Then I used my stick blender to speed up the process. At a light trace, I added the honey. I guess I should have diluted the honey. My finished soap had some brown spots.

Dark Spots
You can see the dark spots in the corner and sides.

According to one online troubleshooter (dead link removed—sorry!), this can also happen when your soap goes through a very hot gel phase. Like mine did.

Gel Phase
Ay chi wawa! That was hot!

I had read that honey does funny things. Perhaps I didn’t need to cover the soap with a towel. However, I did read that the dark spots might go away once the soap is cured, and also that the soap is still fine to use. Whew! I think they sort of give it character.

At trace, I added the essential oils and ground oats and stirred thoroughly to mix everything in well. I covered the top with bubble wrap for the honeycomb effect, then put my soap to bed.

I actually made a mistake in my recipe. I added 20 oz. of olive oil instead of 19. I’m not sure what it did to my batch, aside from make more soap. I’ll have to wait and see if there were any unintended effects, but the soap looks just fine.

Finished uncut soap
Pretty! But stuck in the mold!


I have a mold that comes with a cutter, so once I finally wrestled my soap out of the mold, I sliced it into bars. They’re kind of quirky and not all the same size.

Bar of soap
This one looks nice.


But like I said, I learned my lesson about the lining, which should prevent some of the odd looking bars next next time.

Finished bars
Let’s cure this soap!


You’re probably wondering about that huge bar of soap on the far right. Right? It may be the result of adding the extra ounce of olive oil, or it could be that I’m a newbie and can’t figure out how much oil will make the exact right amount to fit my mold, but I had that much soap left over after my mold was full, so I poured into a plastic container, and put bubble wrap on it, too.

Funny leftover bar
Funny leftover bar of soap.


And it came out pretty well.

Finished funny bar
Finished leftover bar in the mold.


It was a little easier to get out of the mold, but it still gave up a little fight. I used a peeler to make it look a little nicer around the edges.

Funny soap edged

That is one huge bar of soap.

Still the honeycomb effect turned out well.

Honeycomb
Honeycomb!

Overall, I’m very pleased with how the finished soap looks, despite the brown spots. I was working with honey, which can be kind of cranky, and I was using a recipe of my own, so who knew what would happen? It smells absolutely divine, by the way. The combination of the honey and essential oils is amazing.

By the way, this soap had an INS value of 155, which is close to Dr. Bob’s ideal of 160. So that’s good? I guess. Also, the calculator I used to create the recipe predicts the recipe will produce soap with a medium hard bar, very good cleansing, great conditioning, good foam, and average stable lather. I wasn’t sure whether to worry about lather stability over much or not.

Washing up my supplies told me that the soap lathers up really well and feels good on my hands. I can’t wait to use it.

Creative Commons License

Honey Cinnamon Oatmeal Soap by Dana Huff is licensed under a Creative Commons Attribution-NonCommercial 3.0 Unported License. Permissions beyond the scope of this license may be available at Suds Life: About.

Hello Soap!

I made my first ever batch of soap last weekend, and it didn’t turn out very pretty.

It was a recipe from Elizabeth Letcavage and Patsy Buck’s Basic Soap Making, which is a book I highly recommend for beginning soap-makers. This soap is a basic four-oil recipe—olive, canola, coconut, and safflower.

The trouble I had was that my mold was bigger (3 pounds) than the recipe called for, and being inexperienced, I wasn’t sure how much to change the recipe so that the soap would fill the mold. I also wasn’t sure whether to expect the soap to expand. As a result, the bars are nice and thick, but they’re sort of squat.

Still, for my first ever batch, I have to say I’m pleased. The soap has been curing for a week, and it will be ready to use in about three more weeks.

The recipe I used isn’t mine to share, but it’s the Basic Four Oil Soap Recipe from Basic Soap Making, with the addition of (not enough) lavender essential oil and sweet orange essential oil. I’ve since discovered I really need to add more essential oil than I initially thought.

Still, it was a great learning experience, and I’ll be interested to see what the soap is like to use.