Lye-Heavy Soaps

I think nearly every soapmaker makes a mistake and winds up with lye-heavy soap.Lye Heavy SoapI unmolded these beauties this morning. This soap was supposed to be a really nice lavender goat milk soap. I’m not happy that I used some nice materials with this result, but it does happen.

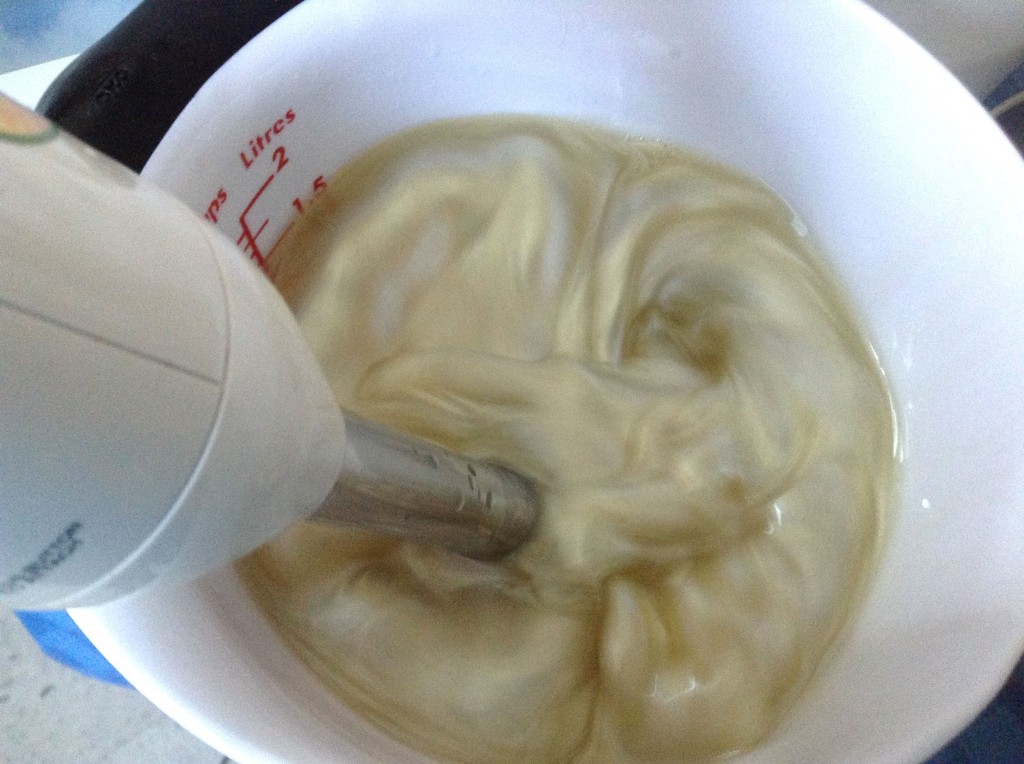
I knew something was wrong as I was mixing this soap together. It seemed to trace much more quickly than I thought it would, and I wondered if it was false trace, so I kept blending. I am still not sure if it really did get mixed well.

I check on my soap frequently as it sits to gel, and this one acted up almost immediately. I could see a yellow fluid oozing out of the tops of the bars. And it kept oozing, even after I patted it dry with paper towels. I checked it several more times, and each time, more liquid ooze.

It also seemed to take quite a long time to begin to gel. A few hours passed before I detected the temperature was over 100°F. It also seemed softer than usual. Even if soaps haven’t yet begun to gel, they begin to harden so that you can press lightly on the surface.

Sure enough, when I unmolded the soaps this morning, there was a large amount of that yellow liquid underneath the bars. They were the mottled shade you see in the image rather than a nice uniform lavender shade. I could see the lye much better on the bottoms of the bars, so out of curiosity, I put a pH strip into some of the oozy liquid on the bottom of a bar.

pH Test
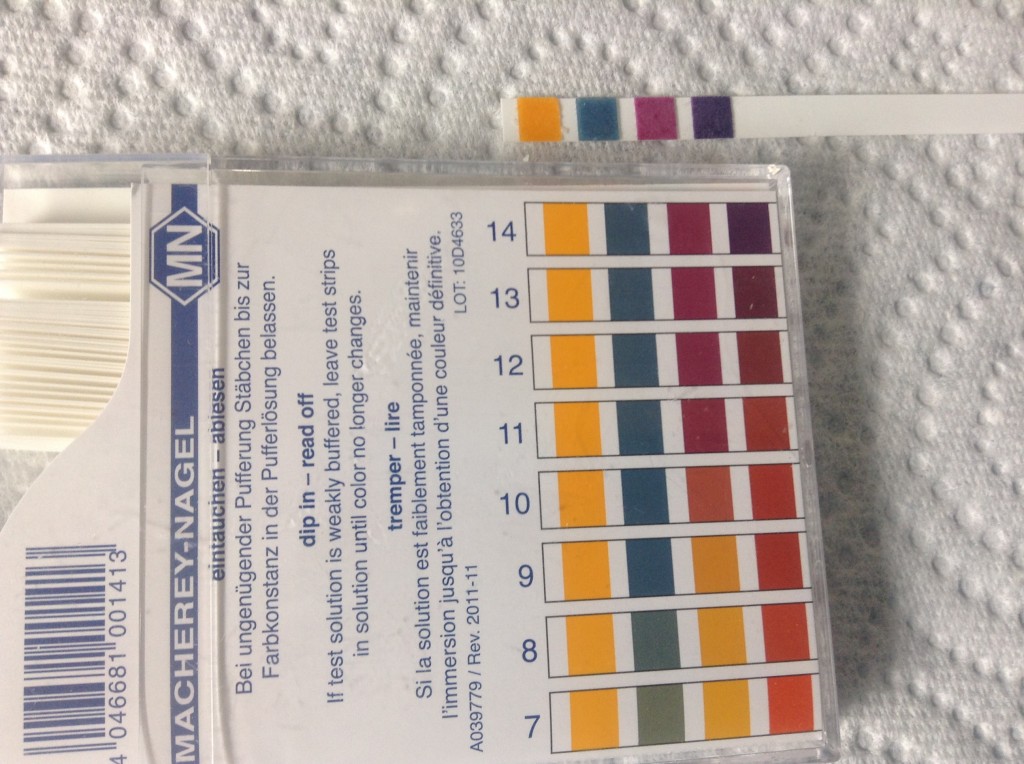
If you haven’t used these kinds of test strips before, you might not be familiar with how to read them. Essentially, you hold the strip up to the scale on the package above and compare it to the different sets of colors. I think my test strip looks most like the set labeled 14. If you are not familiar with the pH scale, it works like this:

  • It ranges from 0-14.
  • It measures how acidic or basic (or alkaline) a substance is.
  • Substances with a pH below 7 are acidic.
  • Substances with a pH above 7 are alkaline.
  • Substances with a pH of 7 are neutral and are neither acidic nor alkaline.
  • Each number is ten times greater than the number before. For example, something that is pH 11 is ten times more alkaline than something that is pH 10. Likewise, something that is pH 4 is ten times more acidic than something that is pH 5.
  • 14 is just about as alkaline as you can get. Lye is about 14 on the pH scale.

Yikes! I certainly should not have been handling my soap with bare hands! It was dangerously lye heavy. I immediately washed my hands. The tips of my fingers are a little dry, but other than that, no damage. A quick note: The soap itself was probably not uniformly pH 14. I’m pretty sure the pH strip came in direct contact with a patch of lye in the soap. In any case, I should have been using gloves to unmold. I’m really glad I didn’t try to zap test it.

In the case of this particular batch, I don’t know what I did wrong, so rebatching it in an attempt to fix it is probably not a good idea. If you know exactly what you did wrong to produce lye heavy soap, you can try rebatching it and correcting the problem. For instance, if you know you forgot an oil, or that you used the wrong amount of oil, you can shred the soap with a grater and put it in the crock pot, add the oil, and cook the soap, similar to making hot process soap. I personally hate rebatching. Your rebatched soap is just not going to be as nice as regular cold process or even hot process soap. I have done it once and swore I’d never do it again. However, some soapmakers regularly rebatch their soap and like it just fine.

What can you do if you don’t know what you did wrong? You have two options:

  1. Toss it in the trash.
  2. Use it as laundry soap.

I put on a pair of gloves and shredded the soap. Then I put it in a box in the laundry room. Interestingly enough, the first soaps used were laundry soaps. Ancient Babylonians used soap as early as 2800 BCE. Archaeologists have found evidence of a soap-like residue in containers, and a cuneiform tablet dated from 2200 BCE had a soap recipe on it. The recipe describes the soap’s use for washing clothes. Your grandmother or great-grandmother may even have made soap to use for the laundry. Though lye-heavy soap is too harsh to use on your skin, you can use it to clean your clothes, and that way, at least it doesn’t go to waste. Lye-heavy soap is actually pretty good at whitening whites and cutting grease. It’s best used with some washing soda, Borax, and baking soda to create a nice detergent. The Soap Queen has some laundry soap tips here.
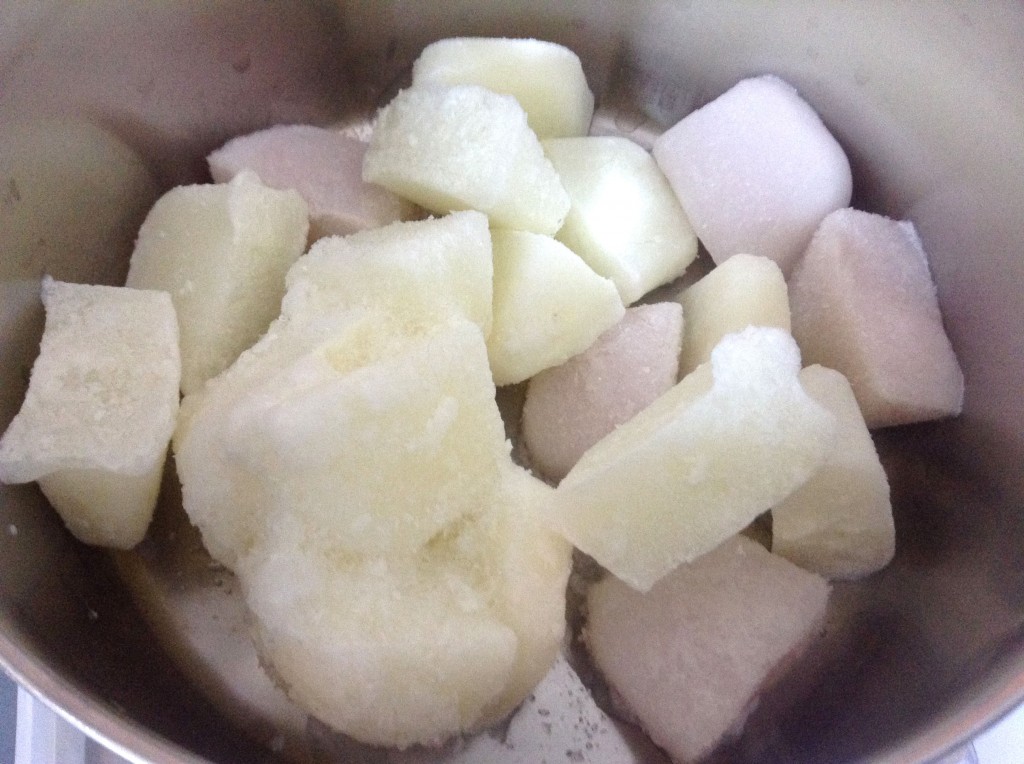
Related posts:

Luxury Goat Milk Soap: Recipe and Tutorial

Cee from Oil & Butter is my favorite soap blogger for many reasons. She is generous with her expertise and her ideas. Her soap looks incredible (and her photographs are beautiful). She is knowledgeable and friendly. She shared a recipe and tutorial for a Luxury Soap two years ago, and it looks so gorgeous that I have been dying to try it. In the spirit of Cee’s original post, I share my recipe, advice, and reflections.

Luxury SoapIngredients

Lye Solution

  • 291 g goat milk
  • 85 g coconut milk
  • 155 g lye

Oils

  • 56 g mango butter
  • 57 g shea butter
  • 225 g coconut oil
  • 200 g palm oil
  • 430 g olive oil
  • 57 g avocado oil
  • 57 g sweet almond oil
  • 56 g castor oil

Additives

  • 1.5 t honey mixed with 1.5 t distilled water
  • 68 g fragrance (I chose Brown Sugar and Fig from Nature’s Garden)
  • 2 t Diamond Dust Mica dispersed in the sweet almond oil
  • 1 T sodium lactate

Equipment

First, a quick note about grams as opposed to ounces. I use grams to measure the weight of my soap ingredients because grams are more precise than ounces, even if you are measuring tenths of an ounce. I always recommend that soapmakers use grams, and whenever I use a recipe someone else has posted, I convert it to grams using SoapCalc.

This recipe was adapted from Cee’s own Luxury Soap recipe. I removed the jojoba oil mainly because it’s terrifically expensive. I don’t have much of it right now, and I prefer to use it for leave-on products like lotions, like other soapmakers. It’s perfectly fine in soap, however, and I didn’t remove it because I thought it shouldn’t be used. Using it would certainly have added a bit of decadence to an already almost sinful soap, but I think the recipe is plenty luxurious without it, too. I didn’t have chamomile extract, so I didn’t use that either. Aside from removing the jojoba and chamomile extract, I tweaked the numbers of the other oils and swapped almond milk for coconut milk. Otherwise, the recipes are quite similar.

I began by preparing the oils. First, I measured out the butters.

Mango Butter
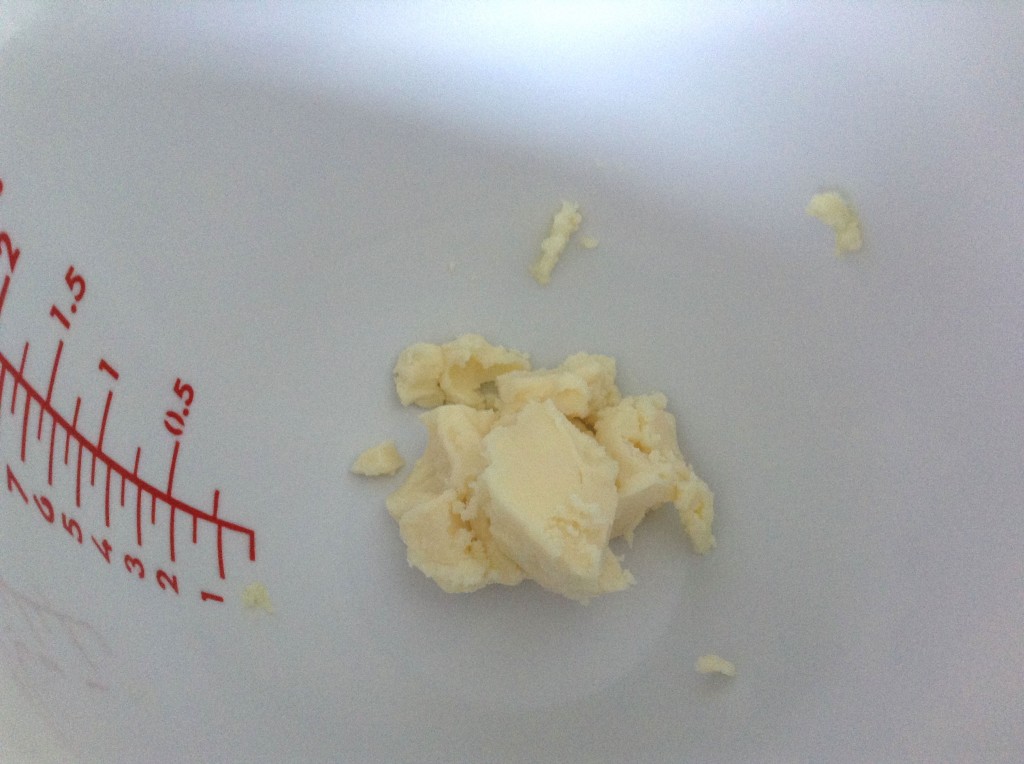
Mango butter is truly wonderful. It is similar to shea butter in some respects in that it has a significant amount of unsaponifiables, meaning that more of the conditioning and moisturizing qualities of the butter make it through the saponification process. It also contributes to a creamy lather.

Shea Butter 
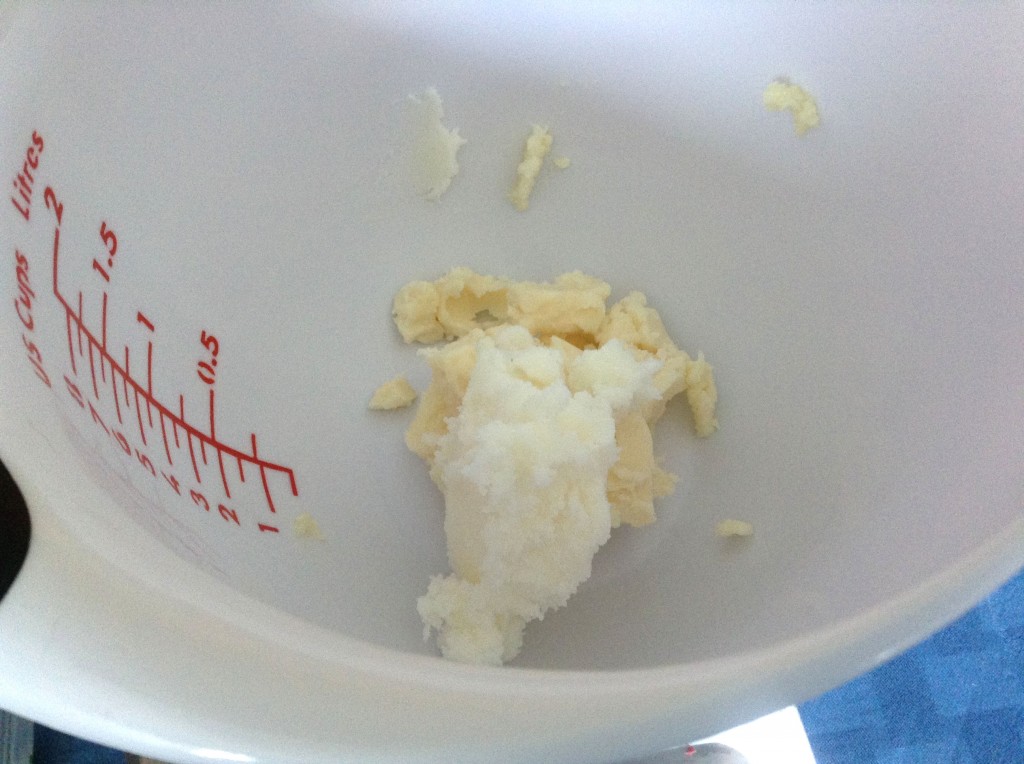
I added the shea butter to the mango butter. I use shea butter and/or cocoa butter in almost all of my soaps because I love what it does for skin. It does speed up trace, so be careful.

Coconut Oil
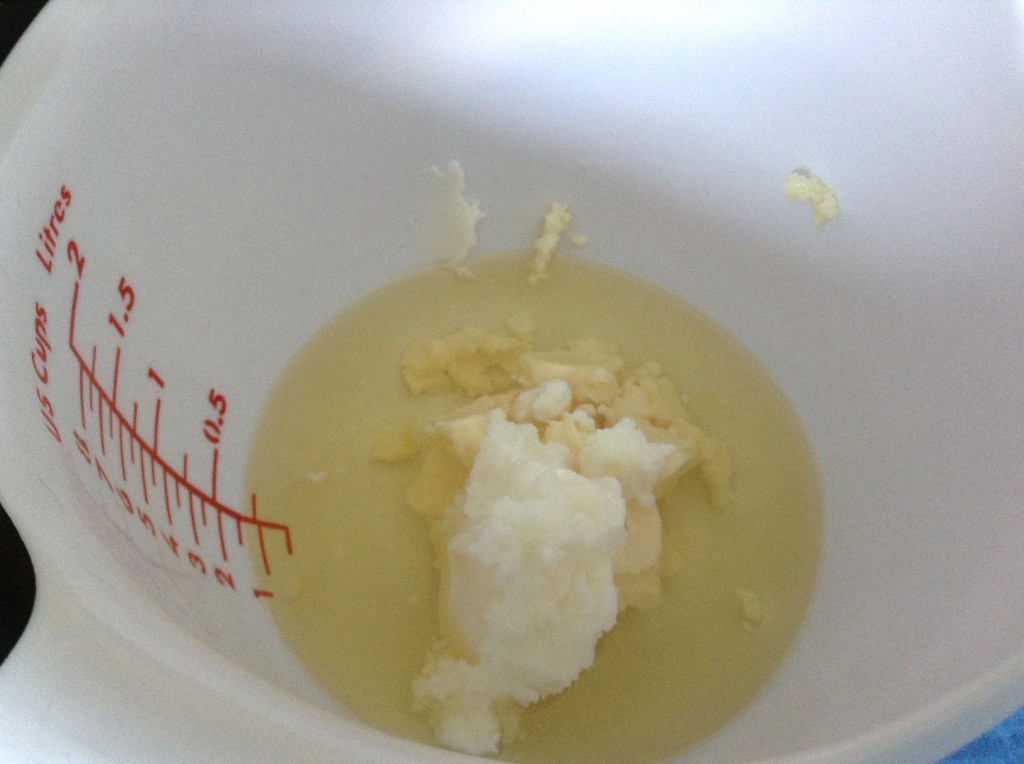
In with the coconut oil. It’s so hot here today that it’s completely melted already. Actually the mango butter was kind of soft as well. It’s usually a little harder (and almost brittle) than it was today. Coconut oil is great for bubbles—it contributes to fluffy lather and cleansing as well as bar hardness. I use coconut oil in almost all of my soaps.

Palm Oil
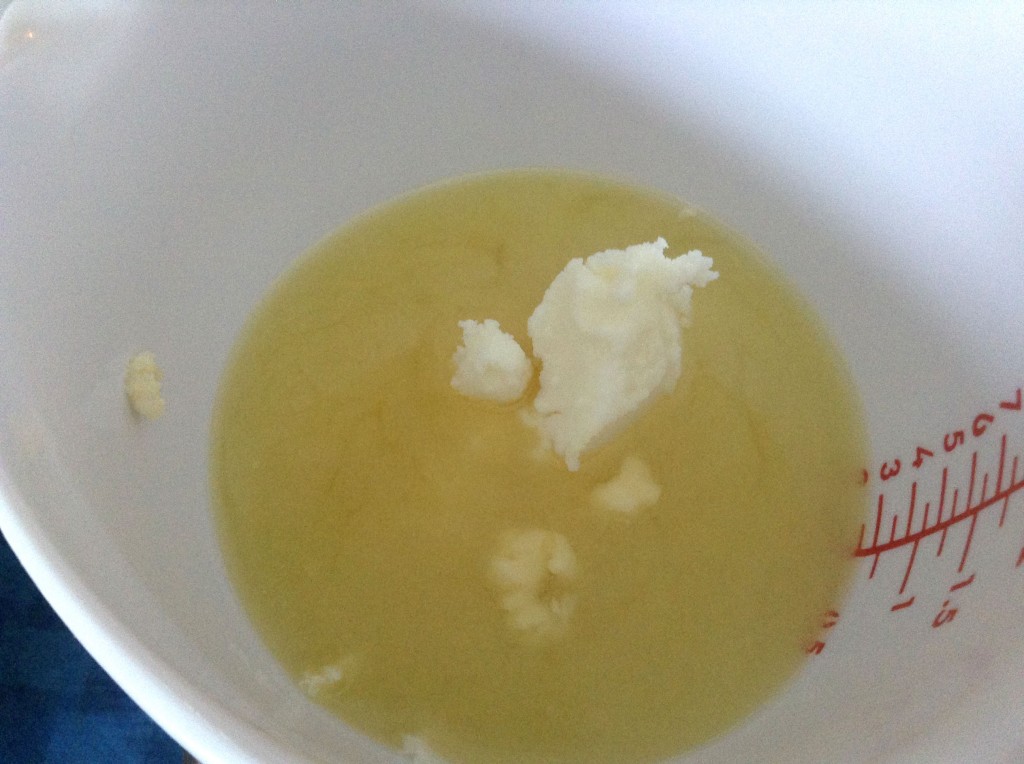
The last hard oil is palm oil, which I use because it contributes to bar hardness, stable lather, and conditioning. I use it in a lot of my soaps.

What I like to do is put all my hard oils in the soap bowl together, then melt them in the microwave. It saves time as opposed to melting each separately and adding them together. I warmed these oils for about one minute (try 30-second bursts). At that point, the shea was almost melted, so I stirred it until it was completely melted.

Olive Oil
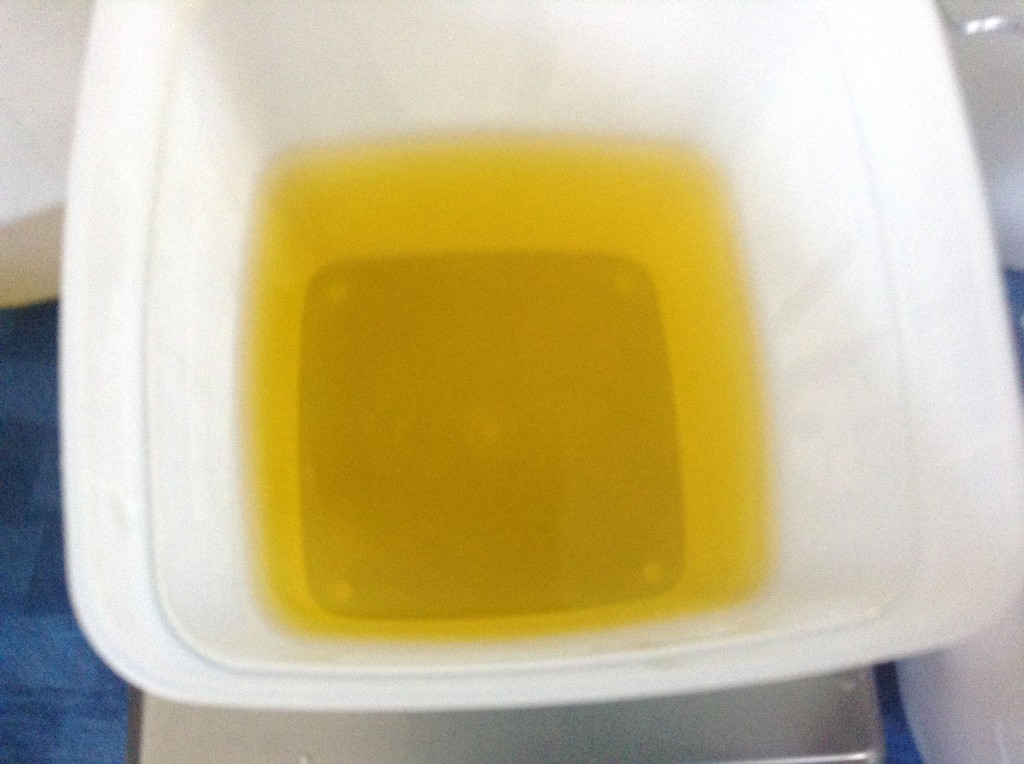
A quick word about olive oil: you can use any grade of olive oil in soap, but I always use pure golden olive oil. I don’t think it’s necessary to use extra virgin olive oil in soapmaking. In fact, it’s not different enough from pure golden olive oil to warrant its own category in SoapCalc, though olive oil pomace is. I personally don’t use pomace because pure golden olive oil is available at my local discount membership warehouse for a really good price (and no shipping). I use olive oil in every single soap I make. It’s highly conditioning and contributes to stable lather and bar hardness. I believe it to be the single best soaping oil there is.

Soft Oils

I prepared the soft oils—olive oil, avocado oil, and castor oil—measuring them out one at a time, and then adding them all to the melted hard oils and butters.

Avocado oil contains vitamins A, D, and E, and contributes to the bar’s conditioning properties.

Castor oil is the best source of ricinoleic acid and make the lather much fluffier and more stable. I use castor oil in most of my soaps. Castor oil is also a natural humectant, which means it draws moisture to the skin. I usually only use 5%, except in shampoo bars.

Mica Added

I added my Diamond Dust Mica to the sweet almond oil, mixed it with a small hand mixer, and then added the sweet almond oil to the rest of the oils. Sweet almond oil is another of my favorite oils. It contributes to a stable lather and conditioning bar. It works well as a carrier oil for colorants, too. It’s also great in lotions.

I blended the oils so that the Diamond Dust Mica would disperse. Look at that pearly sheen!

Diamond Dust Mica

I believe this mica is probably similar to Bramble Berry’s Super Pearly White Mica. That lovely, pearl sheen will not completely make it through the soapmaking process, but if you use it in melt-and-pour soap, you should see a nice shimmer in your soap. I do still notice a little bit of shimmer in cold process soap as well, and it definitely adds something that just plain titanium dioxide lacks.

Goat Milk and Coconut Milk

After my oils were prepared, I prepared my milks and lye. Why didn’t I do that before preparing the oils? Well, if I were using water, I would have prepared the lye mixture first because it needs time to cool. However, if I am starting with frozen milk, there is no reason to start with the lye mixture because it doesn’t need to cool. In fact, I find that I can control my milk and lye much better if I prepare it after the oils. I have found that if you prepare the milk and lye before the oils, the fats in the goat milk begin to saponify, and while that’s not necessarily problematic for any reason, I just find I like it better if the milk is still liquid. I used a 6% lye discount in this soap, but you could alter it to your preferred superfat if you like. I find 6% to be my personal sweet spot.

Lye Mixture
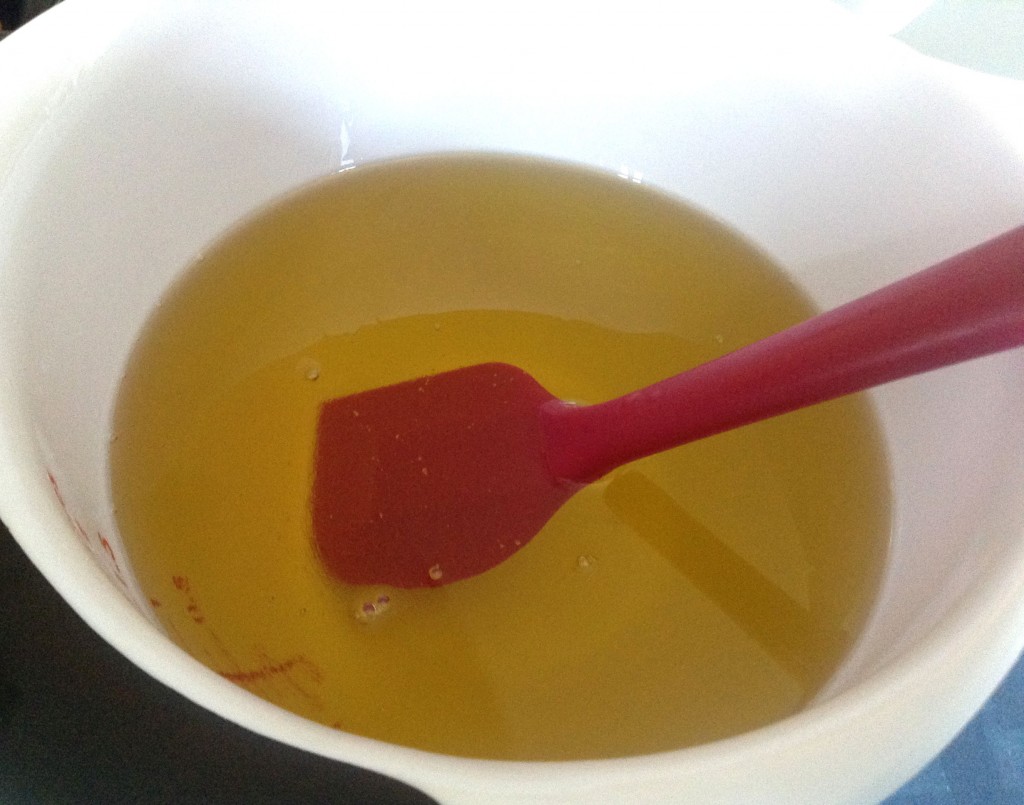
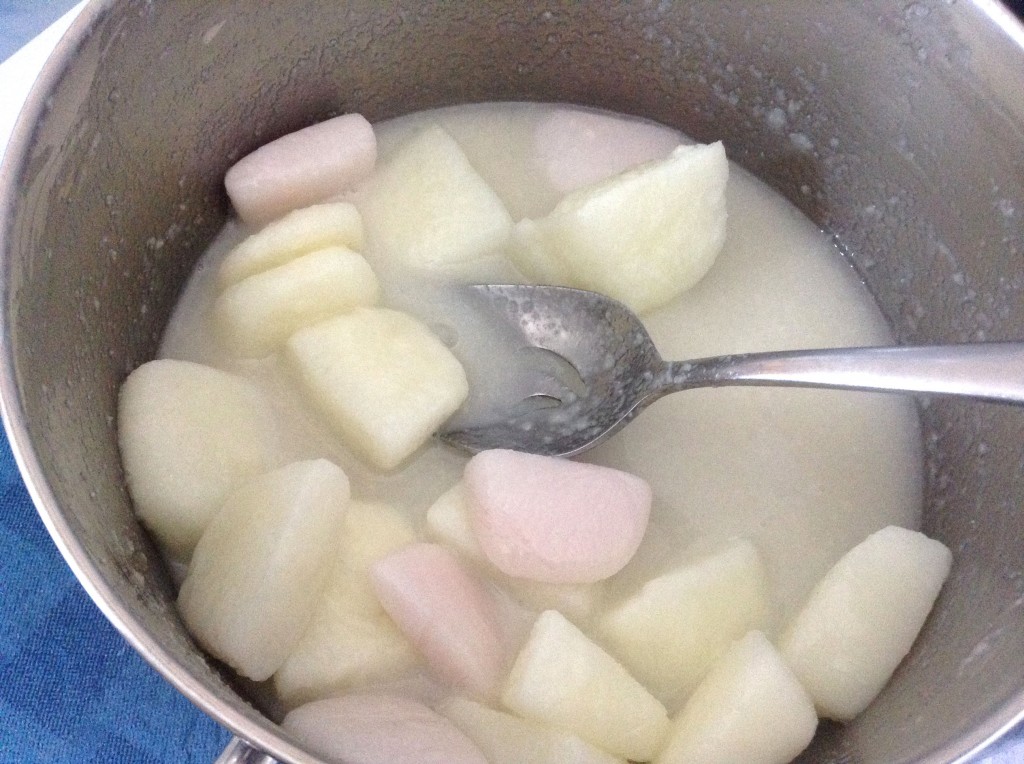
Working with milk requires a bit more effort than working with water. I use a stainless steel pot because if I need to quickly cool it down the mixture, stainless steel is a better conductor (hot or cold) than plastic or glass. I also add the lye to the milk just a little at a time and stir until the lye is dissolved. Then I add more. It can take a little while. Once all the lye was added, and I was relatively sure the all of it had dissolved in the milk, I added the sodium lactate to the lye mixture and stirred well to dissolve it.

Lye MixtureI checked the temperature of the lye mixture, and it was about 82°F. Pretty good. I don’t like it to rise above 90°F. If it starts to become too warm, I put the pan in a cool water bath to bring the temperature down.

Another benefit of preparing the oils first and then the lye mixture is that the oils have a little bit more time to cool down as well. I didn’t take their temperature, but my guess is that they were 90-95°F by the time the lye was ready. They would likely have been about 100°F when I began preparing the lye mixture.

Once the lye mixture was ready, I added it to the oils and stirred a little bit. Anne-Marie Faiola of Bramble Berry likes to pour the lye mixture down the barrel of her stick blender to reduce splashing and bubbles. I did that this time, too.

Stick Blending Soap
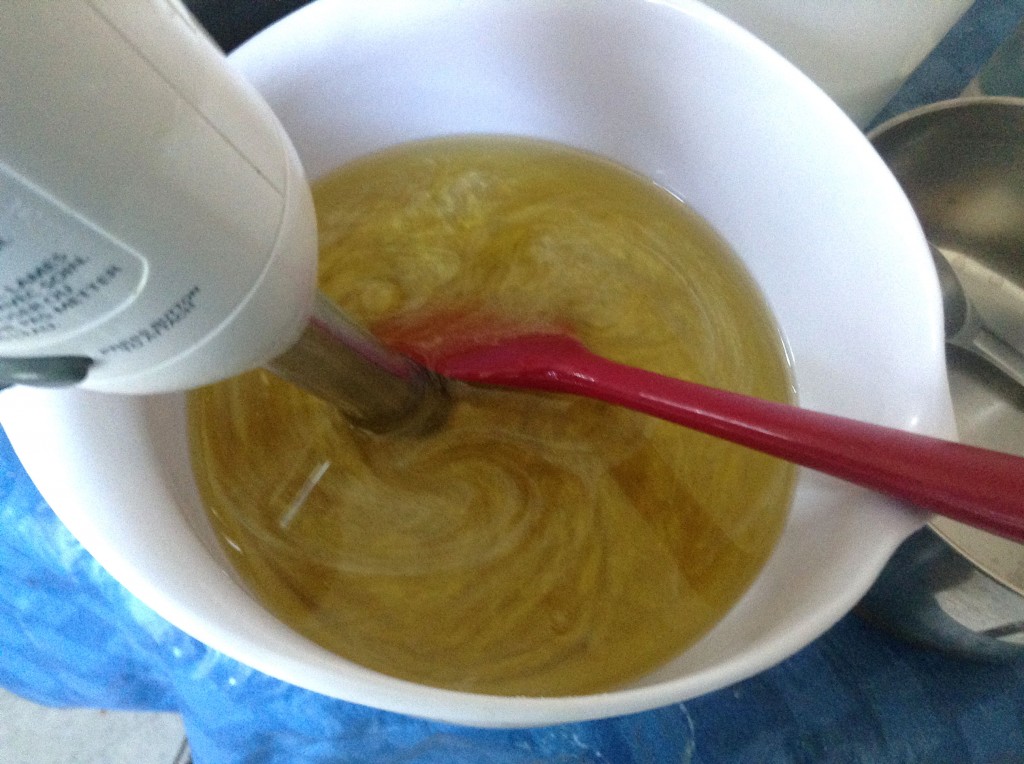
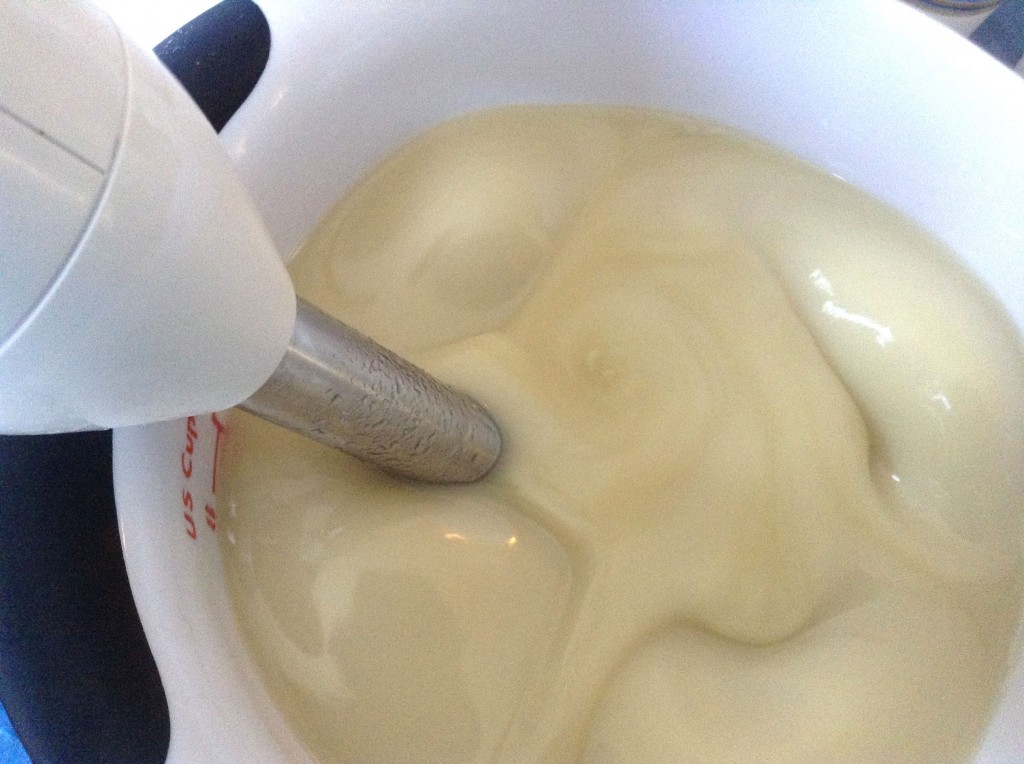
I stick blended until a very light trace, then I added the honey. Honey will accelerate trace, so make sure you add it at a light trace, or you may find you have gone too far with the stick blending. When I use honey in soap, I mix it with an equal amount of distilled water. In this case, I used 1.5 t of honey, so I mixed it with 1.5 t of water. Then I microwave the honey for a very short time—only 5-10 seconds. I stir until it dissolves in the water. I find that I have fewer issues with scorching, overheating, and caverns in soap if I dissolve the honey. I have also learned not to use more honey than I need. I wouldn’t go higher than a tablespoon in a batch of this size, and given I used a log mold instead of a slab mold, even that much might have caused temperature issues. Honey is a natural humectant and contributes to the lather in soap.

I added my fragrance, which was Nature’s Garden’s Brown Sugar and Fig. I wanted a scent that evoked the creaminess of the soap. I chose this fragrance also because I knew that it had a very small amount of vanillin in it, and reviews said that it didn’t discolor. I love the fragrance description:

This magical, complex fragrance oil by Nature’s Garden is composed of top notes of fresh figs, peaches, and passion fruit; followed by middle notes of coconut milk, vanilla orchid, jasmine, muguet, and freesia; well-balanced with base notes of vanilla beans, caramel, maple sugar, fig leaves, and musk.

To be honest, I don’t smell any fruit notes, with the possible exception of the fig. I mostly smell vanilla, sugar, and musk. It smells great, and I think it’s perfect in this soap. I had no issues with acceleration or ricing. I’ll have to wait and see as the soap cures to determine whether the claims that it doesn’t discolor are true.

I should think other good fragrance choices might be Nature’s Garden’s Baby Bee Buttermilk or Oatmeal, Milk, and Honey or Bramble Berry’s Wildflower Honey (which will discolor, but to a nice honey shade).

Trace
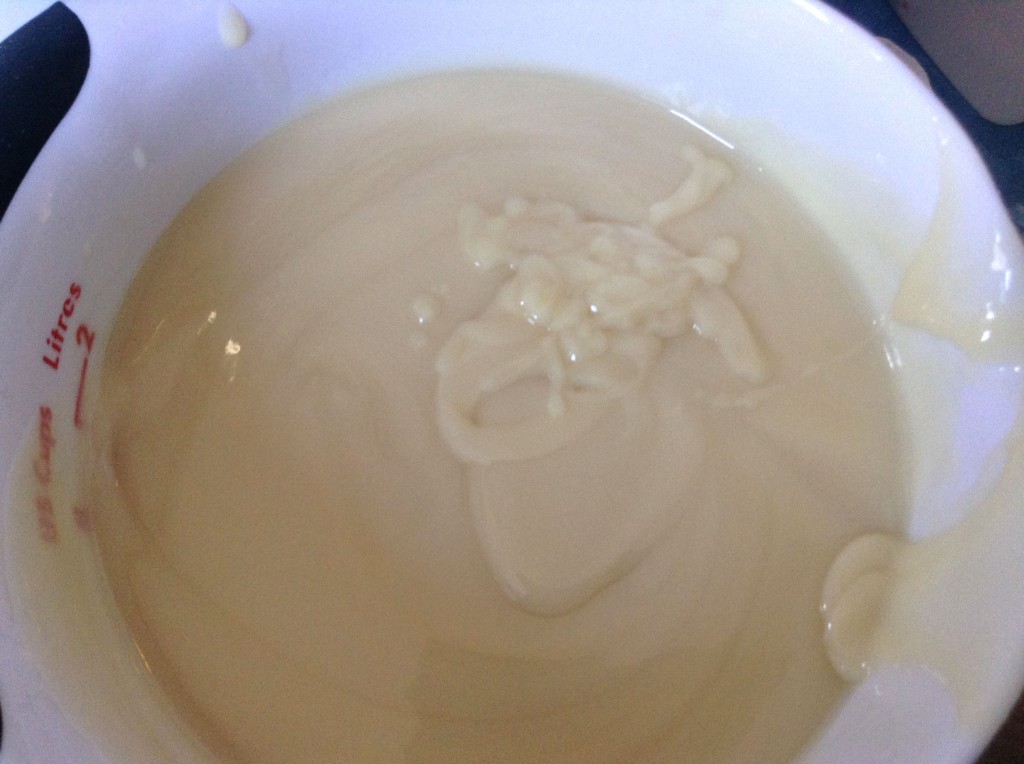
I blended to a pretty thick trace, then poured the soap into my 10-inch silicone loaf mold, which was the perfect size for this recipe. Bramble Berry recommends using sodium lactate to make it easier to remove soap from this mold, and in any case, sodium lactate adds a nice silky feel to soap.

Soap In the Mold
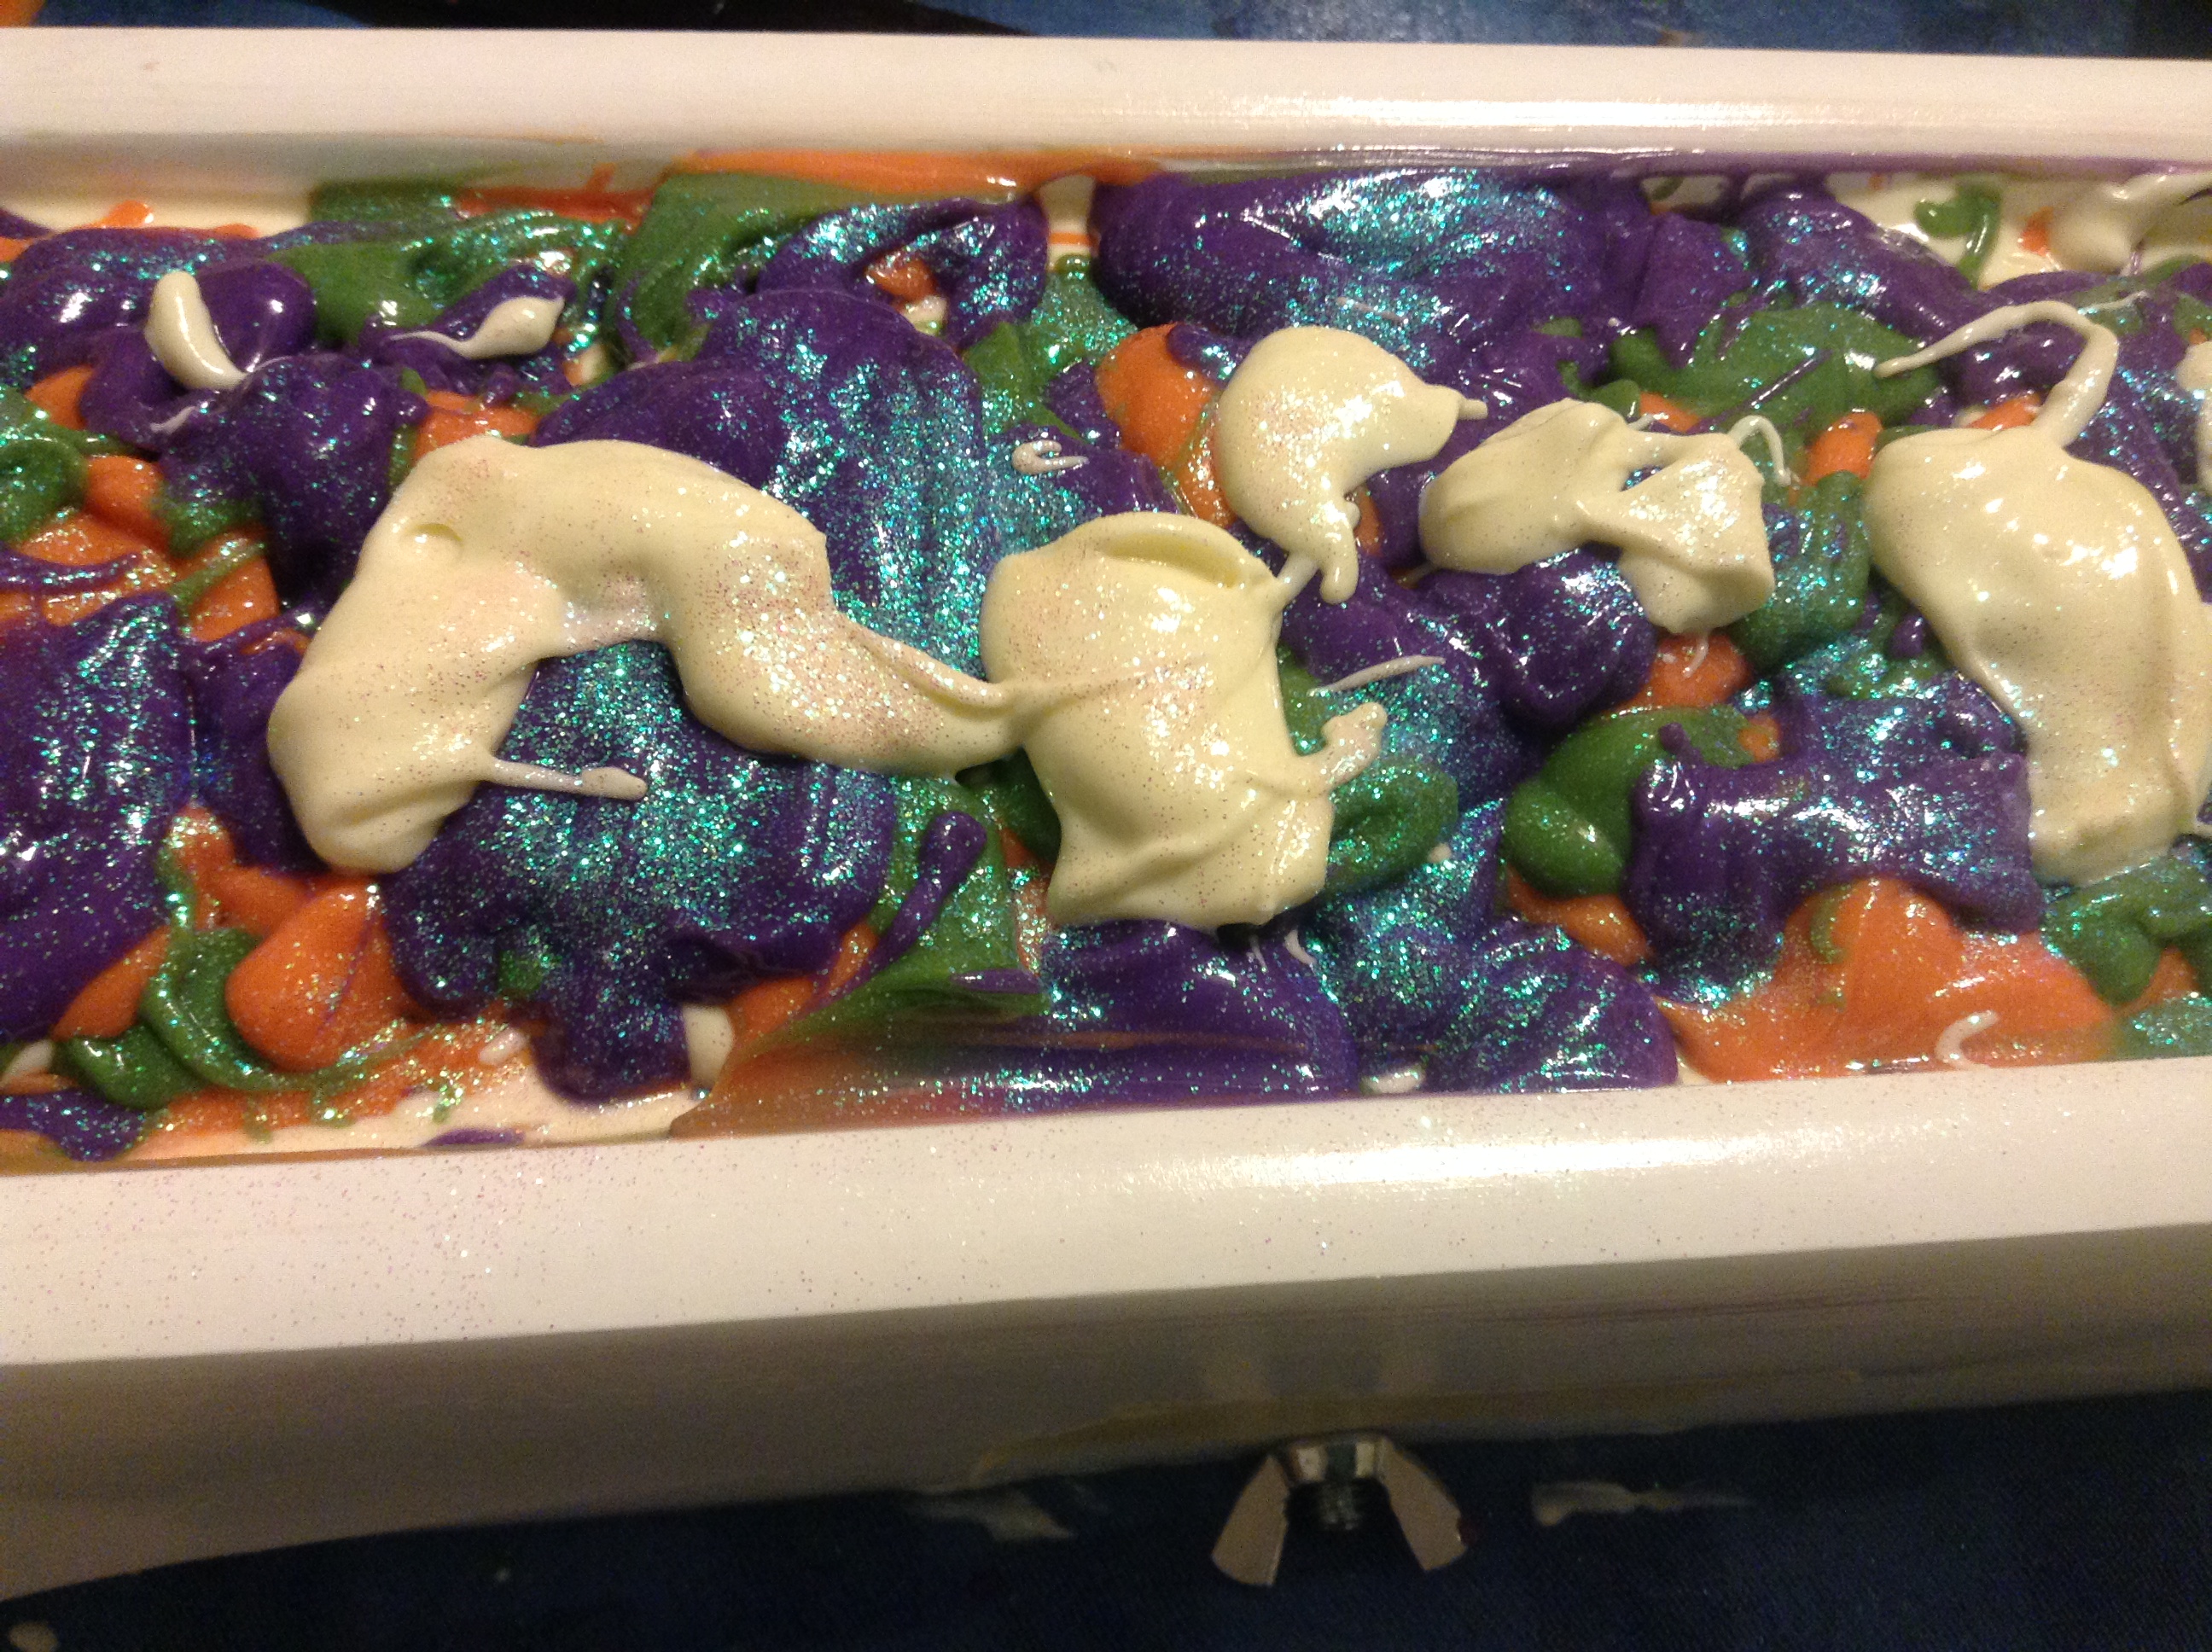
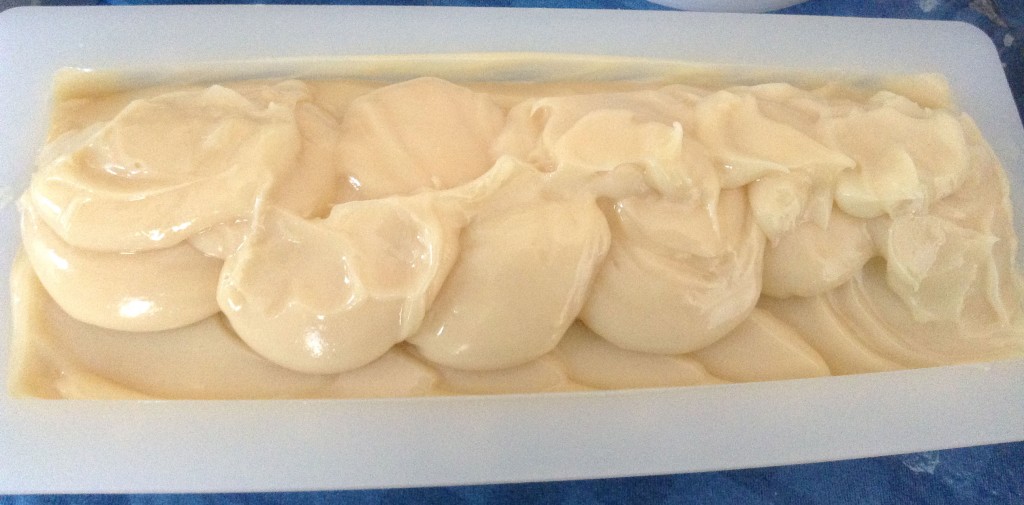
Like Cee, I spooned soap on the top after doing a little bit of sculpting, but I didn’t think my tops were as pretty as hers, so I experimented a bit with a skewer to create a slightly different design.

Swirled Soap Tops
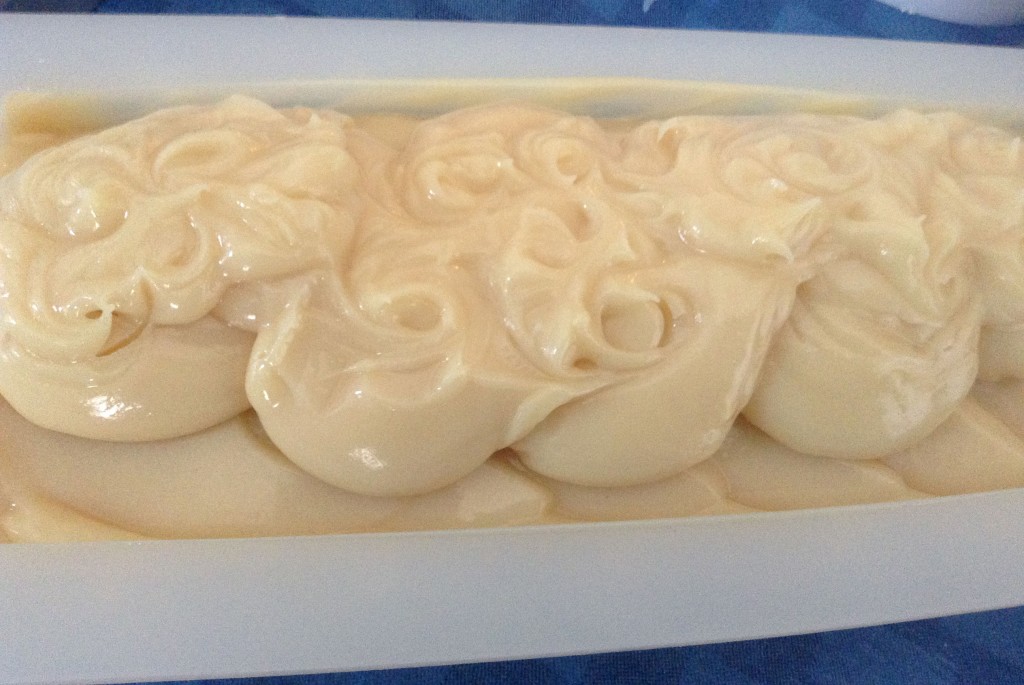
I spritzed it with 91% isopropyl alcohol, which might not have been strictly necessary since I didn’t choose to gel the soap, but it can’t hurt anyway. Isopropyl alcohol can help prevent soda ash on the tops of soap, but it’s not 100% effective.

A quick word about gelling milk soaps. You will hear some soapmakers insist that you can’t or shouldn’t gel milk soaps. I don’t see any problem with it. I gel most of my milk soaps. Even the ones with honey in them, too. I have only had a problem with overheating once, and it was because I used way too much honey. My advice is to do what you want. I chose not to gel this one because I didn’t want it to darken as much as I knew it would if I gelled it. You might not need to insulate, or perhaps just to insulate lightly, but your milk soaps will gel just fine if you are mindful of the other additives you use and keep an eye on the temperature.

Cut Luxury Soap
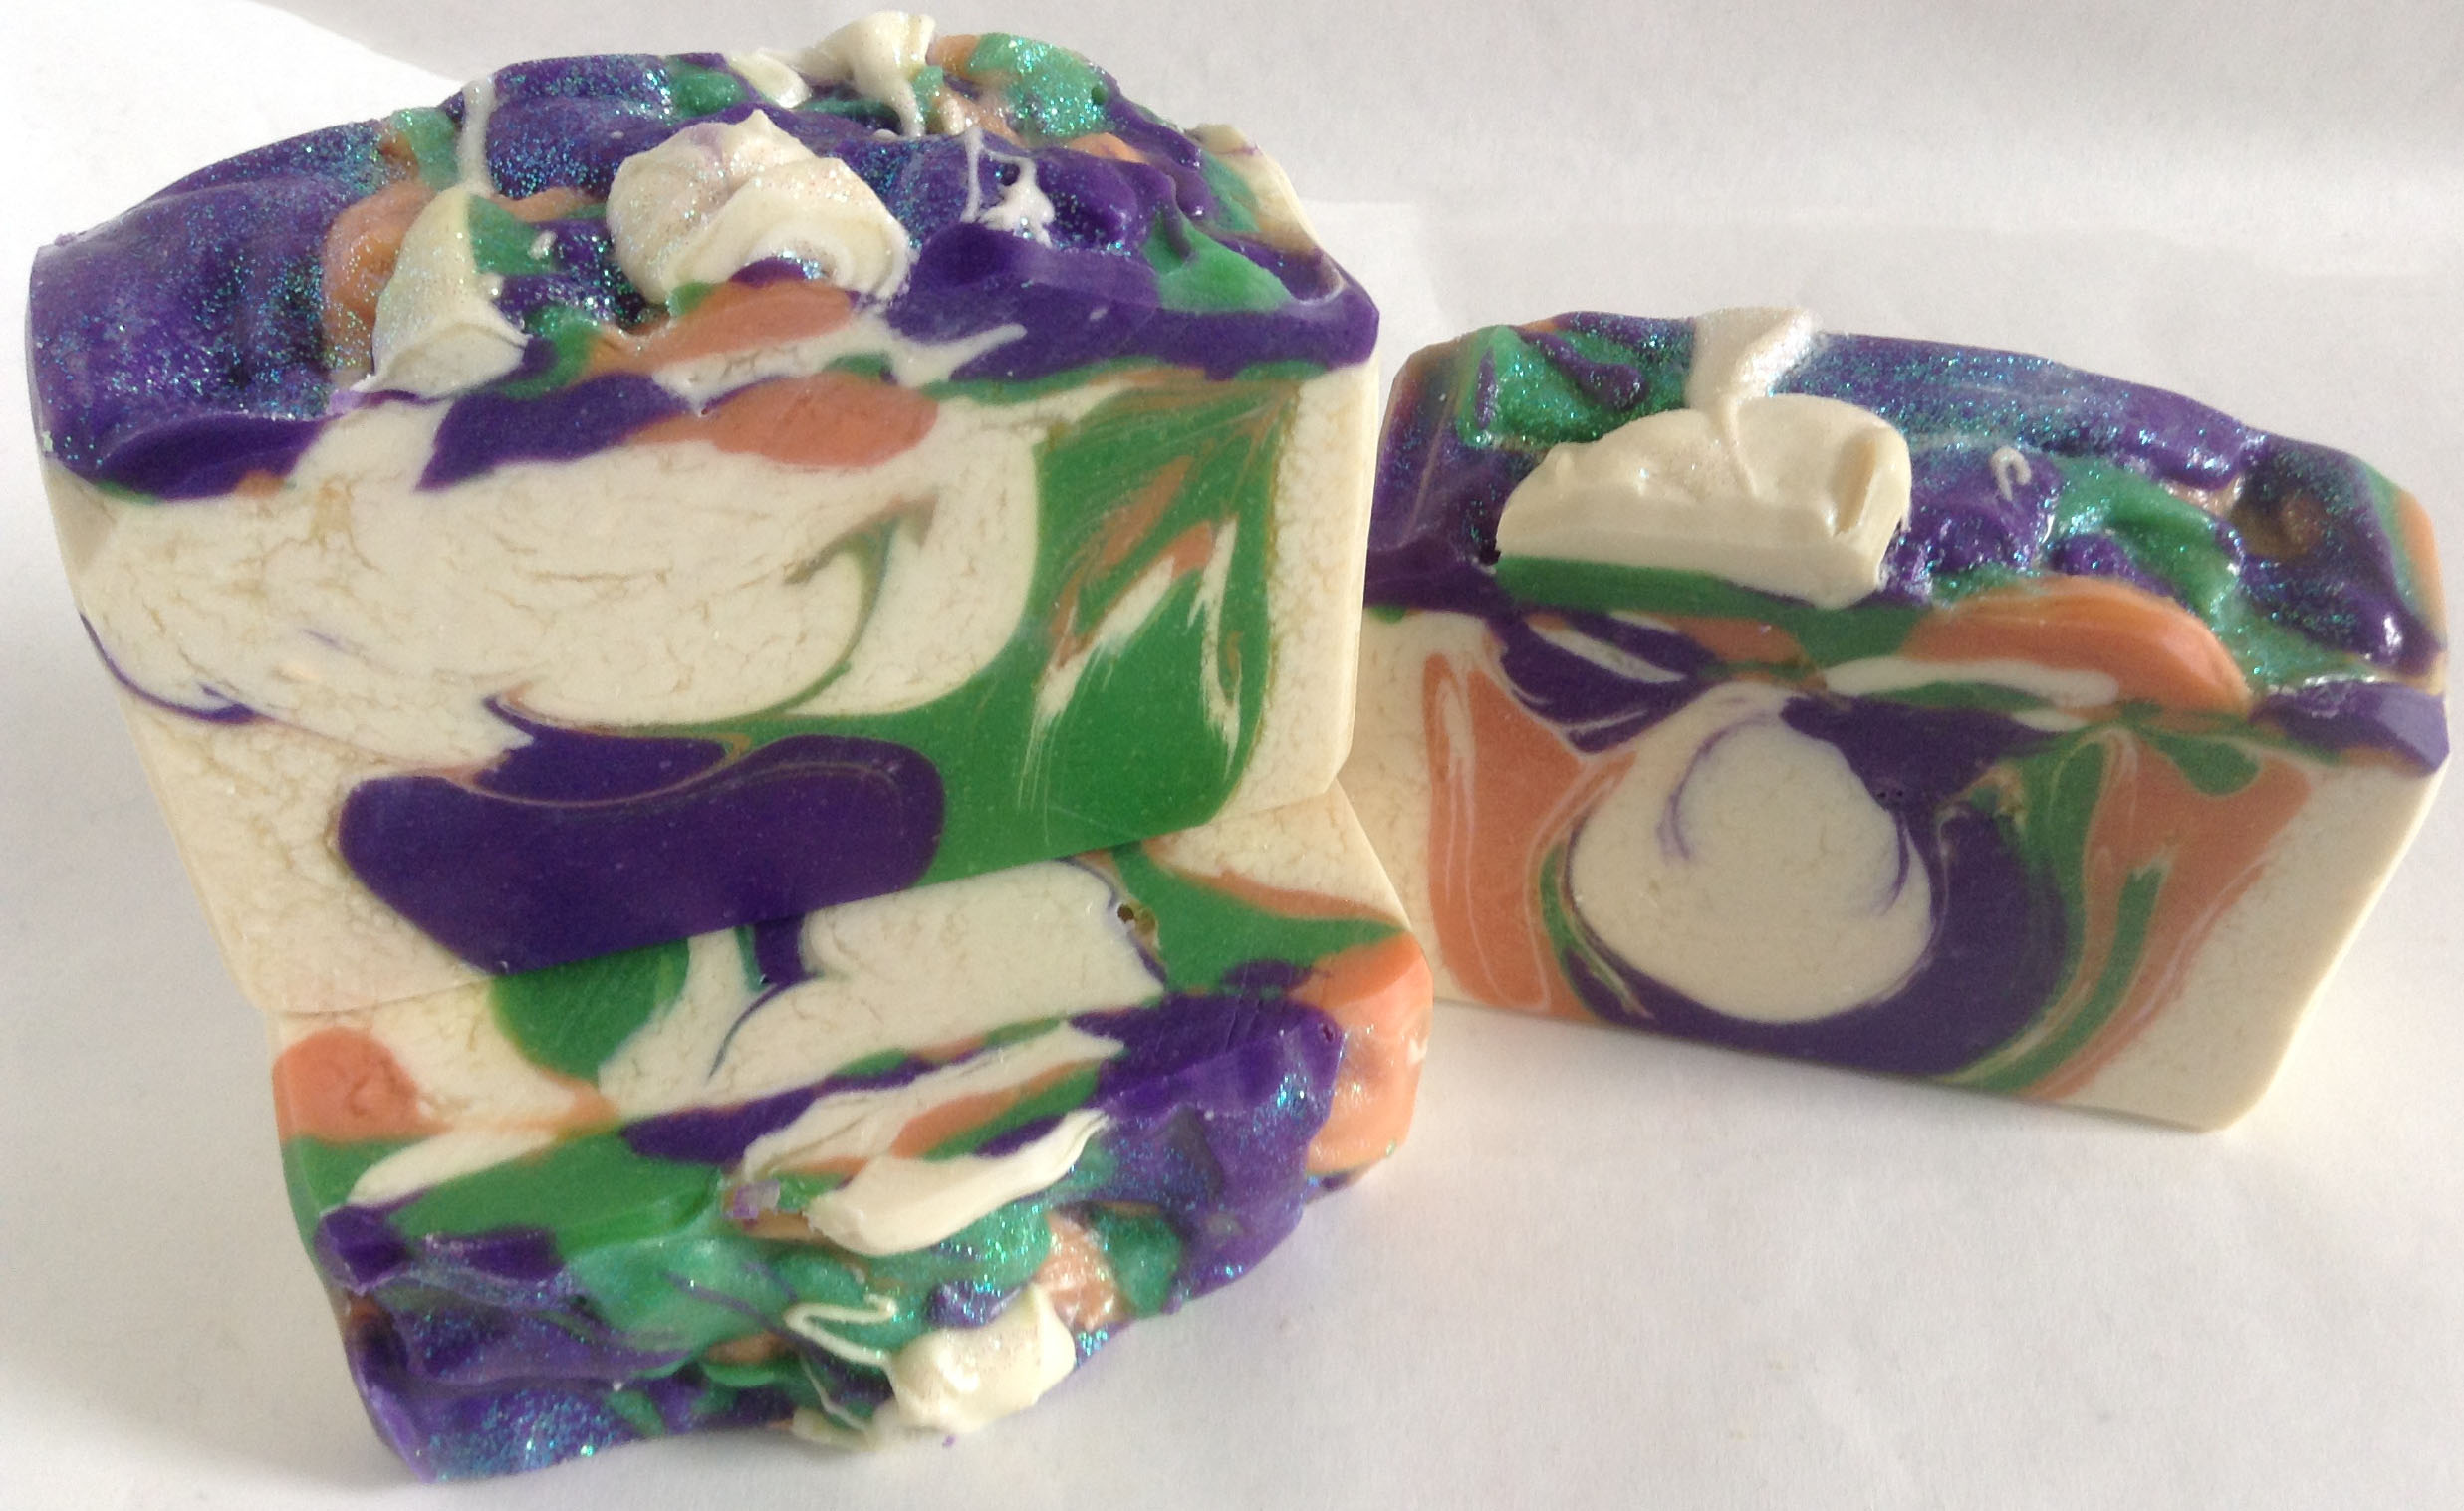
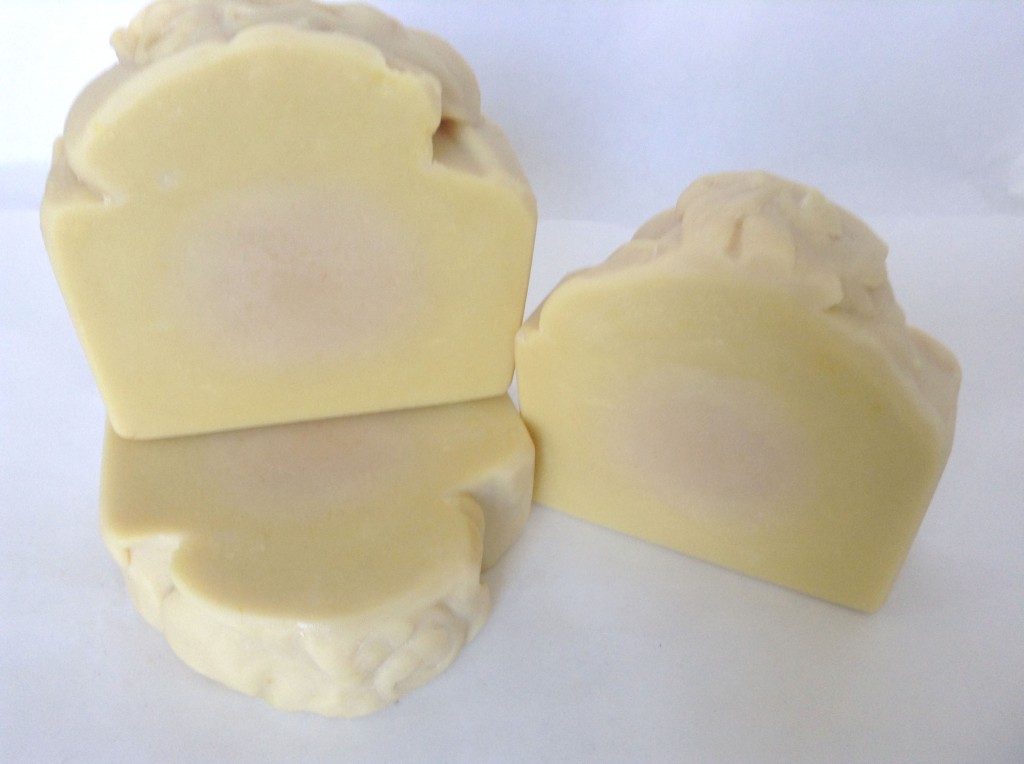
The cut soaps smell wonderful. I am going to let them have a nice long cure and give them to family and friends for Christmas.

Related posts:

The Store is Open!

Romeo and Juliet
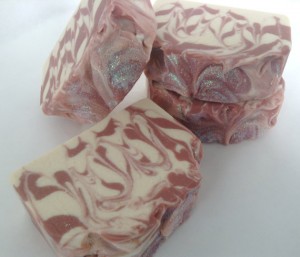
Woo! It’s time to celebrate because the online store is now open. You can access the store at any time by clicking the Shop link in the menu bar at the top of every page on this site.

You may be asking yourself why buy New England Handmade Artisan Soaps here instead of at the Etsy store? Customers who purchase soaps here will have a couple of advantages over customers on Etsy.

First, all new soaps will appear here for a full week before they appear on Etsy, so you can be the first to order new soaps and make sure you don’t miss out if you order via the shop. That also means that if items sell out in this shop, they may never appear on Etsy, so if you really don’t want to miss it, check it out here.

Second, the shipping in the shop has been calculated by weight instead of by item. Etsy will not allow shipping to be calculated by weight, which is how the USPS calculates shipping. As a result, I have to calculate by item, which sometimes results in inaccurate shipping charges. While I do refund shipping overages that amount to more than $1.00, it is much simpler to pay the correct amount in the first place.

A final advantage to customers in this shop is that they will have the opportunity to order more items. I plan to list fewer numbers of soaps on Etsy—in many cases, only a maximum of three bars of the same soap will be listed on Etsy.

With all these reasons to try the new shop, it is my hope that if you have been a loyal customer of my Etsy store, that you will give the new shop a whirl.

Related posts:

Big News for New England Handmade Artisan Soaps

I have some exciting news, and I just didn’t want to wait until September to share it. Starting Monday, August 25, New England Handmade Artisan Soaps will be opening its own independent online store right here on this website! In fact, you may even see the store button on the menu bar above, but at the moment, there are no items for sale.

What will change?

Aside from having a new outlet for purchasing New England Handmade Artisan Soaps, nothing will change. The Etsy store will remain open, and if purchasing via Etsy is preferable for you, you will still be able to purchase soaps via Etsy. You will no longer be able to access the Etsy store using the link above in the menu bar, but the link in the sidebar to right will remain active. Prices will be the same on both sites, but my personal store will make it easier for me to run sales and promotions, so you might want to check into it. You will also still be able to use either credit/debit cards or PayPal in the new store, just as on Etsy, but of course, Etsy gift cards will not work in the new store. Coupon codes shared in the regular monthly newsletter will also work in both stores.

Why the new store?

Well, a couple of reasons. First of all, I have control over more aspects of operating an online store at my own site than I do on Etsy. For instance, Etsy has always made calculating precise shipping difficult because the only method for setting up shipping is per item. USPS works more conveniently when calculated by weight. In my own online store, your shipping price will be based on weight and will automatically configure orders of certain sizes to fit USPS Priority Mail shipping containers. There will be no need to set up custom orders to achieve exact shipping quotes.

Also, it is my hope that customers will find what they are looking for more easily through my online store. Etsy does have a large number of gifted artisans, many of whom are soapmakers, and it is easy to be lost in the shuffle. The chances of someone searching online for a certain kind of soap and finding my Etsy store are slim, but a personal storefront will make it easier for customers using search engines to find what they are looking for at New England Handmade Artisan Soaps. It was also my hope to attract attention to my blog, which many customers on Etsy may not even be aware exists.

Finally, an independent storefront will make it easier for me to set up preorders for soaps that are not yet ready so that you can reserve soaps in advance and not miss out on your favorites. I can also set up backorders for soaps that are out of stock. If these features interest you, please feel free to let me know you’d like to see them implemented in the store.

What else is new?

You may have noticed things look a little different on the blog masthead, the Facebook page, the Etsy store, or even Twitter and the blog. As the new online store opens, I thought the time was right to make a few cosmetic changes. The next time you order soap, you might notice small differences in the packaging. However, you’ll be getting the same great soap.

If you have any questions about the new store, feel free to ask. I’m looking forward to sharing this new venture with all of you!

Related posts:

Soaping on the Color Wheel

Some time back, I blogged about color theory as it related to selecting colors for soapmaking. In that post, I discussed that one way to create an appealing color combination is to use complementary colors, or colors that oppose each other on the color wheel.

Color Wheel
Color Wheel via Wikipedia

You can see that purple and yellow directly oppose each other on the color wheel. However, orange and green also oppose purple on the color wheel and form a triangulation of complementary colors. In between purple and green (the darker green), there are three colors, and in between purple and orange (the lighter orange), there are likewise three colors. There are again three colors between orange and green. These sorts of triangulations are also worth considering when you are thinking about color combinations.

Color Wheel TriangulationThis sounds interesting in theory, but in practice, how do these colors look together in soap?

I recently made a batch of Autumn Fig Harvest, with a new fragrance from Bramble Berry (which I tested as part of the S.O.A.P. Panel). One of the first things I do if I am not sure what kind of color combination I might want to try is look for images using Google Image Search. I simply Googled the fragrance oil name, and this is the set of images that I could see (screen-captured because of the changing nature of the Internet):

Screen Shot of Google Image SearchThe images in the top and middle rows caught my eye. The first two images in row one are straight from Bramble Berry’s site. The third image, however, comes from a cooking blog called Figs, Bay & Wine. Notice the green and purple in the plums. As I said in my earlier post about color theory, turning to nature for color combinations is often a good idea because nature understands color theory. Finding that picture was a lucky accident because I was not searching for plums at all. Skipping over the fourth picture, notice the third image is a pumpkin in a fall setting. My eye was drawn to how these colors looked next to each other: purple, green, and orange. Even though those colors (with the exception perhaps of purple) have little to do with figs, I knew I had found the color combination I wanted to use.

Celine Blacow has said in her soapmaking videos that using white is often what brings a color combination together. I have noticed the difference white makes in pulling together the look of a soap. It’s not always necessary, but it often does make a huge difference in the soap’s design. So, a field of white would be important in pulling together a design with purple, orange, and green. I thought the three colors would have an autumnal look as well.

Purple can be tricky in soap if you just use oxides, but I had recently purchased a set of Vibrance Micas from Nurture Soap Supplies. I used the Vibrance Purple and Green micas, and I probably could have used the Vibrance Orange from this set as well, but elected to use Clementine Pop Mica from Rustic Escentuals. I had used it before, and I knew it would make a nice pumpkin shade in the soap.

Here is what the soap looked like in the mold.

Autumn Fig Harvest in the moldFirst I poured in a layer of white, then I did a drop swirl with each of the other three colors. I decided to try the spatter-top technique (a sort of Jackson Pollock effect). Just like using white, I have found that a bit of glitter also adds something extra special to soap.

Here is what the soap looks like cut:

Autumn Fig HarvestYou will notice I have a bit of titanium dioxide crackle, also known as glycerine rivers, in the soap in the white parts. There are many intriguing theories about what causes them—the most recent interesting one I came across is the amount of water used in the lye solution—but frankly, I haven’t been able to figure out why they happen sometimes and don’t other times. I believe them to be the result of heat because when I do not gel my soaps, I never have them. However, gelling soaps produces more vibrant colors and allows soaps to be cut and eventually used earlier than non-gelled soaps, and when I can, I try to gel them. Actually, the TD crackle is an interesting look. I’m sure other soapmakers see these soaps and think of them as mistakes, but the sort of antique look of TD crackle can lend interest (of course, that’s also just my opinion, and I’ve stopped trying to fight it).

The colors do look nice together. They make a bold statement, perhaps because they are triangulating colors. Try moving the triangle around the color wheel to come up with other bold combinations: red, yellow, and blue; violet-red (cranberry), orange-yellow, and light blue. In each case, the combination is a striking mix of complementary colors.

Another combination of colors to try is the square.

Square PaletteAgain, a striking combination of colors. In the example above, orange, yellow-green (lime), blue, and violet-red (cranberry). Each of the colors is two apart, which sets them off a little more than analogous colors (think red, yellow, and orange as analogous) would do. Try moving the square around the wheel to create other combinations.

Playing with color combinations using the color wheel can help you create appealing soap color combinations. Have you used the color wheel in your soaping creations? What were the results? How do you decide what colors to use? Chime in the comments!

Related posts: